

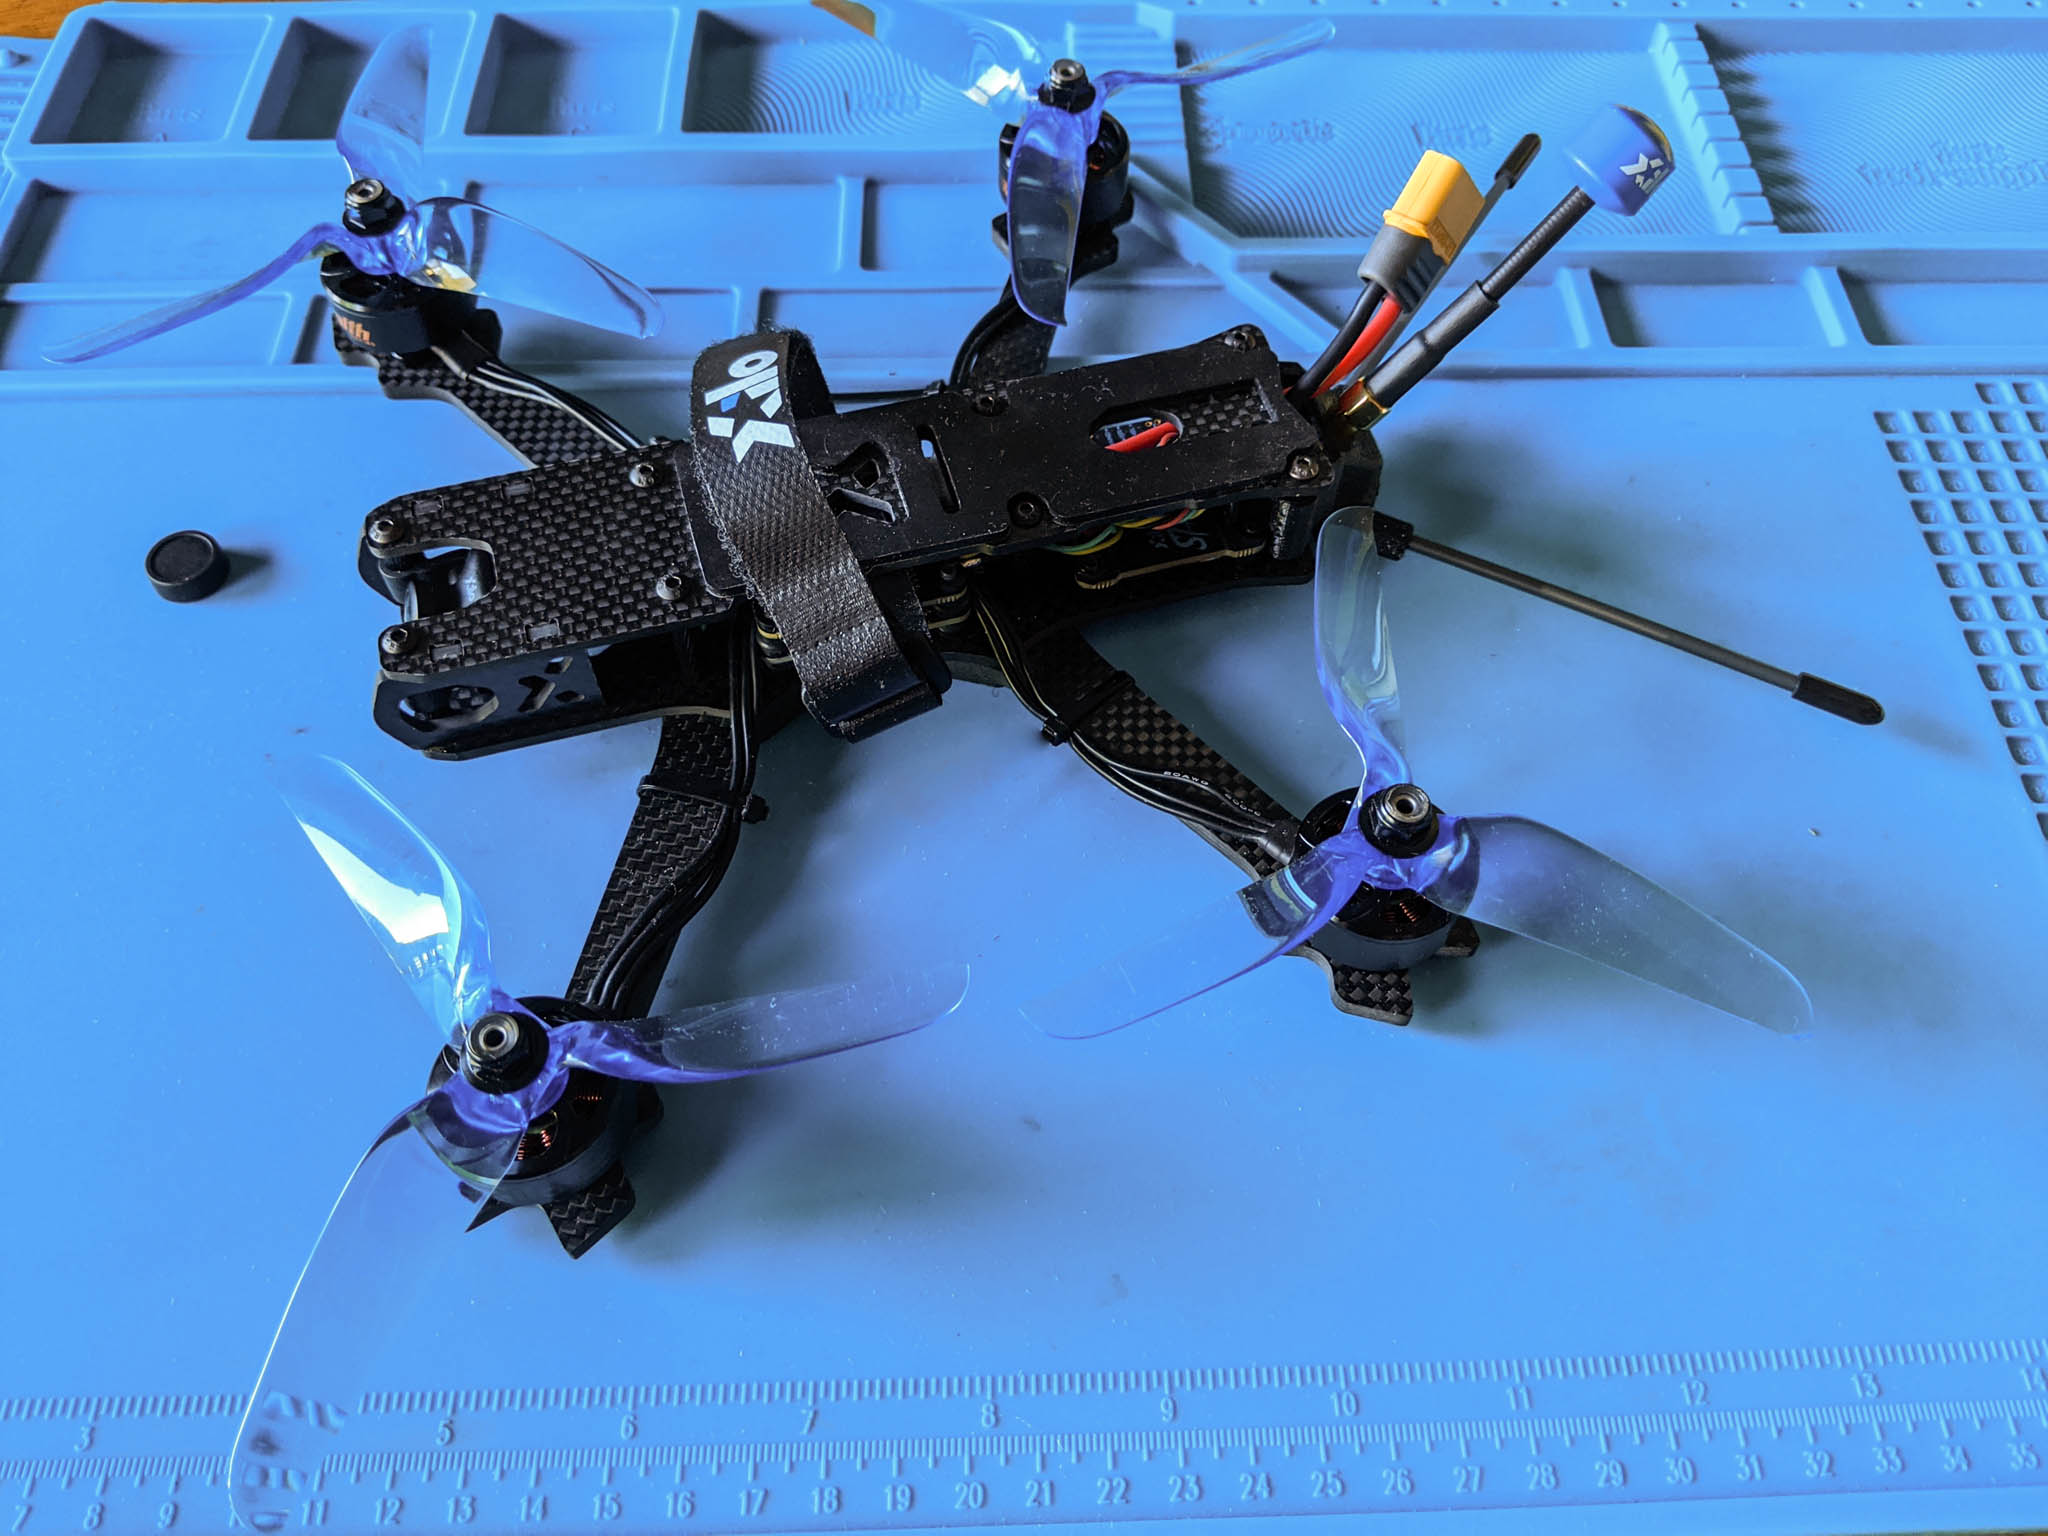
If you’ve been thinking about building your own quadcopter drone, the available kits just keep getting better. GetFPV has released the Xilo 5″ Freestyle Drone Bundle – Joshua Bardwell Edition, a fantastic package deal with everything you need to assemble a very capable freestyle drone on your own. In this guide we’ll walk through some important tips to help you build your quad like a pro! Joshua Bardwell has created an excellent video series detailing how to assemble and set up the kit which is definitely worth a watch for first-time builders—but this guide will also cover additional features and options of this kit that you won’t want to miss.
Frame Assembly
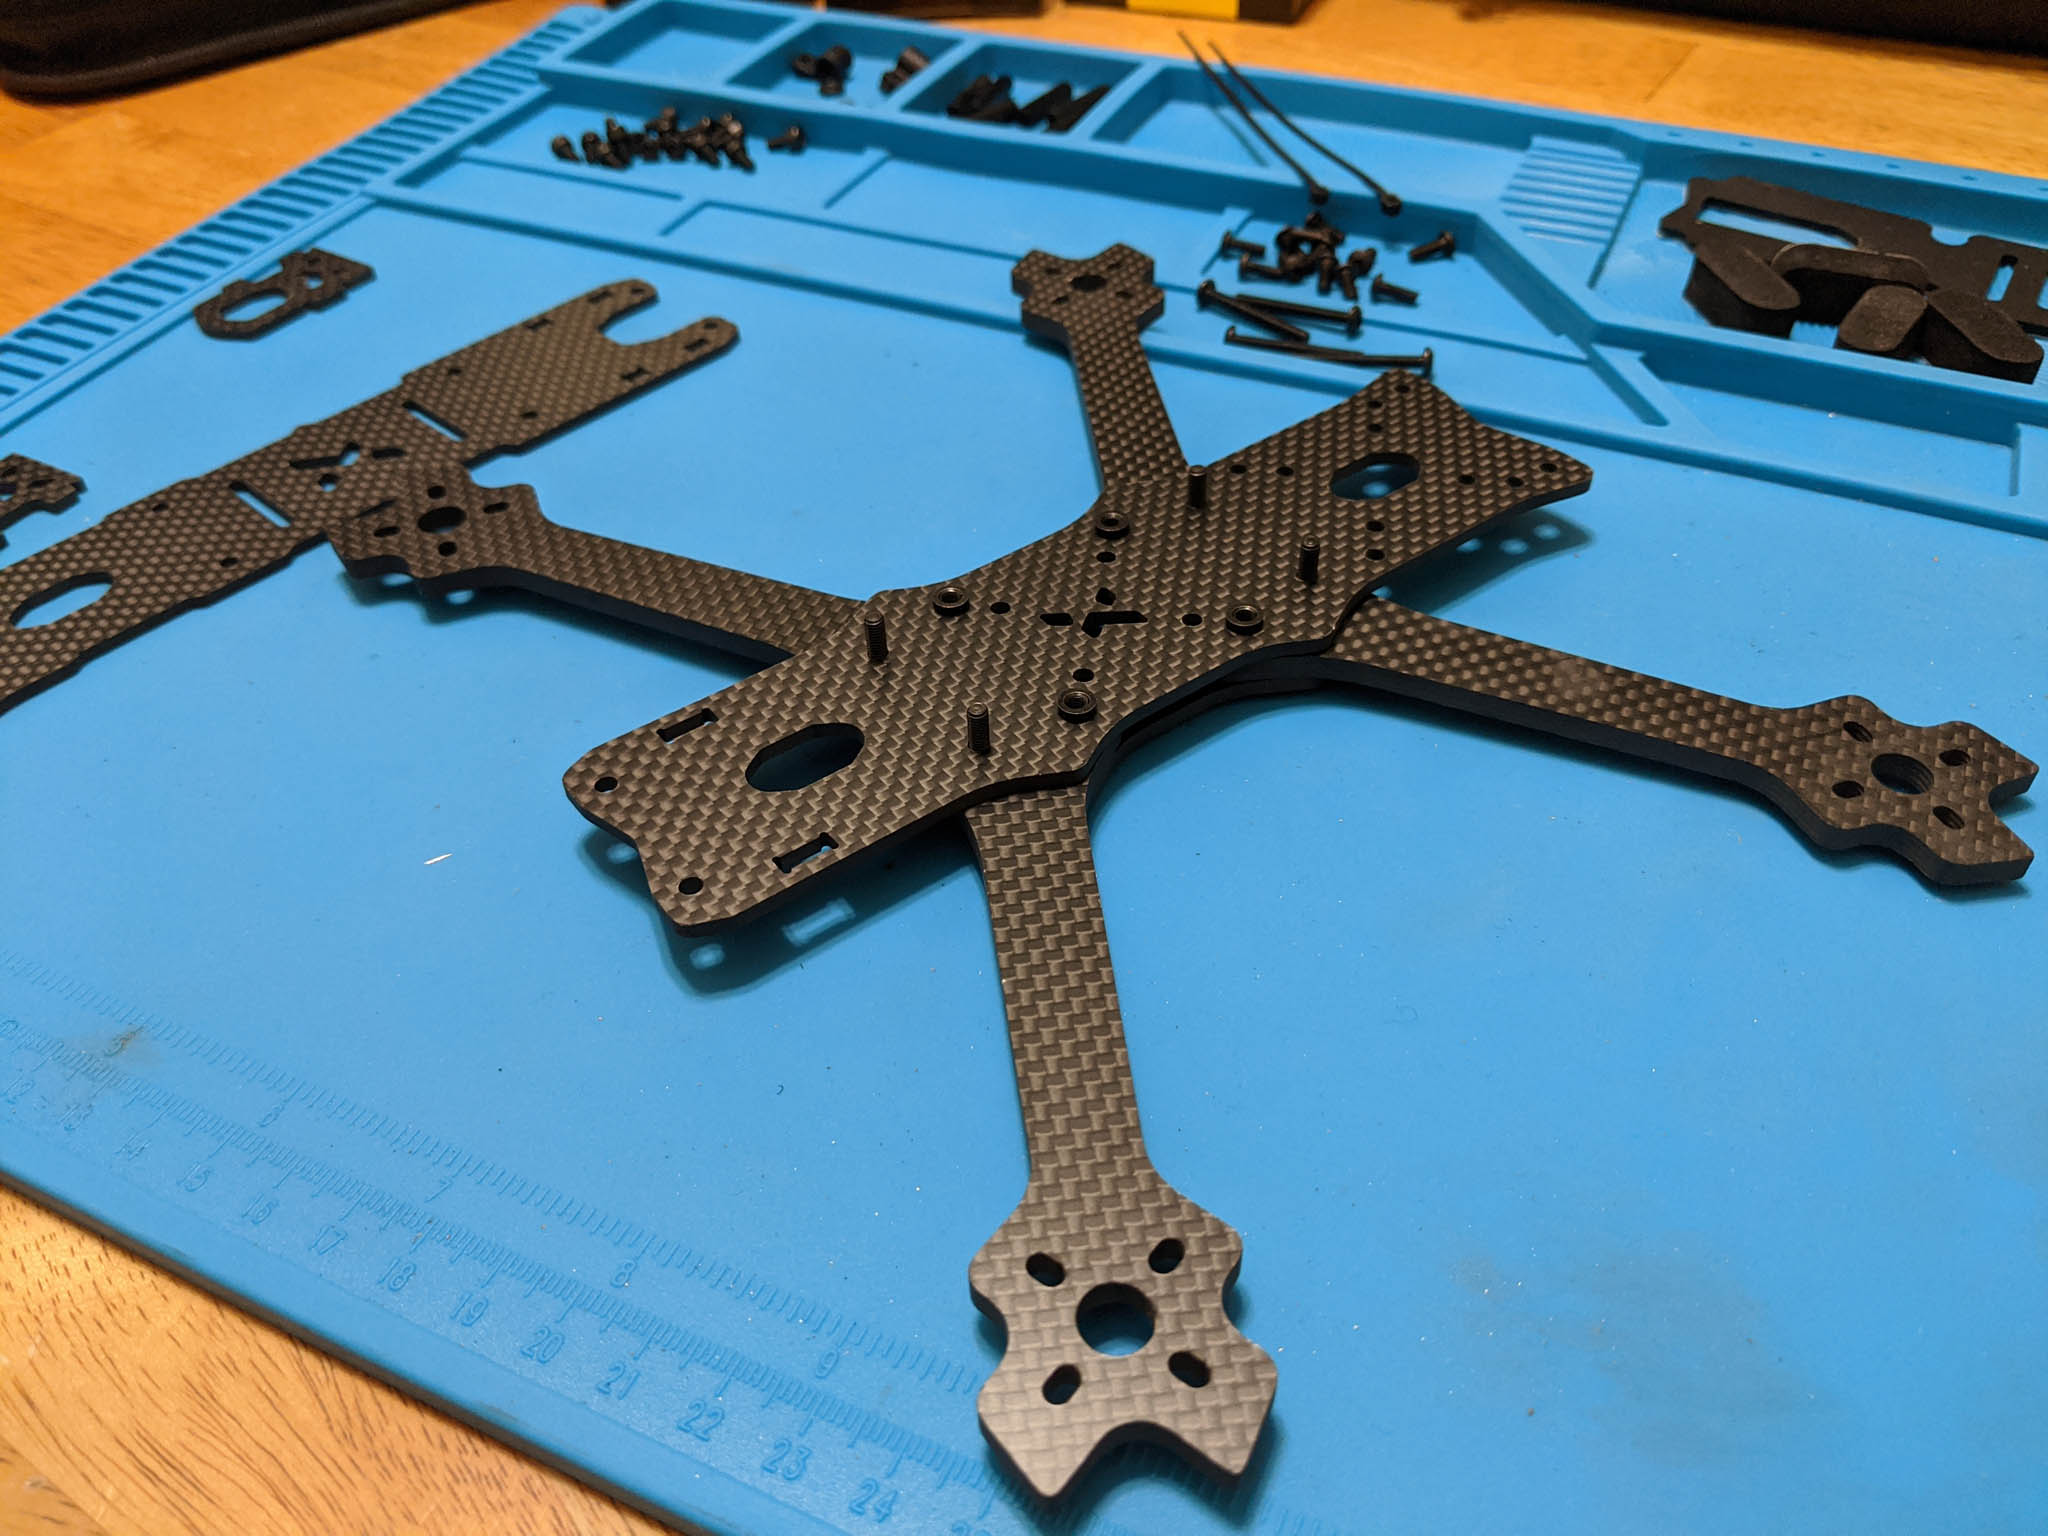
Bardwell covers one method of assembly in his video series, and GetFPV has its own frame assembly video available as well. Many frames can be confusing to assemble without a guide as a lot of the parts look similar.
Build tip: Consider using a silicone work mat. I appreciate mine more than I thought I would! It’s great to separate out various parts, stop screws from rolling away, keep your work surface safe from heat damage while soldering, and organize parts and tools so all are easy to find and use.
Joshua’s method of assembling the frame seems a little simpler than the GetFPV video method, but whichever works for you is fine. However, JB only places two arms at a time, and this makes placing the next two arms a bit harder when you have to blindly slide them into place. If you set up all four at once, it’s easier to align the main bottom plate. Trying to place this many screws at once can be a challenge when you want to flip the whole assembly over, which brings us to our next tip.
Build tip: Screws tend to fall out when you haven’t secured them on the other side. After slotting in a screw, you can use a piece of tape over the screw head to keep it in place. This way you can work with many screws at once without hassle.
Motor Mounting
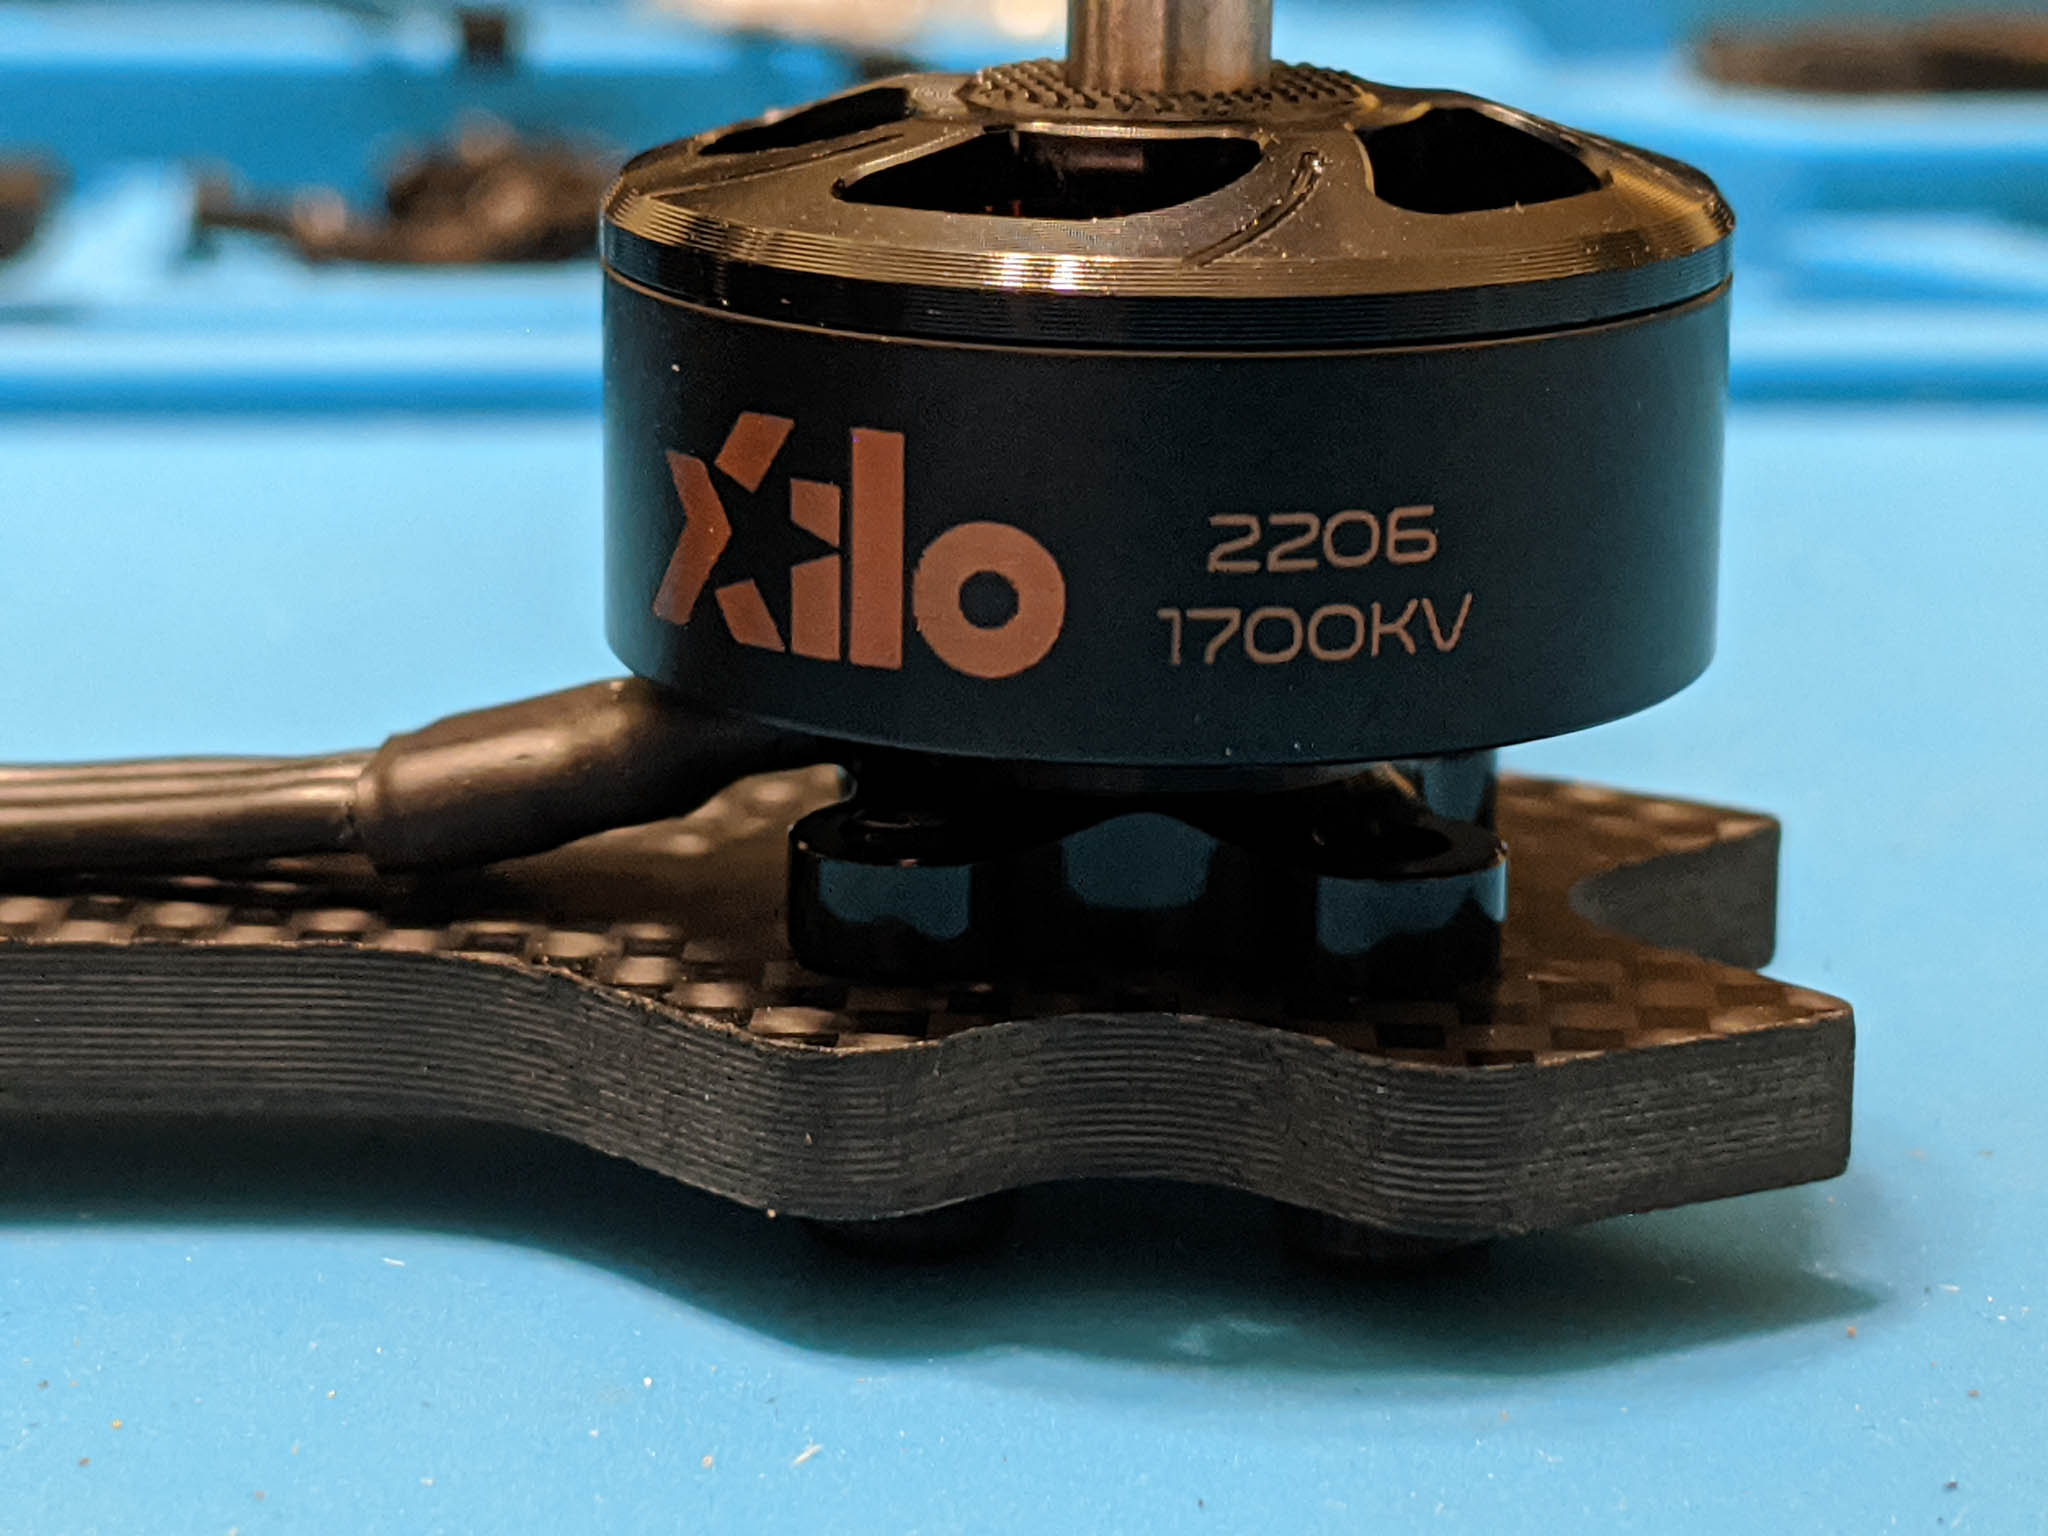
The screws that come with the kit are designed for short motor bells so there are never any problems with putting them in too far—a long screw that touches the motor windings can short them out and cause the motor to fail. However, the motors in the Xilo kit have a pretty generous height on the bottom and can accommodate a much longer screw. If you have some, find a set of screws that will thread the entire way through the mounting hole and peek out just above the top. Don’t go too long; anything longer than just visible above the mounting hole won’t hold the motors any better and you don’t want to risk them getting too long and up into the windings.
Build tip: To secure your motors, use the longest screws available that won’t touch the motor windings. Place motor screws loosely at first until all four have been started into the motor housing. Then, one at a time: remove, add thread locker, replace, and tighten down all the way.
I’ve lost too many motor screws over the years to think that thread locker isn’t necessary. Confusingly, the “Blue” thread locker comes in the red-colored tube, and the “Red” thread locker comes in the blue-colored tube! Make your you use the “Blue” (red tube) which creates a good seal but is not permanent. You don’t need very much at all; a small tube will last a very long time! You also only need to apply to the tip because the frame itself is not threaded.
Fit Up
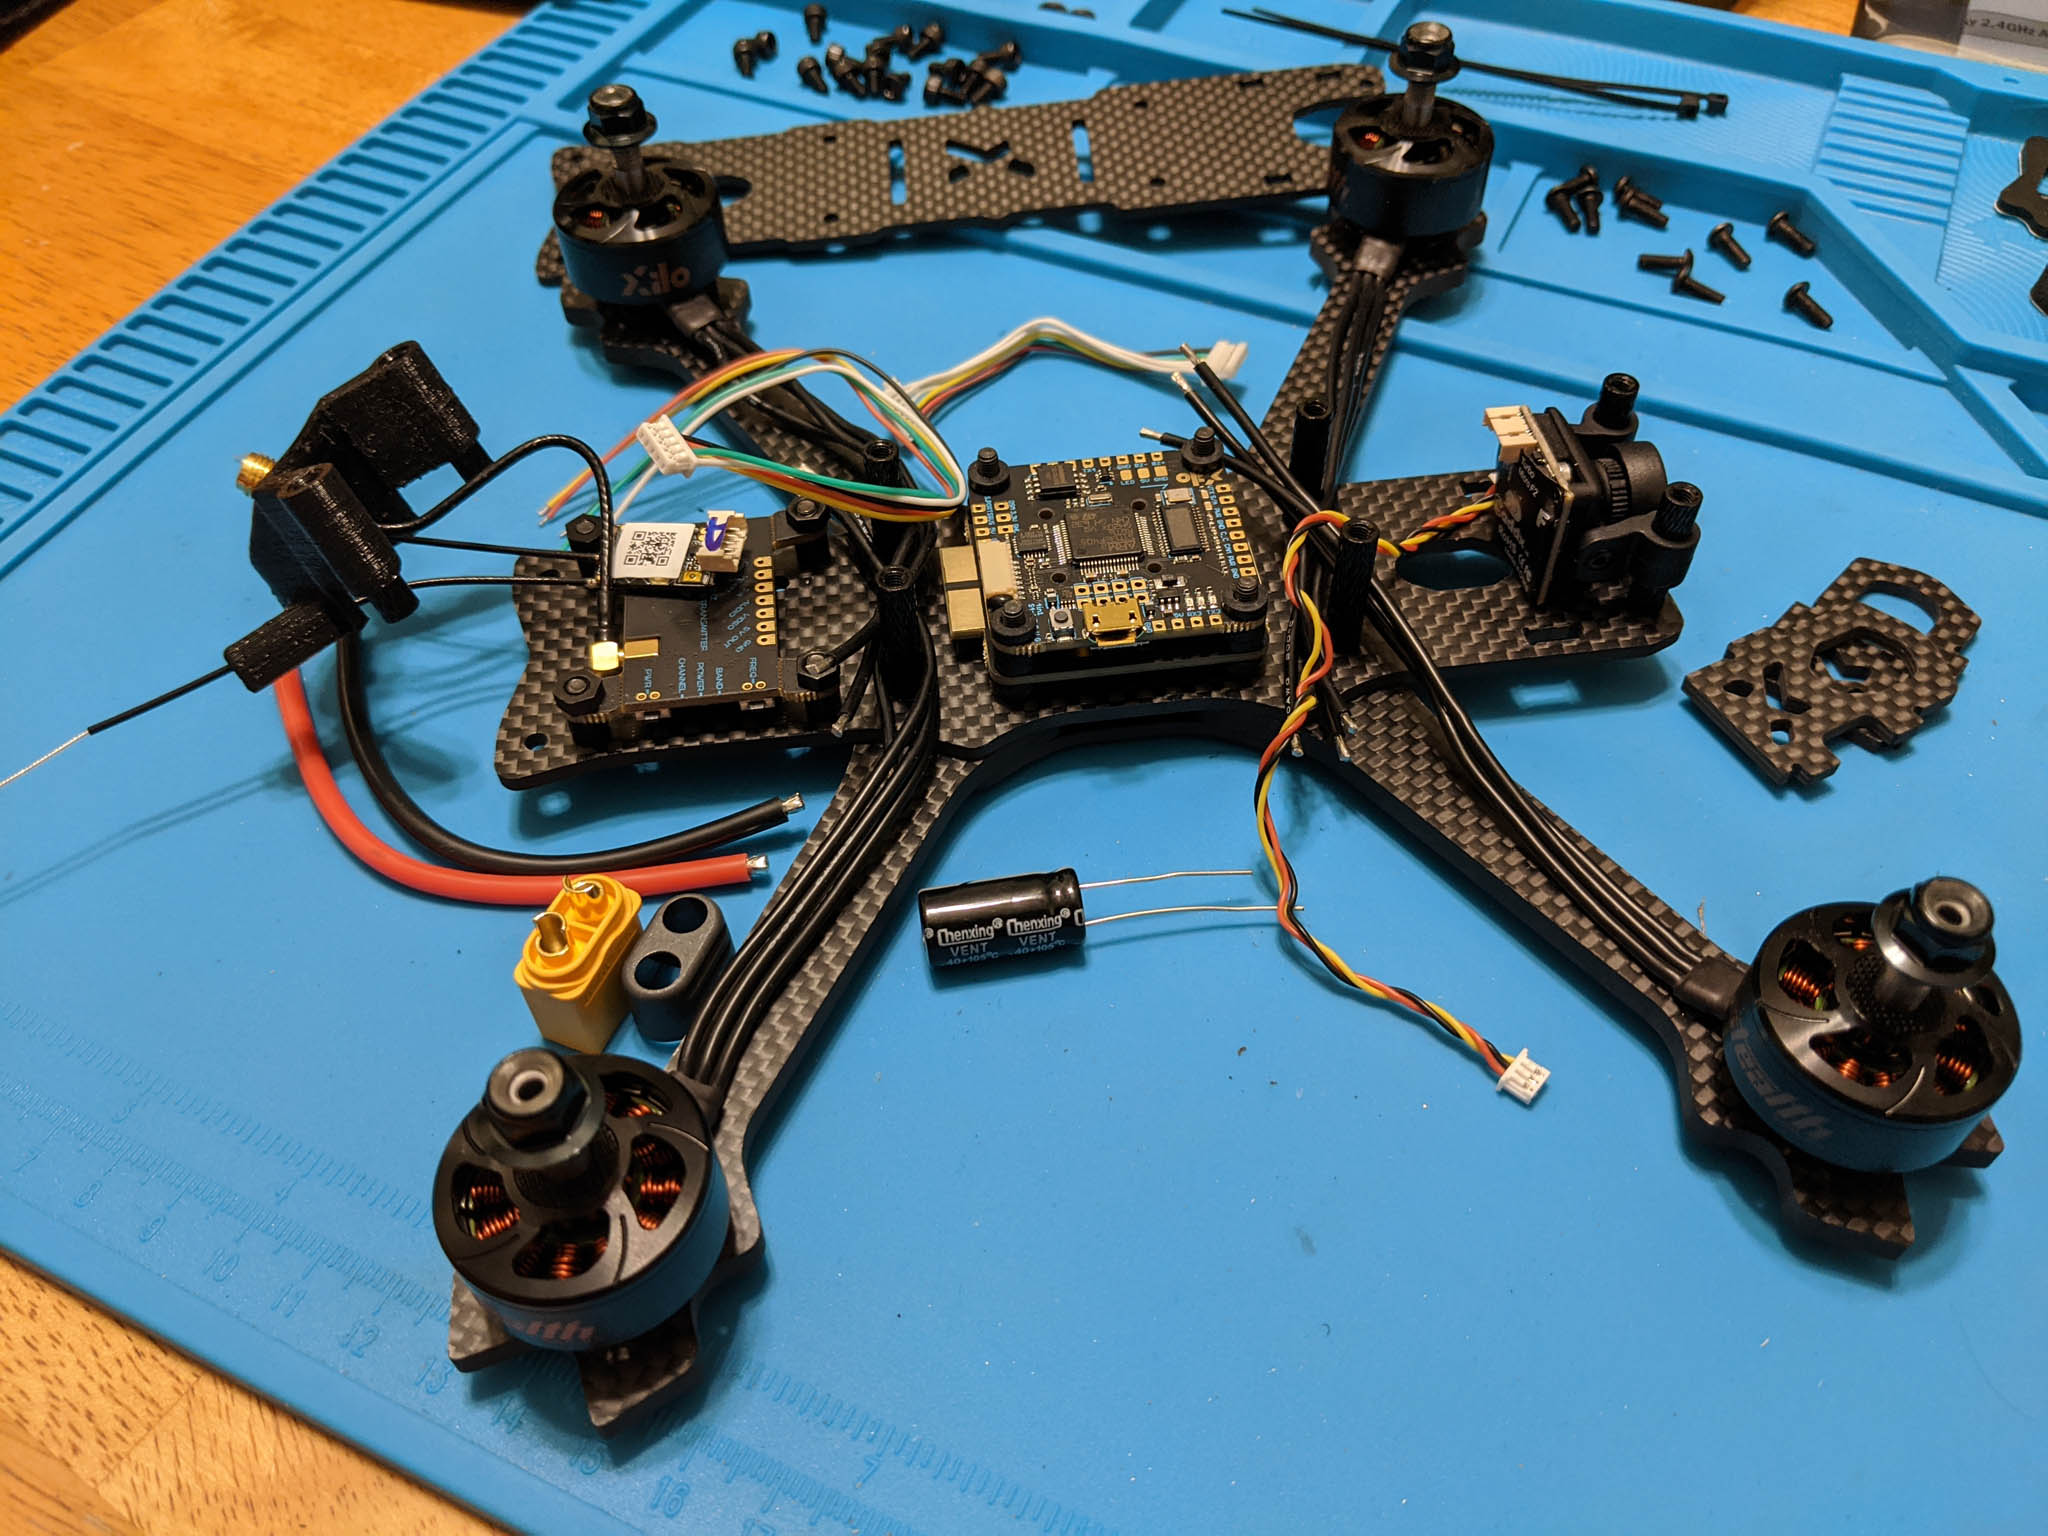
Before the soldering iron or the wire cutters come out, stop to visualize where all the parts will go and how they connect together. This helps you understand a lot about your next steps and if there’s anything you need to solve. The Phreakstyle frame has a lot of space so this might not seem necessary—but on a very tight racing build like the Xilo Phreak or Lumenier Chief, this initial “fit up” step may mean the difference between success and starting over. Here’s what you’re looking for:
- Do I have all the parts I need?
- Do I have enough space for everything?
- Do I have the right connectors to link all the parts together?
- Do I have enough wiring? How long do the wires need to be and where will I cut them?
- Do I have the right power supplies for each part?
- Can I avoid routing the video wires near the ESCs or main power?
- Can I reach the data ports and buttons? (USB, receiver, VTx, SD card…)
- Will my components be safe in a crash? (camera lens, VTx antenna, receiver antenna…)
- What order should the parts be assembled in? (ESCs before FC, heat shrink)
Build tip: Plan out your build before you start cutting wires and soldering to make sure everything will connect and fit in a way you’re comfortable with.
Soldering
If you’re new to soldering, it can be intimidating. Soldering isn’t actually very hard, but it’s not obvious unless you understand what’s going on. If you need an in-depth tutorial on how to solder, we’ve got one of those here on GetFPV Learn. As a quick refresher, there are a few important things to remember:
- Good tools matter. A soldering iron with no temperature regulation is not going to help. Invest in an iron with variable temperature. A lot of irons come with tiny sponges for wiping your tip off which must be wet and need changed out frequently. An inexpensive brass sponge doesn’t need to be wet, lasts much longer, and leaves less gunk on your tip.
- Lower temperatures can get the job done. If you are inexperienced, use a lower temperature. An iron at 350°C can get the job done for every joint in the Xilo build with the possible exception of the main battery lead. Doing the job very quickly with a very hot iron is an expert technique that can damage your equipment if you do it badly.
- Use flux whenever you solder. Flux cleans the iron and joint and helps the solder stick to itself rather than to the iron. Fresh solder right off the reel generally contains a flux rosin core; the white smoke you see while soldering is the flux rosin burning away. If you are working with a solder joint that is no longer smoking, or your solder is creating small peaks when you pull the iron away, you have run out of flux. This is easy to fix; just wipe across the area with a flux pen and reheat your joint.
- Soldering is all about heat transfer. Adding a little solder to your iron gives you more surface area to transfer heat. However, don’t try to add all the solder to the iron first; you’ll just burn all the flux away before you can use it.
- Sometimes it’s easier to tack wires in place and then tidy them up later. A few of the photos here show this in-between step. Apply a bit of flux and get a good angle on the iron. Let the solder melt and then just pull the iron away. Most joints will tidy up very nicely!
Build tip: Don’t learn to solder on your drone! Ask around for scrap boards to practice on or do a few basic soldering kits instead of working with sensitive parts when you start out.
Adding the Capacitor First
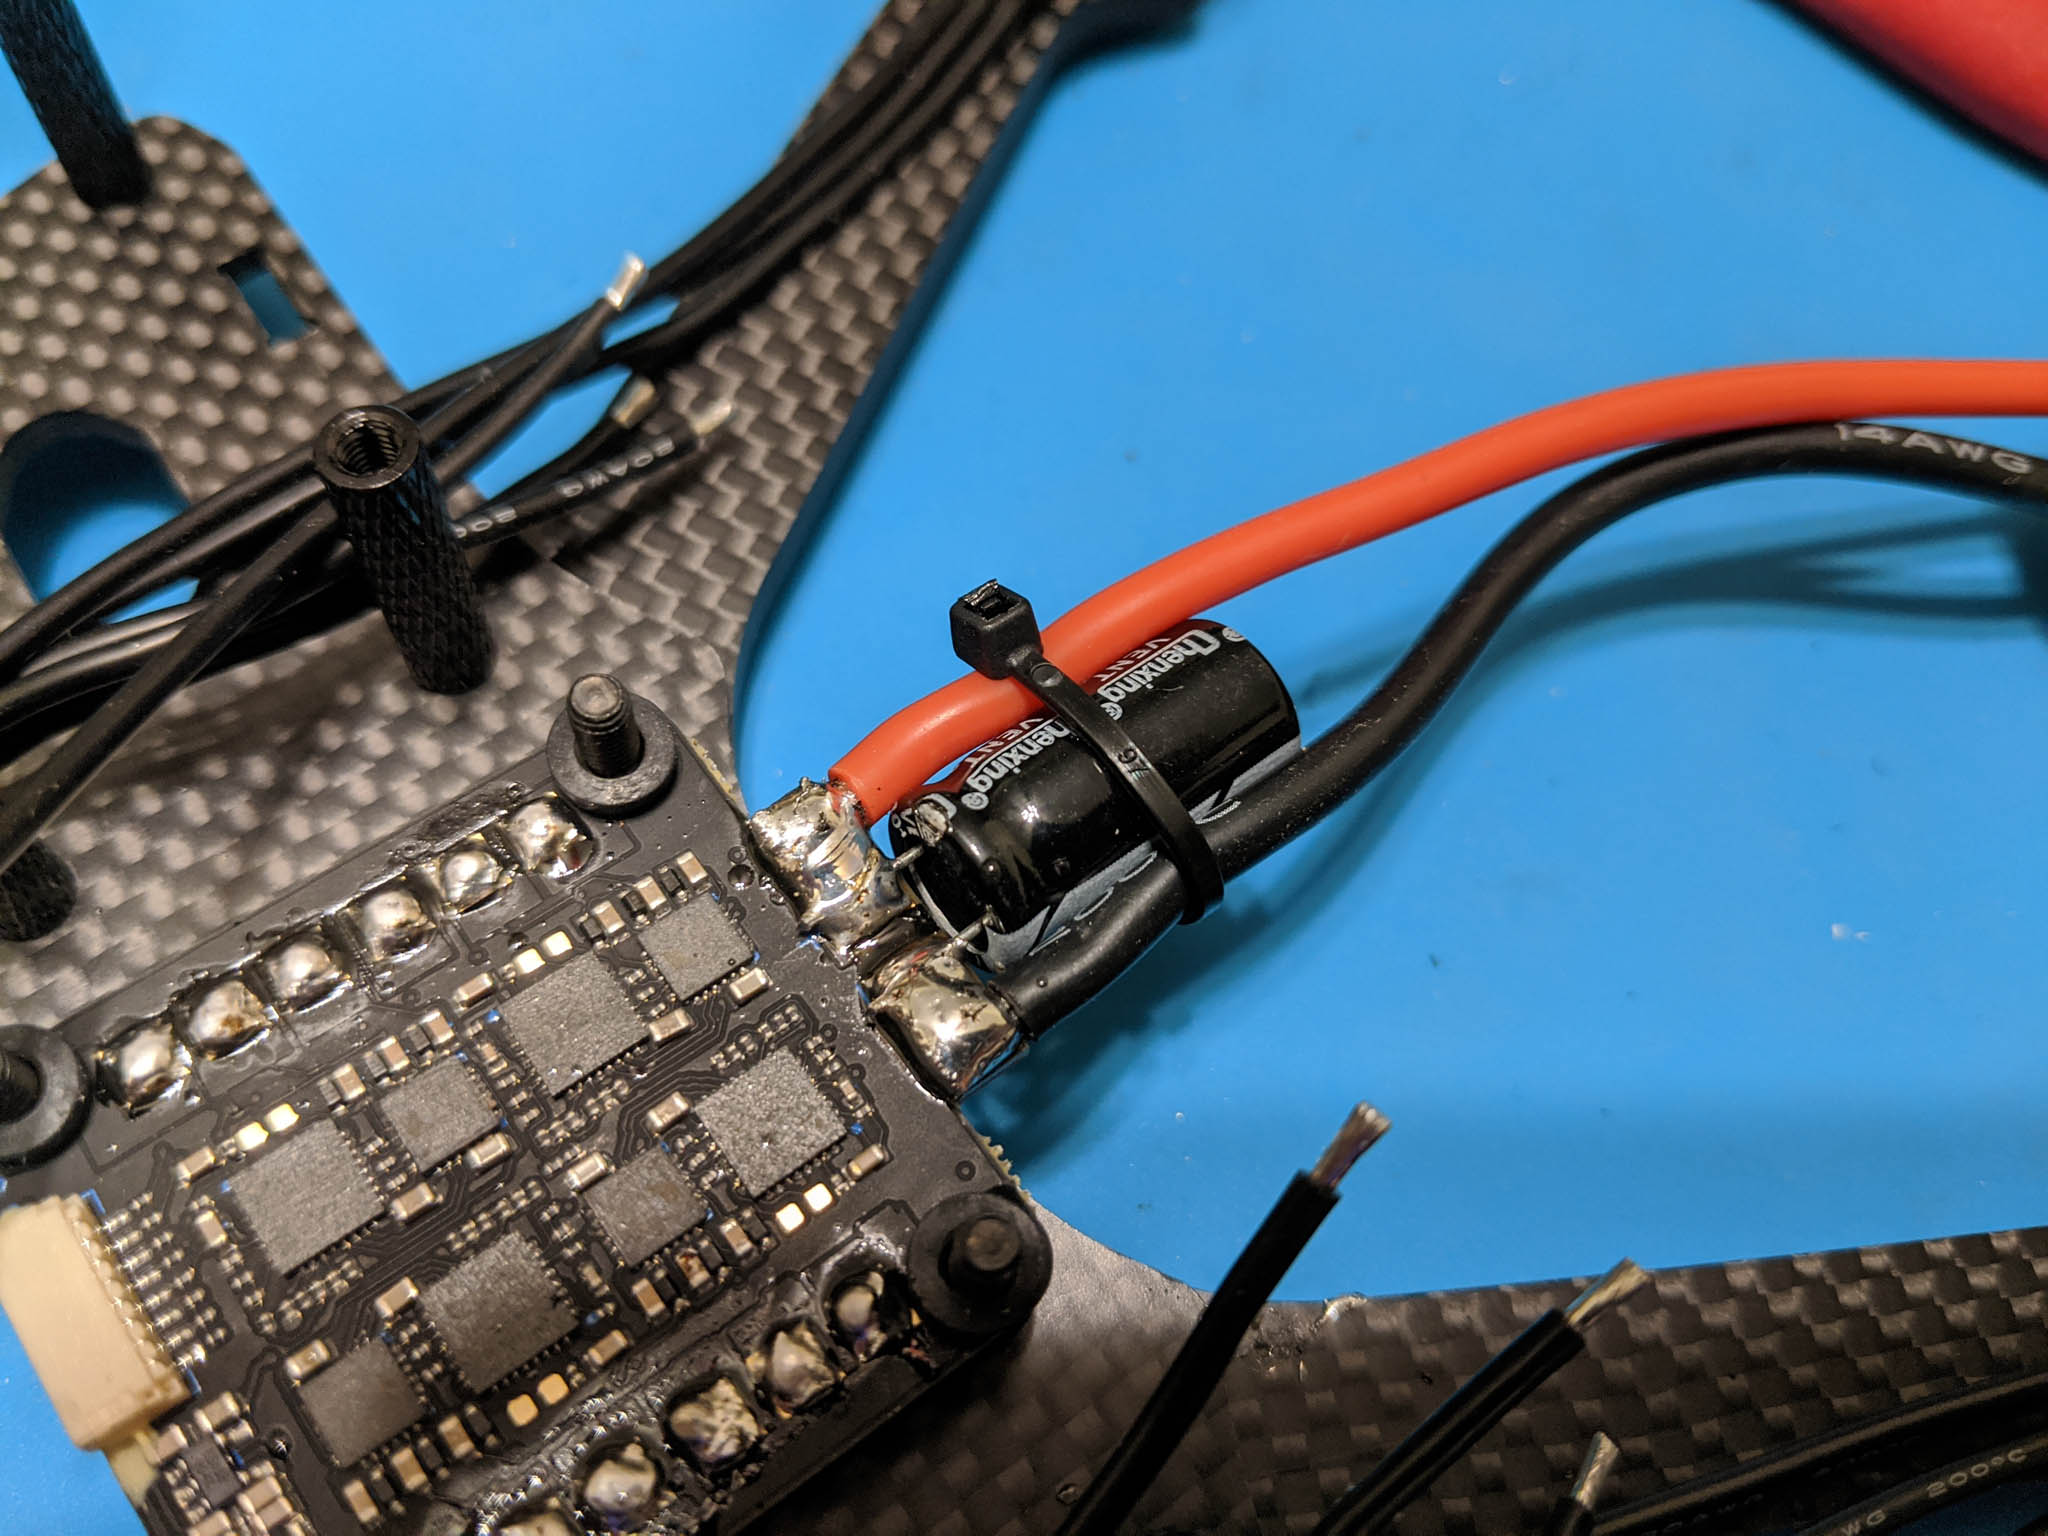
The Xilo Phreakstyle frame gives you a lot of room to work and place components. The Stax 45A 4-in-1 ESC has really generously sized power input pads. With this much space available, you can make life easier by placing the capacitor first. If you solder the battery wires first, they can fall off when you reheat the pad later to place the capacitor. However, the capacitor won’t fall out when you add the wires because it’s also attached to the opposite battery pad. There’s plenty of space on either side of the capacitor for the motor wires with this ESC.
Route the Motor Wires Inside the Frame
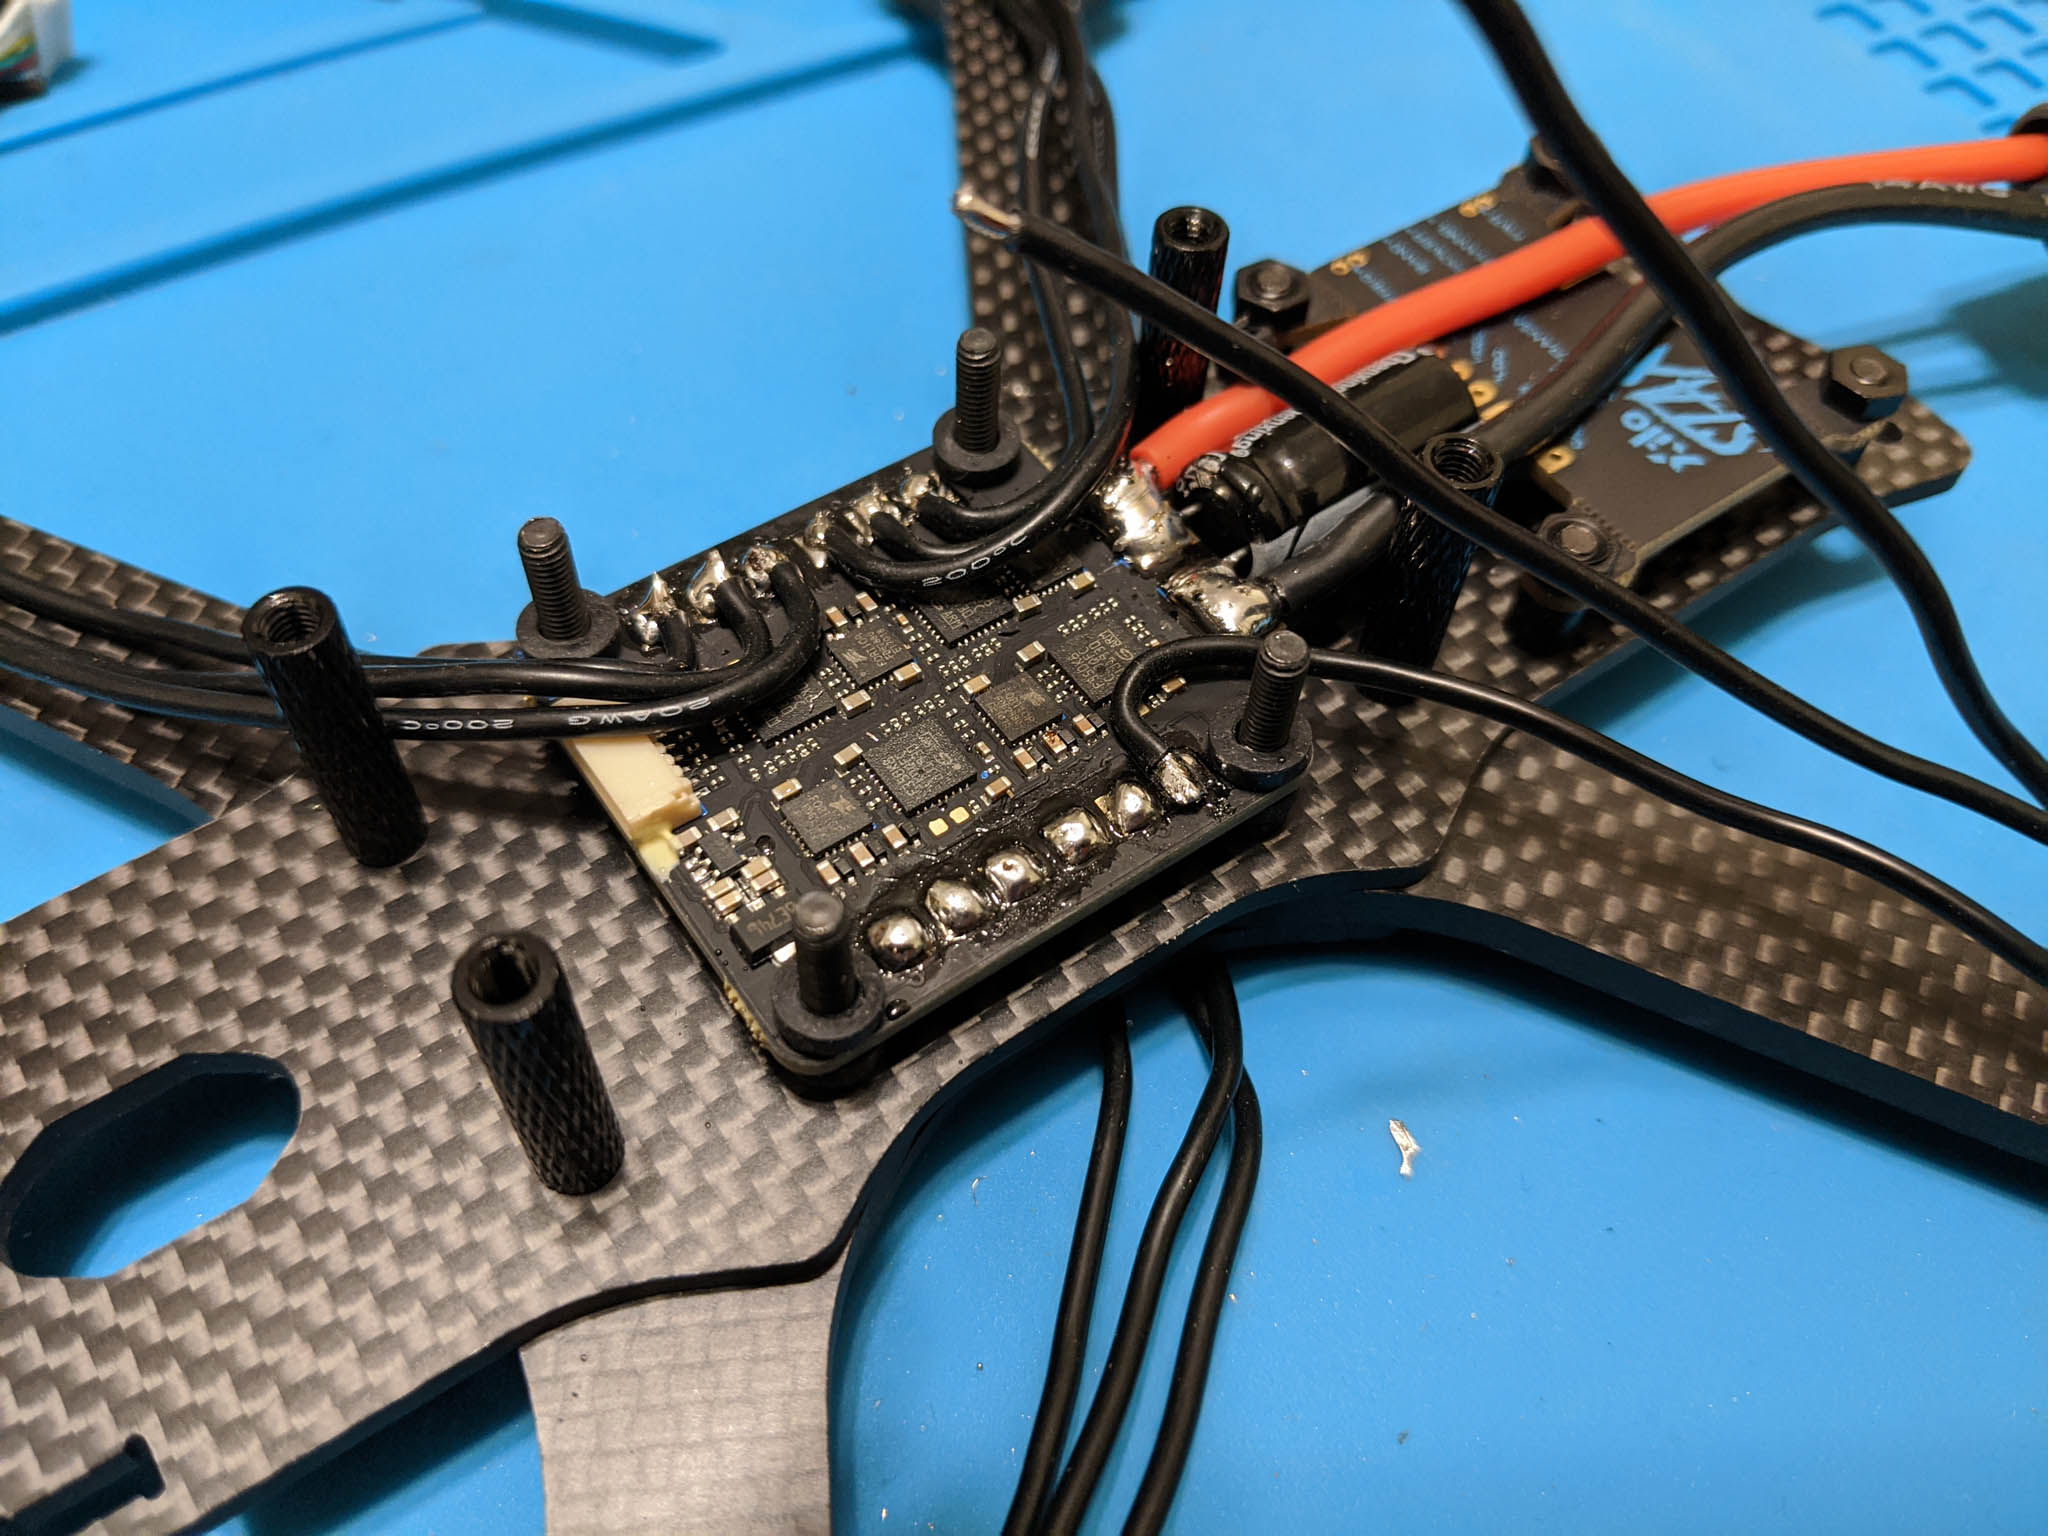
Wires that hang out the side of a quad have a bad habit of getting snagged by branches and ripped out. I’ve certainly destroyed a few parts this way! If you are confident with soldering, you can help avoid this by routing your wires around the FC posts and back on top of the ESC. This keeps them out of the way in a crash—but it’s a little harder to do because the wires need more carefully routed and cut.
Camera and VTx
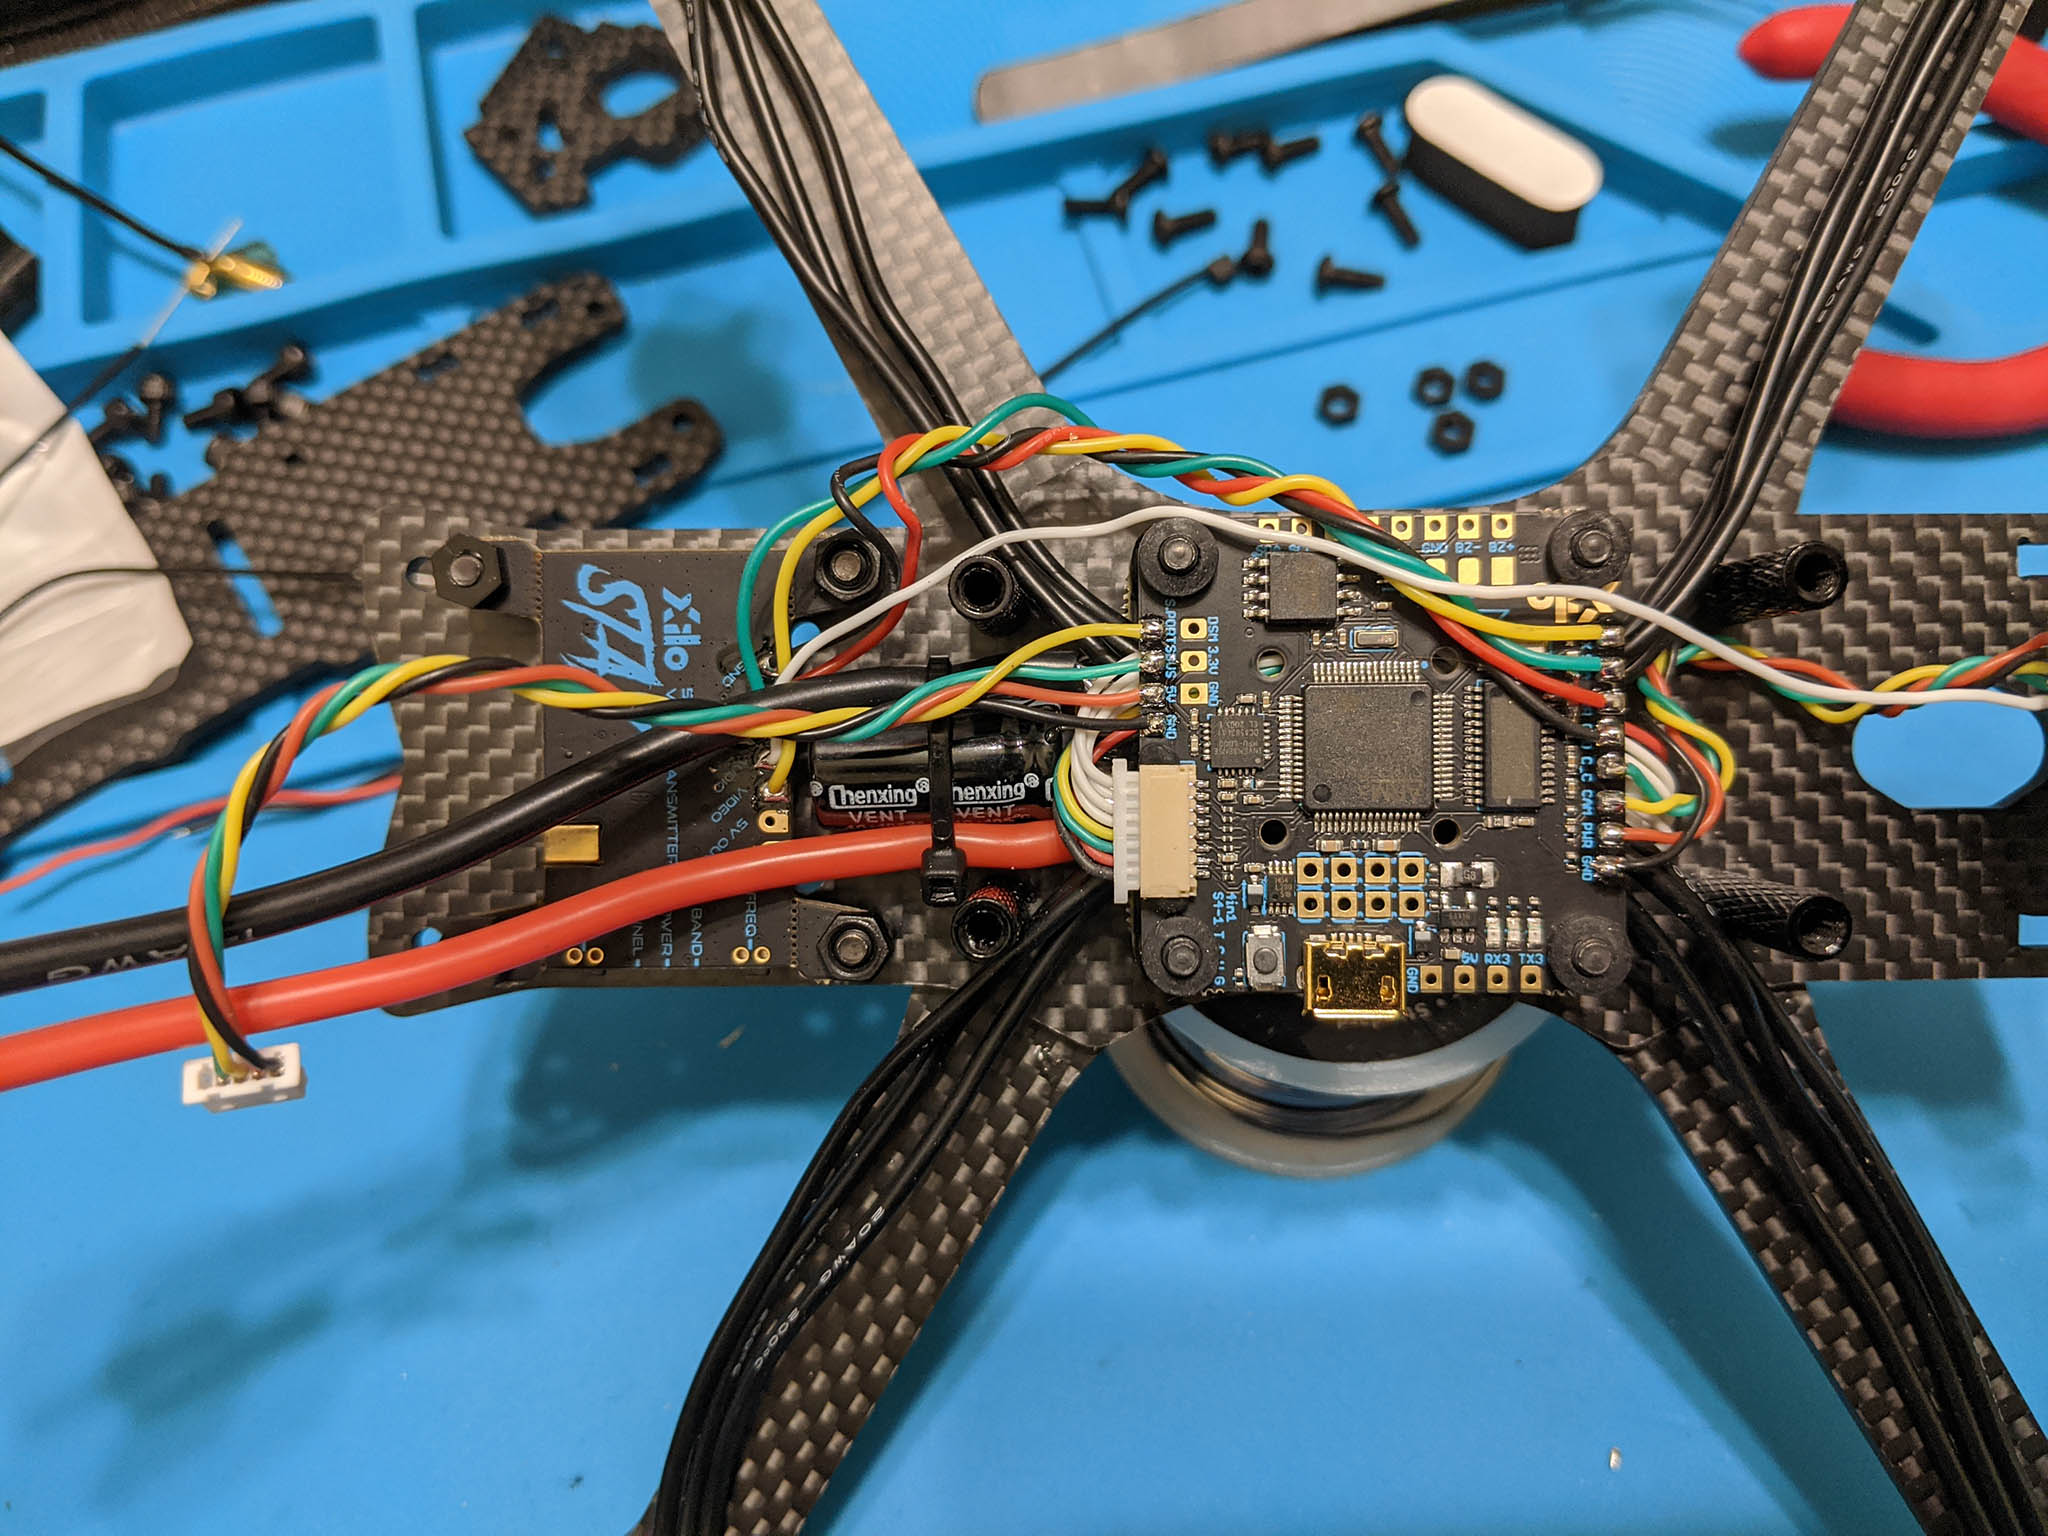
There are two nice features of the Xilo Caddx camera that JB didn’t making use of in the video build. The first is the Caddx camera’s onboard microphone, and the second is the ability to modify camera settings from the flight controller. The Xilo build kit gives you everything you need to hook this up with just a little extra effort.
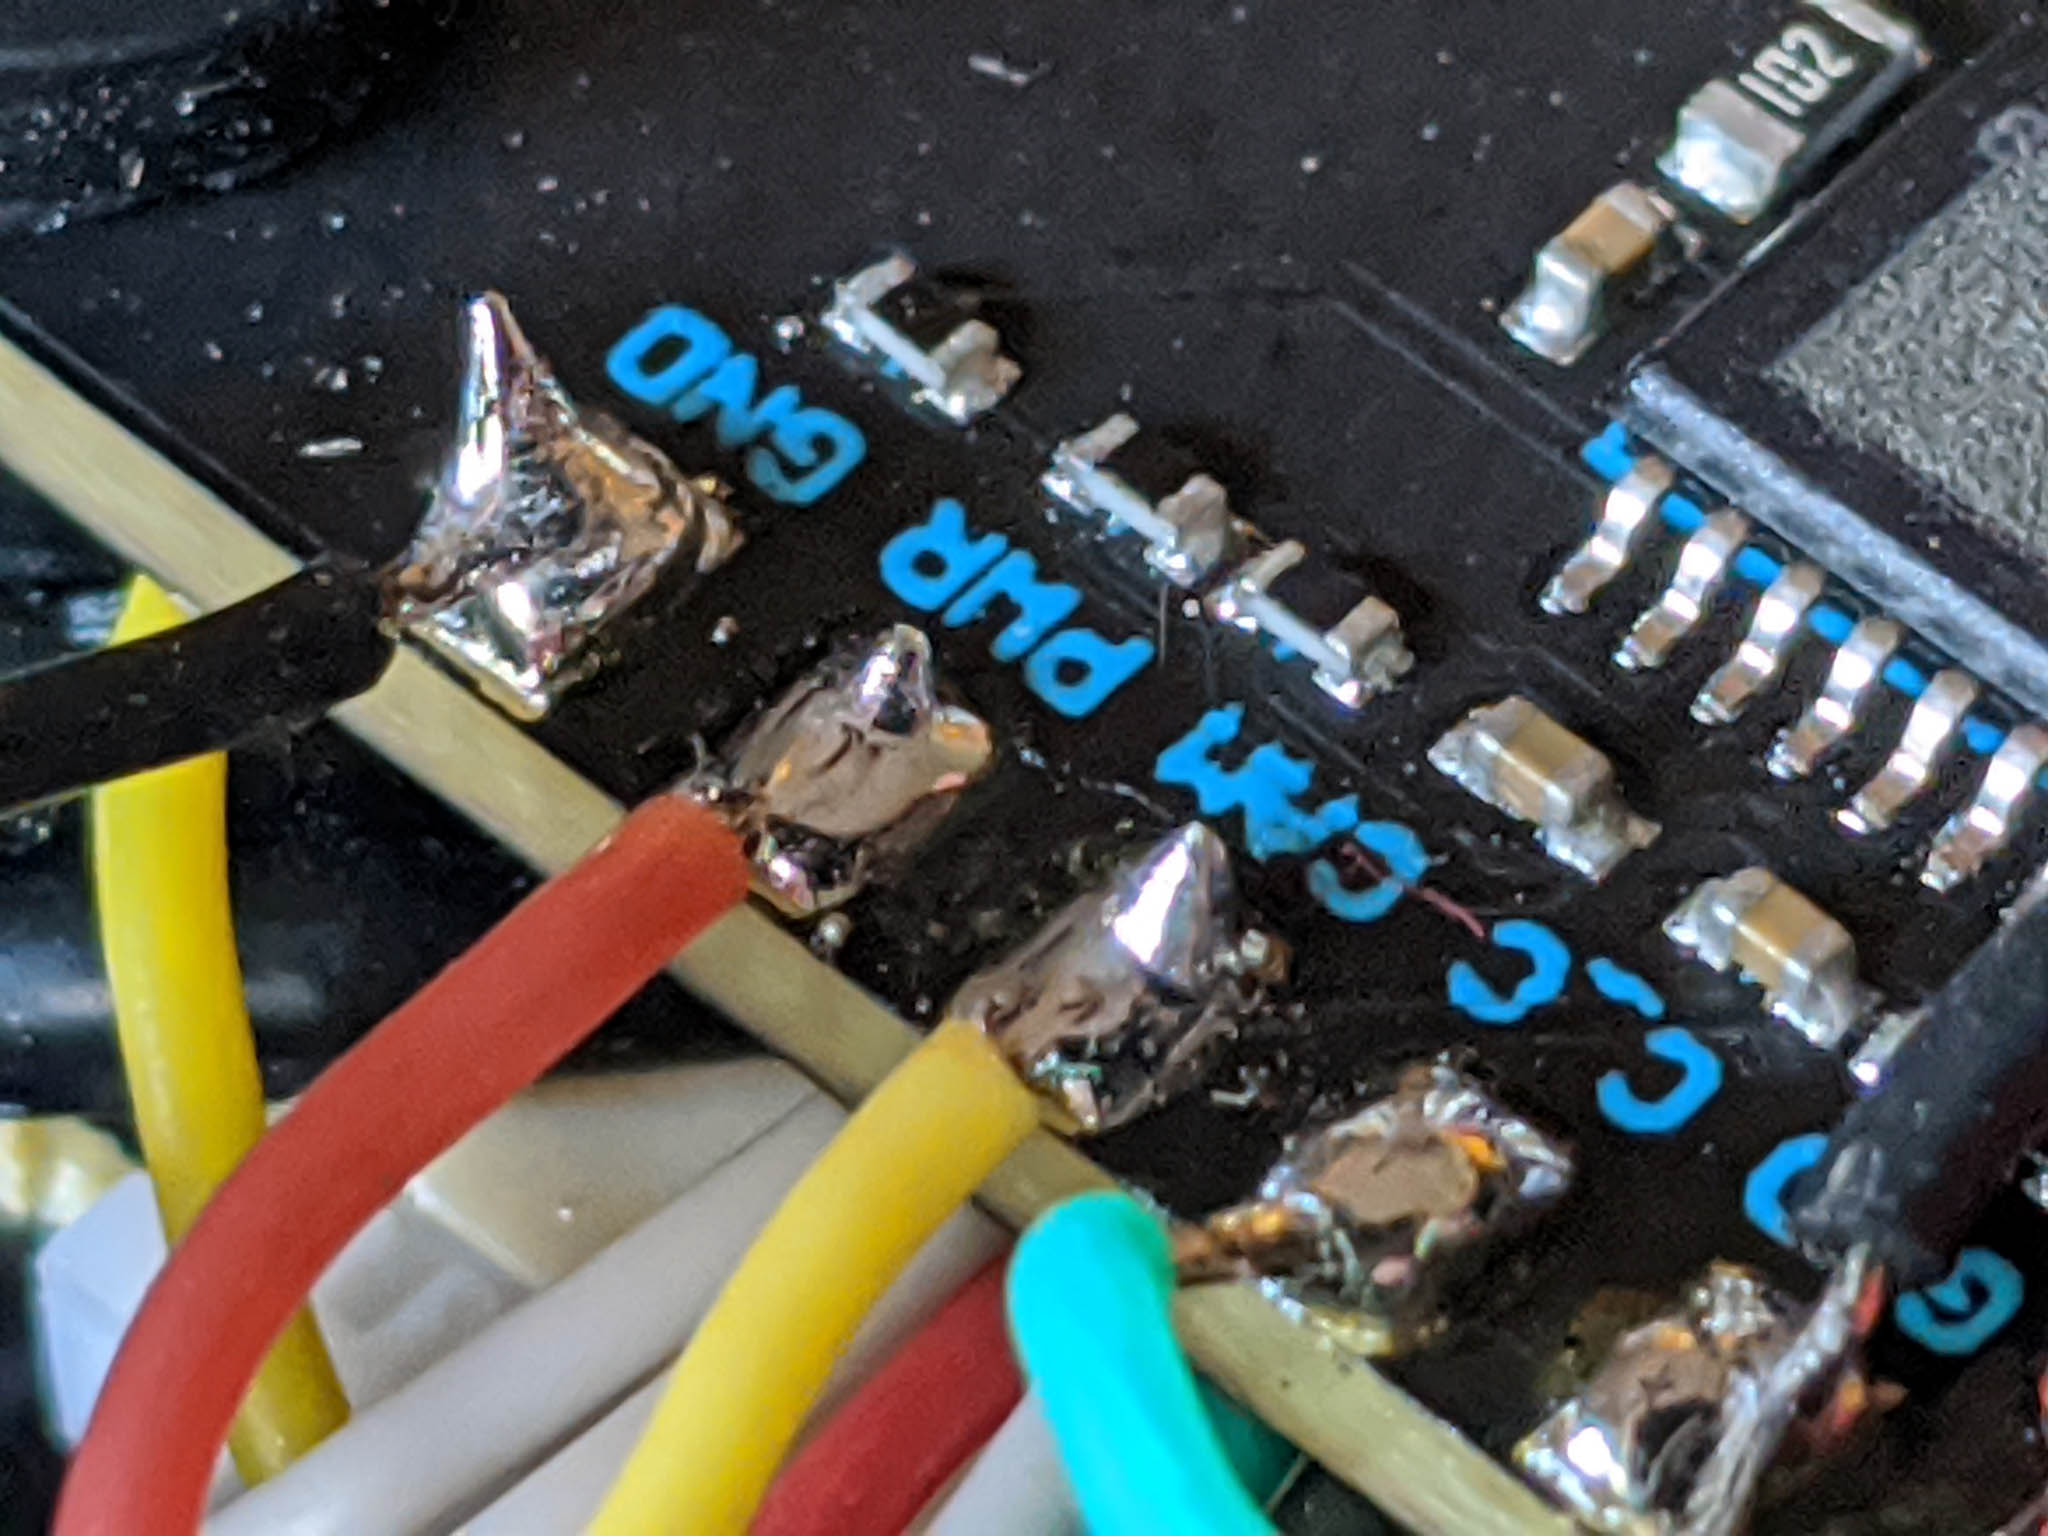
Flight Audio
The audio you hear while flying will be nothing but prop noise, but many like hearing what the motors are doing and how they respond to different movements. Most of the camera wires are soldered into the flight controller, but the (white) audio line is connected directly to the video transmitter. When you cut the camera wires, leave the white wire as long as possible since you will carry it all the way to the back of the frame. Solder it into place on the video transmitter pad labeled “Audio”. That’s it!
Camera control
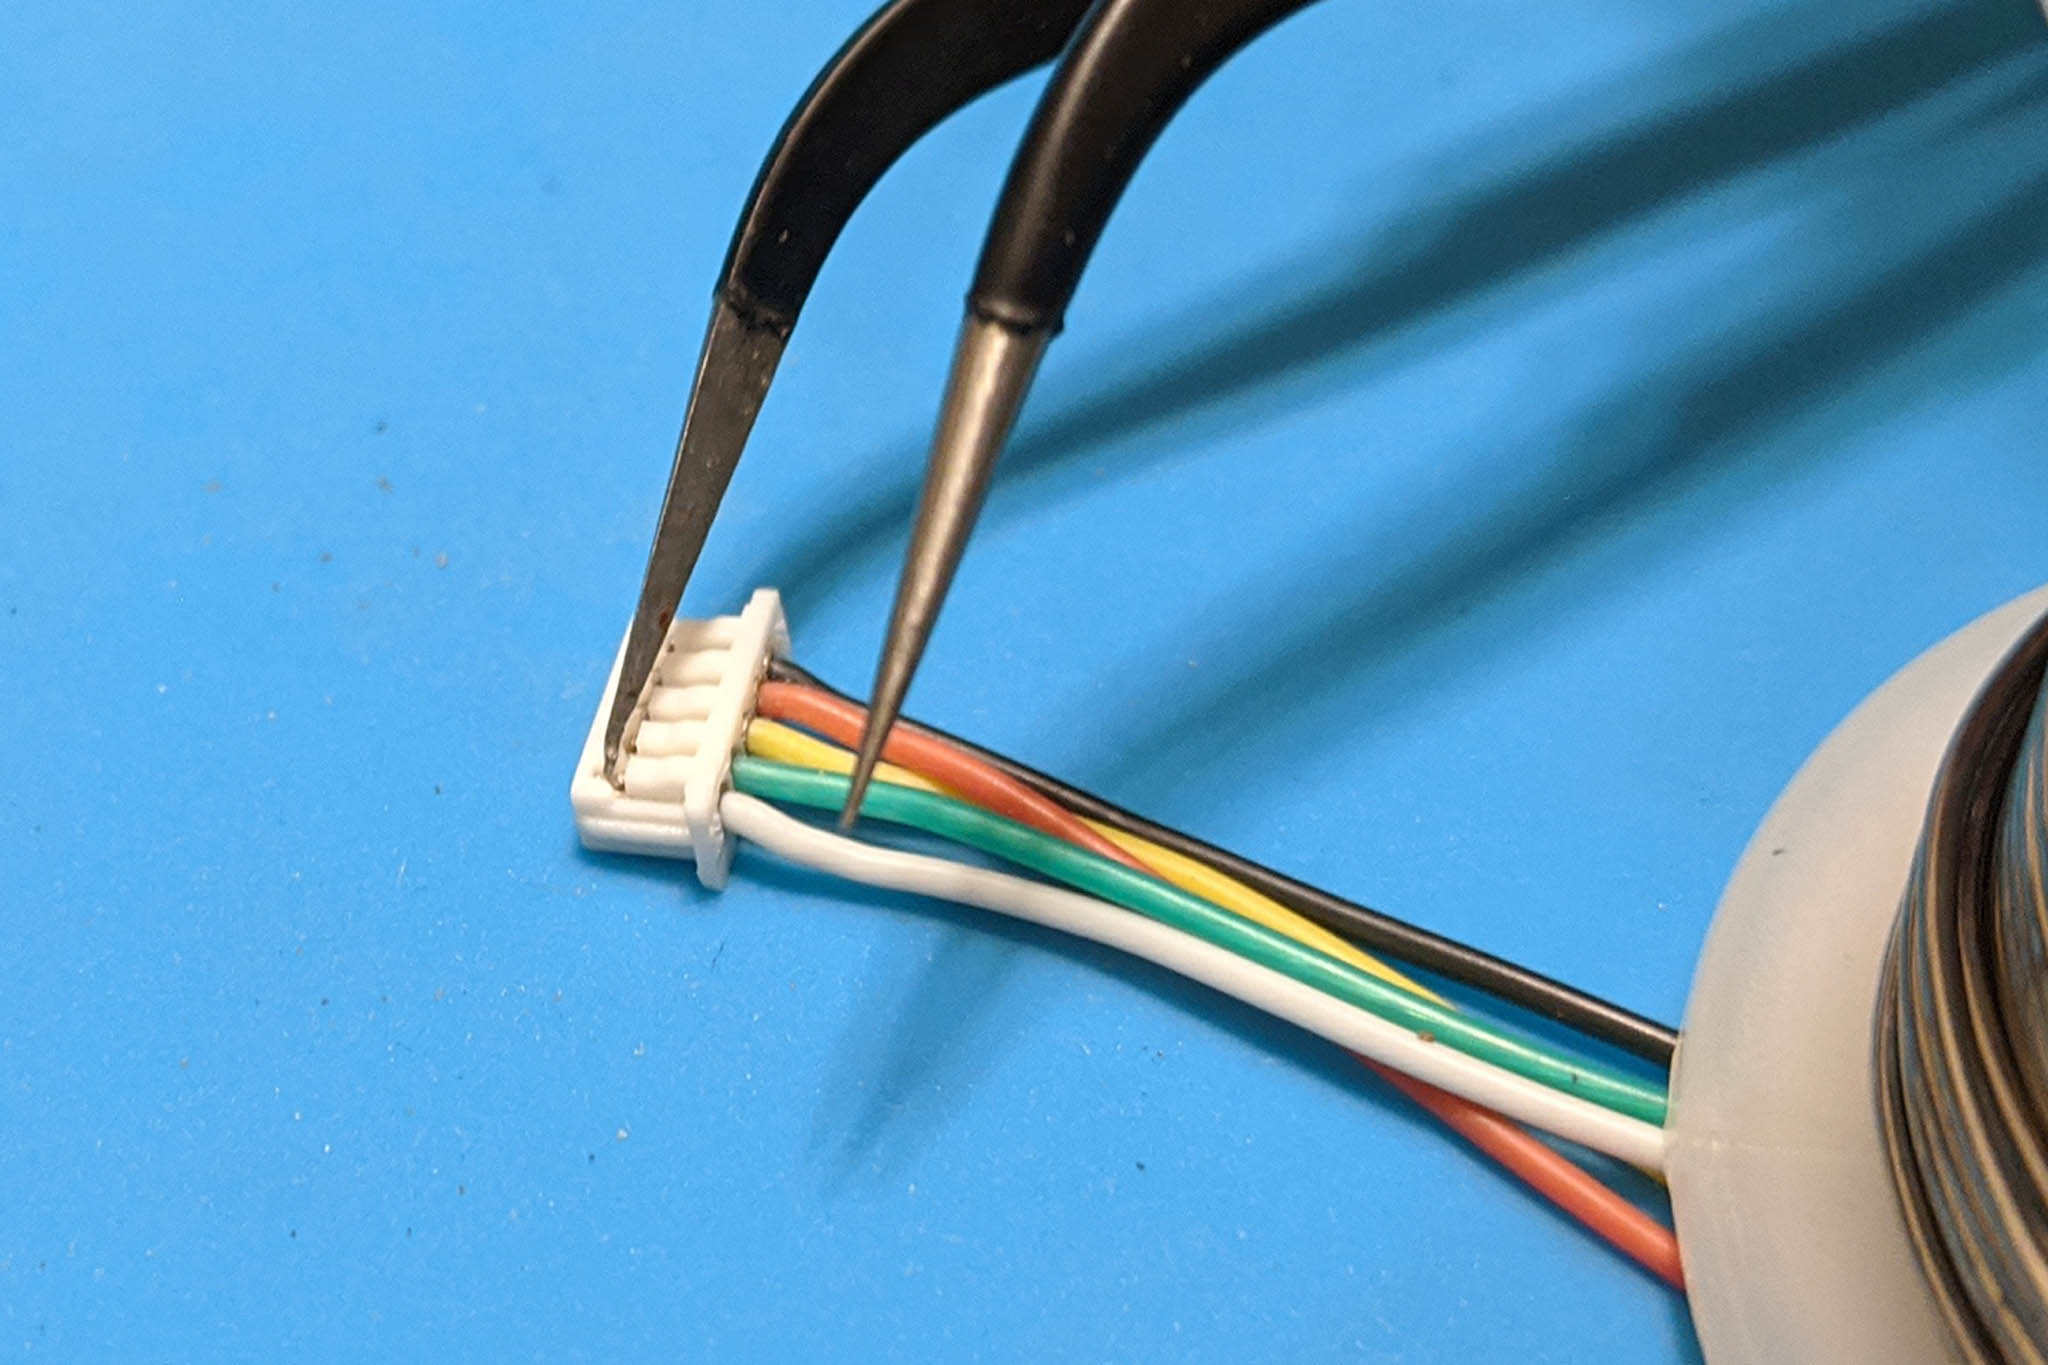
Camera control is a little bit more challenging because the (green) wire provided is a little short. You can make it work if this is all you have, but I decided to tweak my cable and put in a longer wire instead. Once you have this wire ready, solder it to “C_C”, near the other camera wires. After you’ve done this you won’t be able to plug in the camera joystick anymore. Instead, use your radio transmitter to adjust your camera settings without it! Betaflight’s stick commands for camera control are active when your quadcopter is disarmed and not in OSD menu mode.
Build tip: To re-pin JST connectors, use a set of tweezers to gently pull up the tab on top of the pin you want released. While doing this, pull the wire out of the connector. This method also works on battery balance lead connectors—you don’t need to throw a good battery away if only the plastic connector is broken (but be careful not to let the pins touch each other)!
VTx Disable
Another low-hanging fruit on the Xilo FC that you won’t want to miss is the VTx Disable feature. This allows you to completely power off the video transmitter right from your radio and is like having a built-in RealPit device. The feature is primarily used by racers since it allows you to stop transmitting and building up heat in the VTx while waiting for the race to start. It can be great for endurance races, where one quad gets shut off so another can launch immediately. For non-racing pilots it can still be useful if, for example, you get stuck in a tree and want to shut the transmitter off.
If you’ve wired up your video transmitter to the Flight Controller, setting this up is as easy as adding a mode in BetaFlight. Simply assign a channel to USER1. Note that when USER1 is enabled, the VTx will switch OFF (this might feel a little backwards).

Wrapping Up
 Be sure to complete the video series on setting up Betaflight and buttoning up the quad to make it flight-ready. There are a lot of great tips in there for first-time builders as well. Before you launch for the first time, it’s a good idea to do final preflight checks to be certain you didn’t miss anything important and everything is functioning correctly.
Whenever you’re doing a quadcopter build, there are a thousand tiny decisions that need to be made. Joshua Bardwell’s excellent series gives a ton of great information but in the end if your quad doesn’t look exactly like his, that’s okay! If it flies and you’re having fun, you’re doing it right.