

Finding your ideal rates can be a time-consuming and difficult task. There are seemingly endless possibilities regarding which rates to use. In this article, I’ll go over tips on tuning your rates, as well as some helpful resources to aid in finding the ideal setup for your flying style. Of course, rates are all subjective, since every pilot is different. This will just outline some ways to get started.
This article was submitted through the GetFPV Community Program by Lawrence Ro. You can check out more of his content on YouTube.
Disclaimer: This article was written solely by a member of the FPV Community. Views and advice in this article are that of the author and does not necessarily reflect the opinion or views of GetFPV.
Different Rates for Different Tasks
Finding your ideal rates can be a time-consuming and difficult task. There are seemingly endless possibilities regarding which rates to use.
In this article, I’ll go over tips on tuning your rates, as well as some helpful resources to aid in finding the ideal setup for your flying style. Of course, rates are all subjective, since every pilot is different. This will just outline some ways to get started.
Freestyle
Freestyle is like a “dance” for the quadcopter. Pilots spend countless hours perfecting tricks and getting them to flow together, often recording footage via high-definition cameras, such as GoPros.
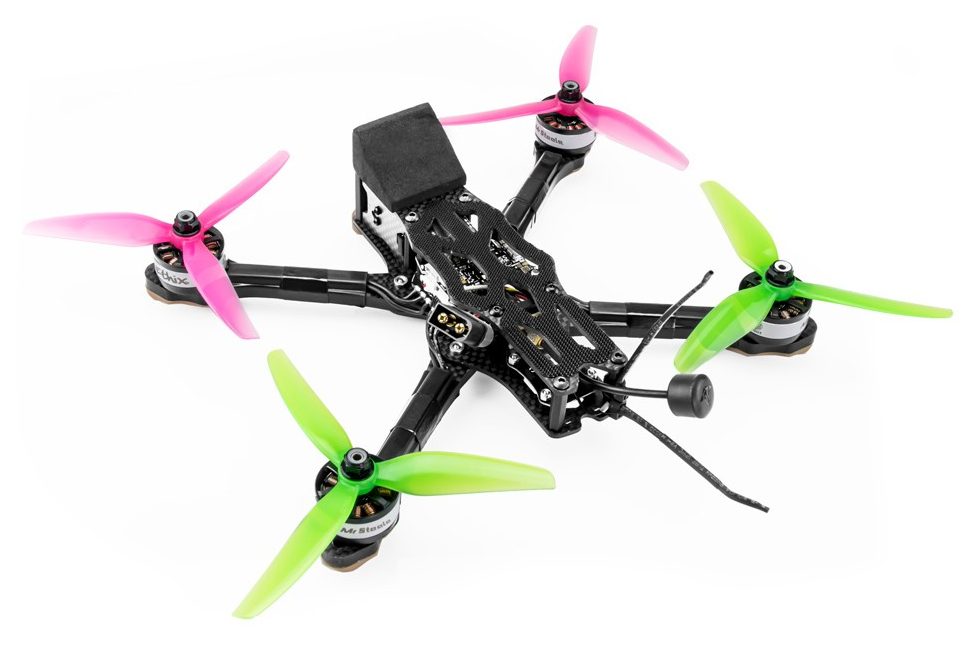 Most of the time, higher rates are needed to perform tricks fast enough. Mr. Steele is an excellent example of what FPV freestyle looks like:
[vc_row][vc_column][vc_video link=”https://www.youtube.com/watch?v=LkcyFfcRidI”][ultimate_spacer height=”20″][/vc_column][/vc_row]
There are a variety of different ways to approach rate tuning for a freestyle quad, but the most reliable method is to adjust to muscle memory.
When starting out tuning rates, I recommend using the default rates that came with either your quad (if it was an RTF) or the configurator. In general, most freestyle pilots prefer a maximum rate of 400-1000 degrees per second on all axes.
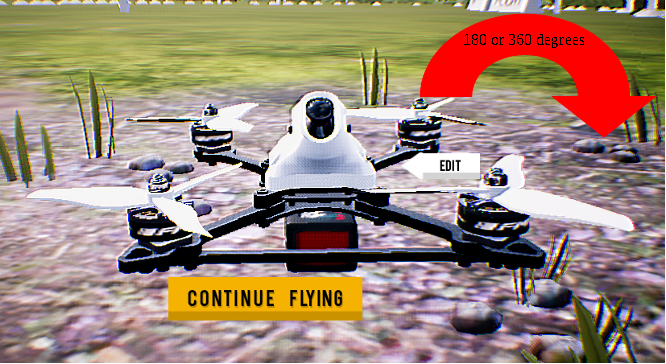
First off, move the roll stick a certain amount that you should expect the quad to do a full revolution (the same can be applied for a half revolution or certain trick). Adjust and tune your roll rate so that the quad rotates one revolution exactly how it felt previously. A good rule of thumb to keep is to close your eyes, perform a roll, and adjust your rates depending on how close you were to a perfect 360 degrees. A good place to try this is either in a large field or an FPV simulator.
Eventually, once this is done on all axes, the quad should respond on “feel”. This is more reliable than flying tricks based on “look” because it means that the added latency of having to recognize when the quad has finished rotating in your goggles as well as latency in the radio system and electronics can be ignored (to some extent), since the actual flip/roll has already been performed on the sticks without much aid of the FPV feed. In a sense, now the FPV video serves to help you navigate through your surroundings, rather than a tool to pull off tricks.
I found that using the fixed quadcopter position in FPV Air 2 was helpful.
One note to keep in mind is that your pitch/roll/yaw axes do not need to be completely identical. Many freestyle pilots prefer to have a higher yaw rate, or a slightly higher pitch/roll rate to account for muscle memory. This also allows for tricks such as yaw-spins to be performed reliably and precisely.
Racing
FPV racers fly rather differently than freestyle pilots. Exotic flips and rolls, yaw spins and other tricks are seldom flown, instead, having most of the attention directed towards standard race maneuvers, such as the split-s, corkscrew, and slalom. Again, the “feel” method can apply here as well. However, there are a few established rate profiles that the pros use, which have been successfully used by many racers around the world.
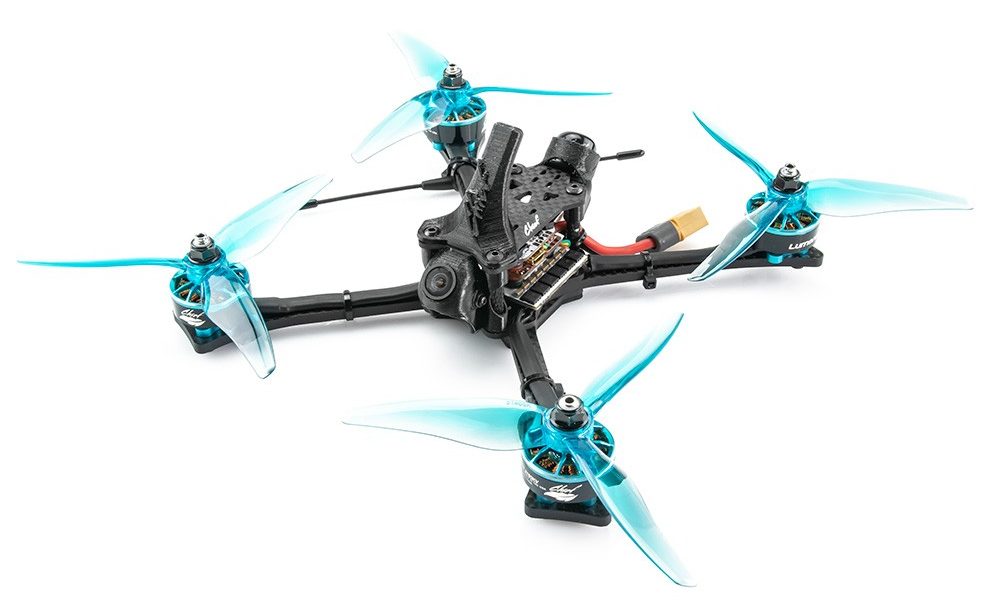
Although initially counterintuitive, the rates that racers normally use are much lower than those of freestyle pilots. This allows for greater control of fine movements around the track, translating to faster lap times. For the most part, racers fly with a maximum rate of 300-700 degrees per second on all axes.
When flying with high camera up-tilt (as many racers do), the yaw axis is used much less to maneuver, instead, relying on mostly pitch and roll to control altitude and position, with throttle to control overall speed. This means that the lower yaw rate makes flying more consistent. Therefore, most pilots also prefer to have their yaw rates equal or lower than their pitch/roll rates.
An excellent tool for testing out different rate profiles is the Betaflight Rates Tuner.
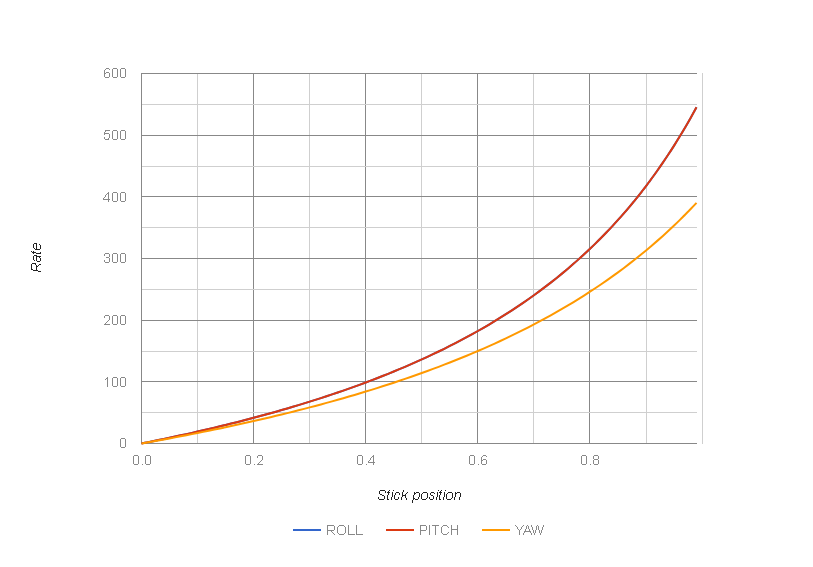 Not only does the Betaflight Rates Tuner allow you to test out different rates and their effect on the RC curve without having to plug in the quad, but also has presets for some of the fastest pilots in the world. As a bonus, stick camera flights are linked alongside many of the pilots’ rate profiles.
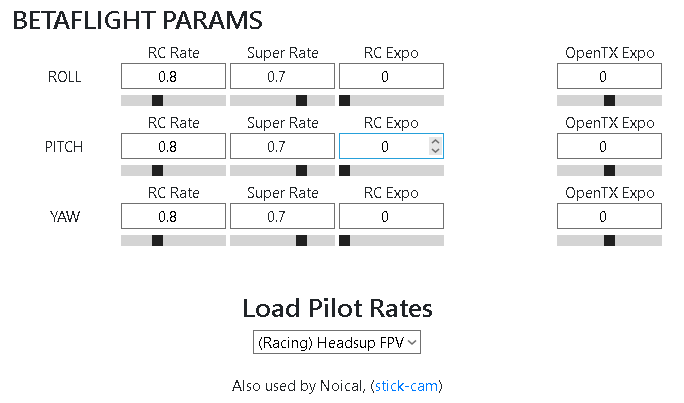
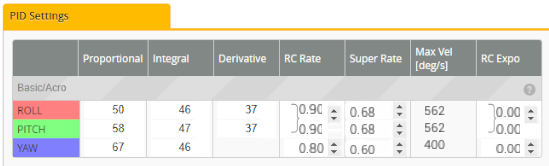
For example, Evan “headsupfpv” Turner flies with 0.8/0.7/0.0 (0.8 RC rate, 0.7 super rate, 0.0 expo) on all axes. This equates to only 533 maximum degrees/second. Here’s a video of Noical, another extremely fast pilot using these slower rates:
[vc_row][vc_column][vc_video link=”https://www.youtube.com/watch?v=AleivyGusJg”][ultimate_spacer height=”20″][/vc_column][/vc_row]
And…if it didn’t get any better, this handy tool allows the conversion of rates between Betaflight and Raceflight!
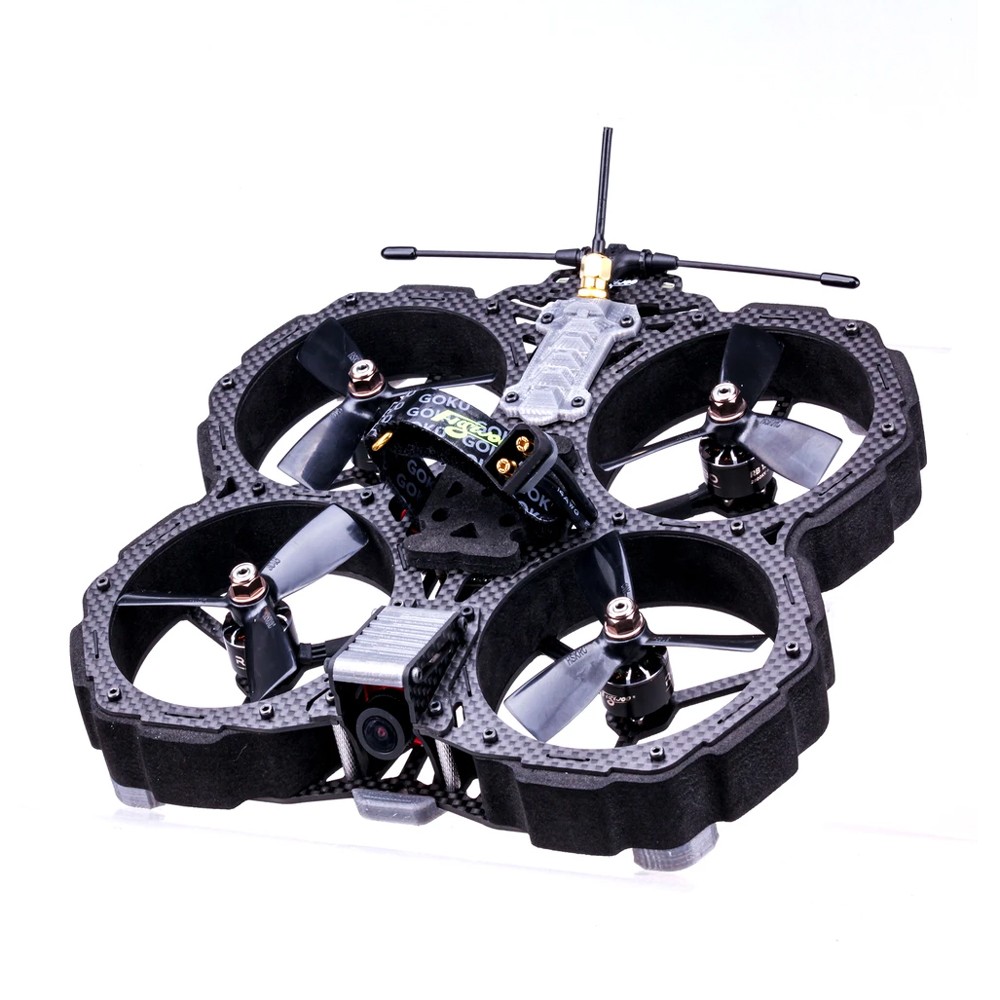
Cinematic / Cinewhoop
Cinematic flying is meant to be smooth and slow, capturing the surroundings as elegantly as possible. This means high precision, stability, and smooth stick movement for the most part.
It is of debate over whether to run a cinewhoop in Angle, Horizon, or Acro mode. Some pilots prefer the stability of Angle, while others like the versatility of Horizon mode. Acro mode is most often used however, since it allows for the most freedom while flying. However, all three modes are viable and have their own applications.
As for rates go, a “numbed” feeling in the center of the sticks caused by expo is often utilized to smooth out jerky movements while flying. Also, like racers, lower rates are more popular, since precision and smoothness are of utmost importance.
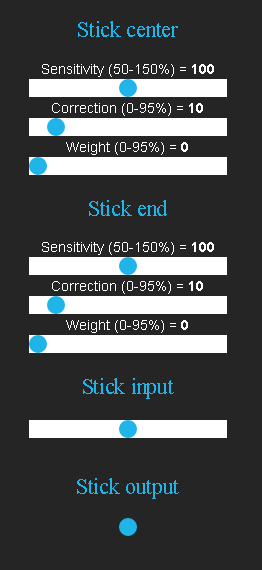
![]() A new feature that was recently introduced to Emuflight (a modified version of Butterflight/Betaflight), is the Rate Dynamics system. Essentially, this is a stick-feel modifier, which allows for any input characteristic to be achieved via a PID controller for the rate system. It adds a greater degree of flexibility when it comes to rate tuning. This is especially beneficial for cinematic quads and cinewhoops, because it allows for a degree of “smoothness” not present in other RC control systems.
A new feature that was recently introduced to Emuflight (a modified version of Butterflight/Betaflight), is the Rate Dynamics system. Essentially, this is a stick-feel modifier, which allows for any input characteristic to be achieved via a PID controller for the rate system. It adds a greater degree of flexibility when it comes to rate tuning. This is especially beneficial for cinematic quads and cinewhoops, because it allows for a degree of “smoothness” not present in other RC control systems.
To read more on the Rate Dynamics system, check out the GitHub page here: [link: https://github.com/emuflight/EmuFlight/wiki/Rate-Dynamics]
There is even an Emuflight Rate Dynamics Demo available for testing: [link: https://stoot.tech/emu-rate-dynamics.html]
KababFPV and UAV Tech both have excellent video explaining Rate Dynamics in their videos here:
KababFPV
[vc_row][vc_column][vc_video link=”https://www.youtube.com/watch?v=w4i8MgJmj_Q&t=525s”][ultimate_spacer height=”20″][/vc_column][/vc_row]
UAV Tech
[vc_row][vc_column][vc_video link=”https://www.youtube.com/watch?v=Hkrm_COds_I”][ultimate_spacer height=”20″][/vc_column][/vc_row]
It’s worth noting that Rate Dynamics are not just used by cinematic pilots. Freestyle and racer pilots will also benefit from the flexibility of customizable stick feel present in Emuflight.
Wrap-up
Overall, different rates cater to different flying styles. Freestyle pilots often use higher rates, while racers and cinematic pilots use lower rates. Muscle memory is more reliable than reacting to what you seen in the goggles. In the end, it only really matters what works for you, since nobody flies the same.
Now…get outside and have some fun!
~ Lawrence