
Your FPV system is the single most important part of your quad. It provides you with a live video feed to tell you where the aircraft is heading, and allows us to perform mind-bending acrobatic maneuvers. If a single component in your FPV system fails during flight, then the quad goes down, all because of one component. A bad FPV video signal, riddled with static can render a quad useless, ending a fun day of FPV. In this guide, the topic of fixing a bad FPV video feed will be discussed and diagnosed.
[vc_row][vc_column][vc_single_image image=”4699″ img_size=”full” alignment=”center” onclick=”link_image”][/vc_column][/vc_row][vc_row][vc_column][vc_column_text]
This article was submitted through the GetFPV Community Program by Lawrence Ro.
Disclaimer: This article was written solely by a member of the FPV Community. Views and advice in this article are that of the author and does not reflect the opinion or views of GetFPV.
Common Causes of Bad FPV Video
The most common causes for a bad FPV video feed are caused by electrical and/or mechanical disruptions in the quad. This can vary from electrical noise coming from the ESCs, to vibrations from a bent prop. Also, objects that are in the way of the line of sight between your goggles and video transmitter can cause multi-pathing, resulting in a low-quality video signal.
There are two main types of FPV static. There is white line static, and black line static. White line static is electrical interference, whereas black line static is usually due to a lack of power going to your camera and/or video transmitter.
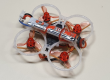
Electrical Noise
The ESCs in your quad generate a lot of electrical noise. They are constantly pumping out high current to the motors at high frequencies. Not surprisingly, this has detrimental effects to the FPV system. A small interference may cause static to appear, and in some cases, can block out the whole signal.[/vc_column_text][/vc_column][/vc_row][vc_row][vc_column][vc_single_image image=”4694″ img_size=”full” alignment=”center” onclick=”link_image”][/vc_column][/vc_row][vc_row][vc_column][vc_column_text]
Change Power Source
One solution to this problem is to power your FPV camera directly from your video transmitter. Many video transmitters these days have built in filtering for cameras, which gives the camera a nice, clean, filtered video. The transmitter itself may be powered directly from the LiPo battery, providing that it can handle the voltage, but this is not recommended, as excessive noise during high motor use can still make its way into the video feed. Instead, power the transmitter off a voltage pad on your PDB.[/vc_column_text][/vc_column][/vc_row][vc_row][vc_column][vc_single_image image=”4696″ img_size=”full” alignment=”center” onclick=”link_image”][/vc_column][/vc_row][vc_row][vc_column][vc_column_text]
Low ESR Capacitor
Another solution to electrical interference in your FPV video is to add a low ESR capacitor to your power setup. Why a low ESR capacitor? Because they are really good at absorbing voltage spikes, which cause electrical interference. Basically, by adding a capacitor, it will not only significantly clean up the video feed, but it will also protect the more sensitive electronics, such as the flight controller from voltage spikes cause by the ESCs and motors. Also, they are cheap and effective way to eliminate electrical noise. For more information pertaining to capacitors in FPV systems, check out this article: https://oscarliang.com/capacitors-mini-quad/[/vc_column_text][/vc_column][/vc_row][vc_row][vc_column][vc_single_image image=”4700″ img_size=”full” alignment=”center” onclick=”link_image”][/vc_column][/vc_row][vc_row][vc_column][vc_column_text]
Look for a large capacitor with a sufficient voltage rating. An example of a common one is a 1000uF 25-35V low ESR capacitor. When installing a low ESR capacitor, you want to solder it as close as possible to the battery. A great video explaining more in depth about capacitor placement and installation can be found here: https://www.youtube.com/watch?v=88wEYTp3i3g
Have a Common Ground
If possible, connect your FPV camera and FPV transmitter to the same ground pad on your PDB. The reason for this is because not all ground pins are the same in a mini quad. Different pads on the PDB may have different thicknesses, lengths, or shape. These affect the pad’s resistance, capacitance, and inductance, all of which can cause voltage and current differences throughout your power system. For best practice, connect the more critical part, the FPV system to a common ground pad. If this is not possible, try to connect them as close to each other as possible.
Keep ESCs Far Away
ESCs operate at high voltages and frequencies, carrying current and signals through wires in our quads. These wires can generate EMFs, or electromagnetic fields, which causes interference in the FPV video feed. Try to keep your ESCs as far away as possible from your flight controller and FPV equipment.
LC Filter and FPV BEC
Yet another solution to eliminating electrical noise in your quad is to add an LC filter and/or an FPV BEC (battery elimination circuit). These two solutions are relatively outdated and not recommended anymore, but adding an LC filter to the power system can help a bit. A better way t counteract interference would be to add a low ESR capacitor. An FPV BEC basically does the same thing as powering your FPV system from a filtered pad on your PDB.[/vc_column_text][/vc_column][/vc_row][vc_row][vc_column][vc_single_image image=”4695″ img_size=”full” alignment=”center” onclick=”link_image”][/vc_column][/vc_row][vc_row][vc_column][vc_column_text]
Video Transmitter Overheating
An overheating video transmitter is a sure way to wreck your FPV system. Since we like to transmit 5.8Ghz signals at 200mw or more for long periods of time day in and day out, the small video transmitters have to work pretty hard to keep up. When they get too hot, the result is poor operation, and sometimes, a burnout. If possible, try to mount the video transmitter in a well-ventilated area of your quad. Also, consider adding a heat sink to the transmitter to reduce the amount of heat buildup.[/vc_column_text][/vc_column][/vc_row][vc_row][vc_column][vc_single_image image=”4697″ img_size=”full” alignment=”center” onclick=”link_image”][/vc_column][/vc_row][vc_row][vc_column][vc_column_text]
Mechanical Issues
Vibrations in your quad frame can disrupt the operation of your FPV equipment. Also, it can cause “jello” in your video. Jello is when the image in your FPV gets slightly distorted and shifted because of the way many cameras process their image. Basically, vibrations = bad.
Check Connectors
Check your SMA antenna connection on your FPV transmitter. If it is even slightly loose, or wiggles a tiny bit, then tighten it or get a new antenna. The vibrations in the quad during flight interfere with the connection of the antenna, which decreases range, and may even put your video transmitter at risk of burning out. Also, make sure that your camera cable, video transmitter cable, and wires are secured.
If the video feed is black, but you can still see the OSD, then its your camera that needs to be diagnosed. However, if you can see the image and the OSD, but have static lines, then it’s the video transmitter.
Uneven Props
This is a huge thing in the stability of your quad. No amount of PID tuning and new Betaflight releases will fix your vibration problems if you have a bent prop. That one bent prop can cause your motors to overheat, can wear out your motor bearings faster, cause jello, and in general, wreak havoc on your quad. Simply bend the prop back to where it was before, or replace it. One trick to this is to look at your prop on the motor to the side. Then rotate and bend the offending blade(s) back to where they should be, usually parallel to the ground. Then, as a final check, quickly spin your motor and check that the props “blur” into an even line.[/vc_column_text][/vc_column][/vc_row][vc_row][vc_column][vc_single_image image=”4698″ img_size=”full” alignment=”center” onclick=”link_image”][/vc_column][/vc_row][vc_row][vc_column][vc_column_text]
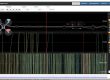
Check PIDs
Another problem which may induce vibrations to your quad is a bad PID tune. This is not really an issue these days, because our flight control software is so good out of the box, that this rarely needs to be addressed. However, in some cases, the PID tune of your quad may need to be adjusted to fix oscillations in flight. Check out this video by Drone Mesh, going mainly over how PIDs can affect FPV video: https://www.youtube.com/watch?v=O4S9xoaEOec[/vc_column_text][/vc_column][/vc_row][vc_row][vc_column][vc_single_image image=”4693″ img_size=”full” alignment=”center” onclick=”link_image”][/vc_column][/vc_row][vc_row][vc_column][vc_column_text]
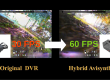
Be sure to check the temperature of you motors when PID tuning and filter tuning. Betaflight specifically says: “It is important to verify motor temperatures during first flights. The higher the filter value gets the better it may fly, but you also will get more noise into the motors. Default value of 100Hz is optimal, but for noisier setups you can try lowering D-term filter to 50Hz and possibly also the gyro filter.”
[/vc_column_text][/vc_column][/vc_row][vc_row][vc_column][vc_single_image image=”4692″ img_size=”full” alignment=”center” onclick=”link_image”][/vc_column][/vc_row][vc_row][vc_column][vc_column_text]
Check Antennas
If your antenna is not properly mounted, or your antennas in you goggles aren’t correctly configured, you may experience bad FPV video. For example, make sure that you are using RHCP/LHCP antennas on both your video transmitter and receiver. They both need the same type of antenna in order to operate to their best extent. If you are using a cloverleaf and patch antenna on your goggles, then make sure to point the patch antenna in the direction of the quad to get the best reception.
If tilting your head in the direction of flight doesn’t seem appealing to you, then consider putting two cloverleaf antennas on your diversity setup. Joshua Bardwell made a video comparing a cloverleaf and patch to a double cloverleaf receiver setup here: https://www.youtube.com/watch?v=uoIQgW8iwV8
Conclusion
Overall, diagnosing a bad FPV video feed can be a time consuming and frustrating task. However, it is an extremely rewarding process that can give valuable experience in diagnosing your quad’s FPV system. The best way to prevent failure is to buy quality parts. Not the cheap stuff from China, but the solid performing parts from reputable suppliers.[/vc_column_text][/vc_column][/vc_row]
Hello,
Good work!
I’m having issues with noise even before arming the quad, diagonal lines and off course it get really worse when arming and flying, so much it become unflyable.
I tested the video signal from the fc connecting with a cable to an analog display and there’s no noise, only when taking video from vtx there’s noise. What can I do? Vtx is eachine TX 1200, fc and esc kakute f7 and tekko 32 60a, with 6s battery and low esr cap on battery line.
Thanks!
Hello, I have had this problem before. Usually, it’s due to a bad Vtx. Try using a Rush Tank, as I have found those to give extraordinarily clear video. The Eachine Vtxs are usually very unreliable. However, you could try checking for components overheating because that could also be a cause.
My drone seems to get a lot of random interference and the screen is interrupted by black lines. I don’t know if I have bad goggles or something is not setup correctly.
Hello, you could try making sure your channels are set up correctly in the goggles/video transmitter. I have had something like this happen to me before, and it turned out that my antenna polarizations were not matching. I was using a RHCP on the goggles, while using a LCHP on the quad. Also, your video transmitter might not be getting enough power. Check Wifi, since the 5.8 ghz can often interfere with your FPV signal.
Hello, I replaced the default VTX antenna in my Tinyhawk Race 2 with the Micro AXII RHCP. I also replaced the receiver antenna with a new one (31.2mm of centre wire exposed). I’m now getting better image quality, but the signal is really bad. If my quad flies 5m behind me, I automatically lose the signal. Same if in front of me but slightly larger range.
Help is so much appreciated
Hope you are doing well, try making sure all antenna connections are secure. Your goggle antenna may not be correctly installed, or it may be the wrong polarization. Hope this helps!
Everything is made in China.
Where do I order American made drone parts from??
When I turn my transmitter on my video becomes very broken up and bad.