

Pretty much everyone has a DVR in their goggles. This gives the pilot the ability to record flight footage, albeit of mediocre quality. Most goggles output DVR in a video which plays in 30 frames per second, or FPS. While this may be suitable for locating lost craft, you may be better off using a higher quality DVR for showing to friends and posting online. Some goggles, like the ORQA, have higher frame rate DVR available.
In general though, most people tend to purchase a separate DVR module like the ImmersionRC Powerplay or FXT DVR. These modules can record your FPV flights at double the frame rate-60 FPS, yielding a much smoother and enjoyable viewing experience.
However, the days of living with low-quality, 30 FPS footage from your Fatsharks are long gone! In this article, we’ll be going over a method which can increase your framerate from 30, to 60 frames per second.
No longer do you have to settle with mediocre, low framerate footage to post on Youtube, dreaming of the day when you can afford such luxury as an ImmersionRC Powerplay. With just a few clicks in software, your DVR can look just like the pros!
If this sounds like something you’d enjoy trying out, then read on!
This article was submitted through the GetFPV Community Program by Lawrence Ro. You can check out more of his content on YouTube.
Disclaimer: This article was written solely by a member of the FPV Community. Views and advice in this article are that of the author and does not necessarily reflect the opinion or views of GetFPV.
Motion Interpolation
First question, what are we even doing to increase our DVR framerate? Well, without getting too technical, we are essentially inserting “extra” frames between our original DVR frames, thus making the video seem like it has a much higher frame rate. This is commonly called “motion interpolation”, and is often used to make animations more fluid, compensate for motion blur (something we are all too familiar with when it comes to FPV DVR), and for mimicking slow-motion effects.
Here is a video demonstrating the powerful effects that frame interpolation can yield: https://www.youtube.com/watch?v=sFN9dzw0qH8&ab_channel=LegoEddy
Additional information may be found here: https://en.wikipedia.org/wiki/Motion_interpolation
It’s worth mentioning that the most widely-used frame interpolation, DAIN, now costs $9.90 (donation) to use. However, the GitHub is available for those interested: https://github.com/baowenbo/DAIN
For us down-to-earth FPV pilots though, we do not need the most advanced software, much less bother to pay $10 simply to improve our video footage.
Hybrid
Today, we are going to be using a software called Hybrid. Hybrid is a multi-platform video handler, and contains a number of frame interpolation techniques, albeit older and less-used. However, these methods should still yield excellent results.
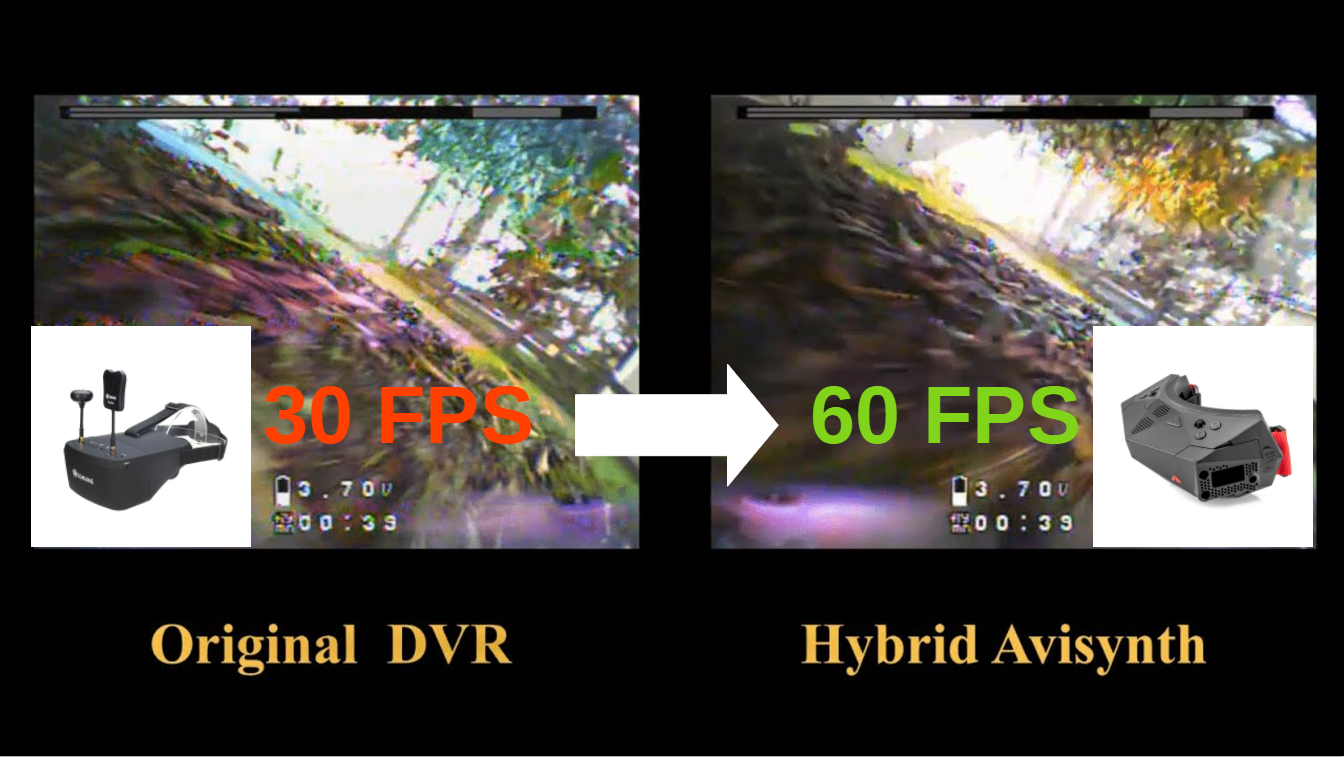
Here is a comparison of 30 FPS DVR, and the 60 FPS version after being processed through Hybrid. As you may see, there is a noticeable improvement in terms of the fluidity in the processed video.
First off, download Hybrid: https://www.selur.de/
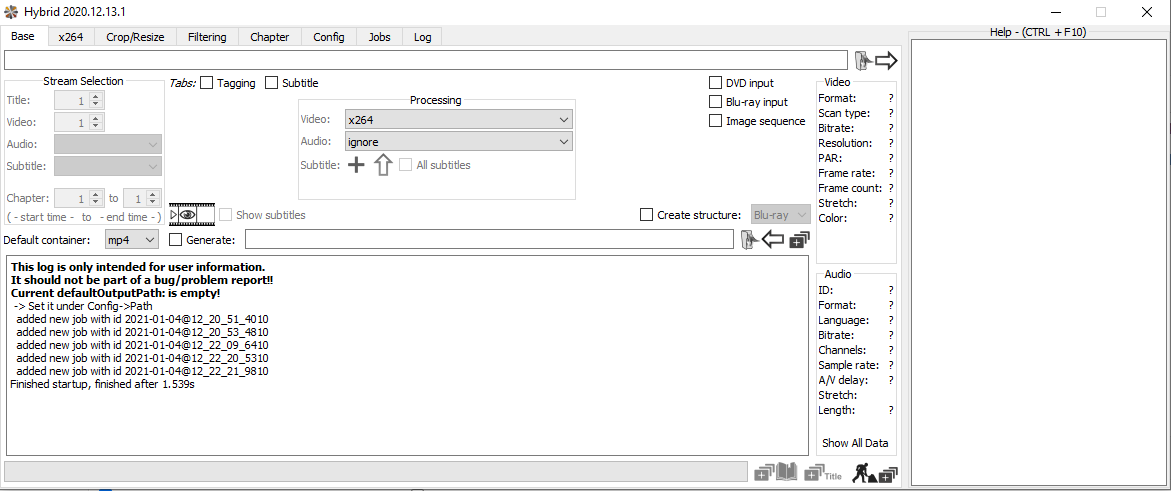
Once Hybrid is installed, you should be greeted with the main page once the software is opened.
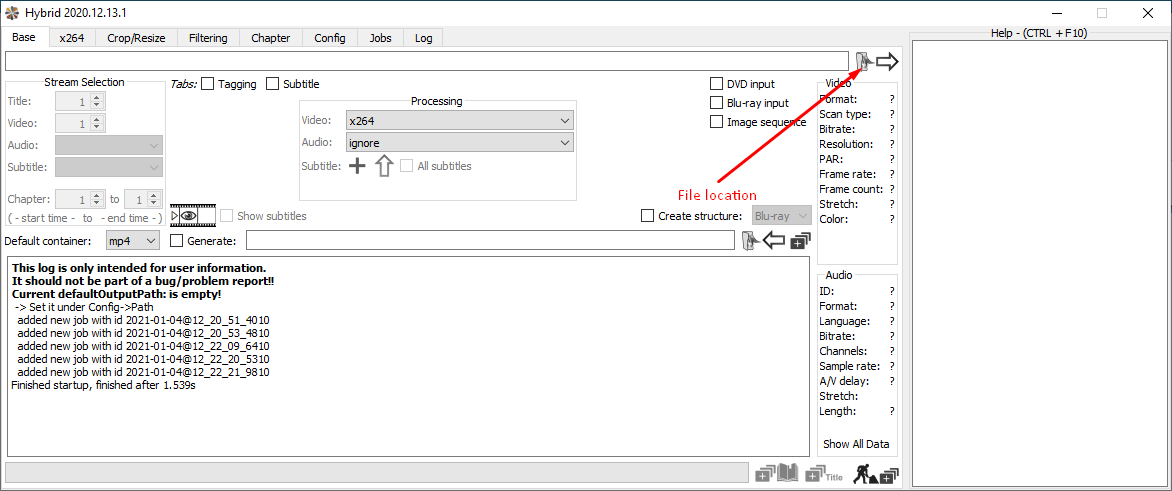
Open file location under the Base tab. This is the file path to your DVR recording, most likely from an SD card.
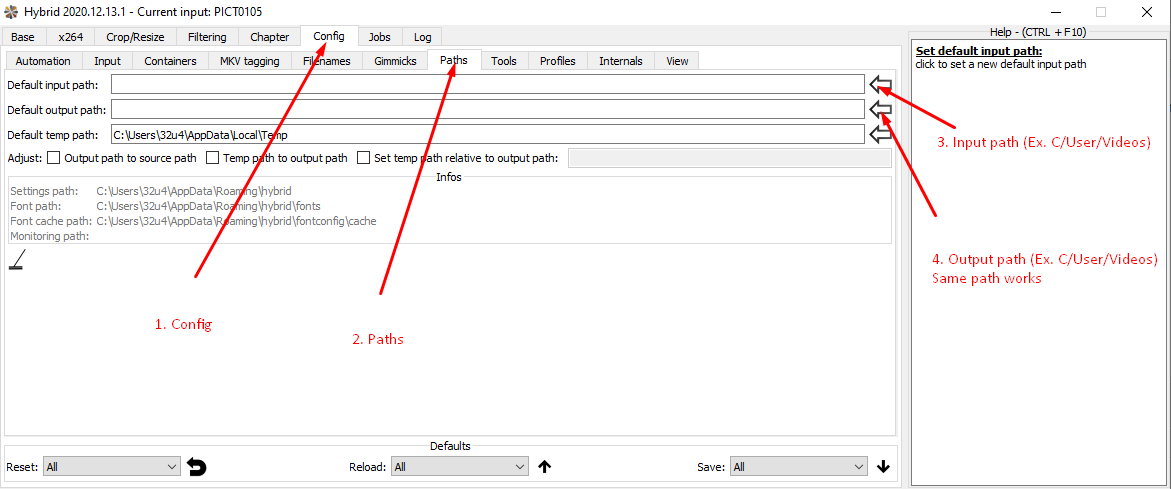
Next, head over to Config/Paths and select your desired input and output paths. The input path should be the same as the directory that your DVR file is located in. The output path can be any valid, writable location.
Now comes the fun part! Under Filtering, you can choose which frame interpolation method Hybrid should use. For the sake of simplicity, I am using Avisynth. Navigate to the Frame tab under Avisynth, and you’ll be met with a number of filters. Make sure that Avisynth is selected under the Support box, in the lower right-hand corner.
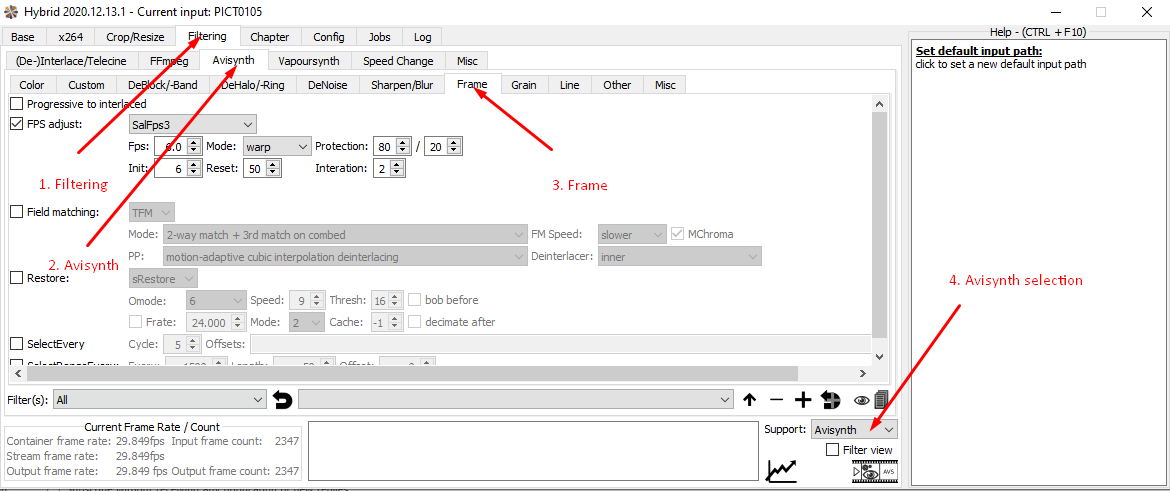
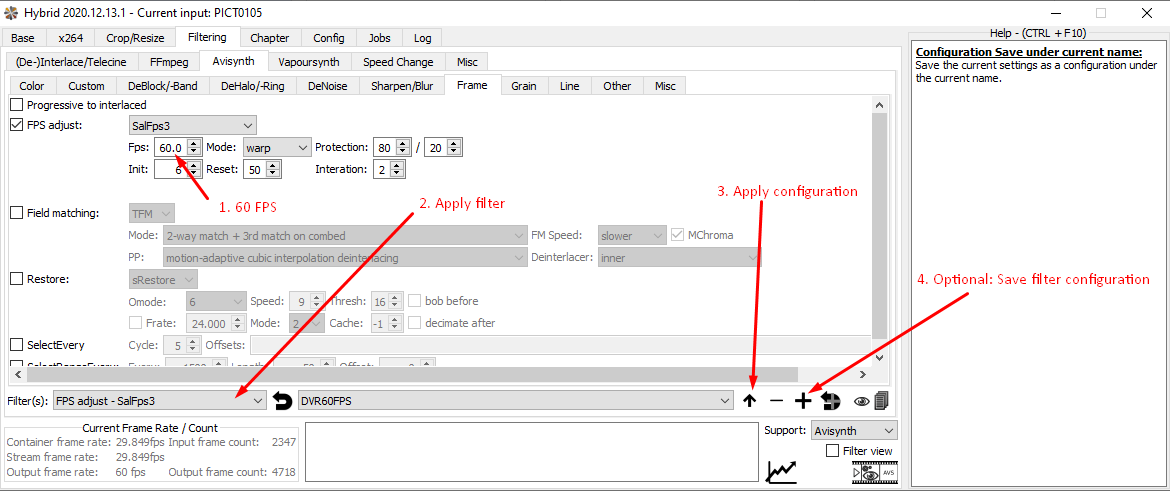
Enable “FPS Adjust”, select SalFps3, and change the FPS to 60. Of course, you can use other configurations. I just found this to be the simplest method.
Choose “FPV adjust – SalFps3” under Filter settings, and then apply the configuration to Hybrid. If you would like, you may save the configuration for later use. In this case, I named mine DVR60FPS.
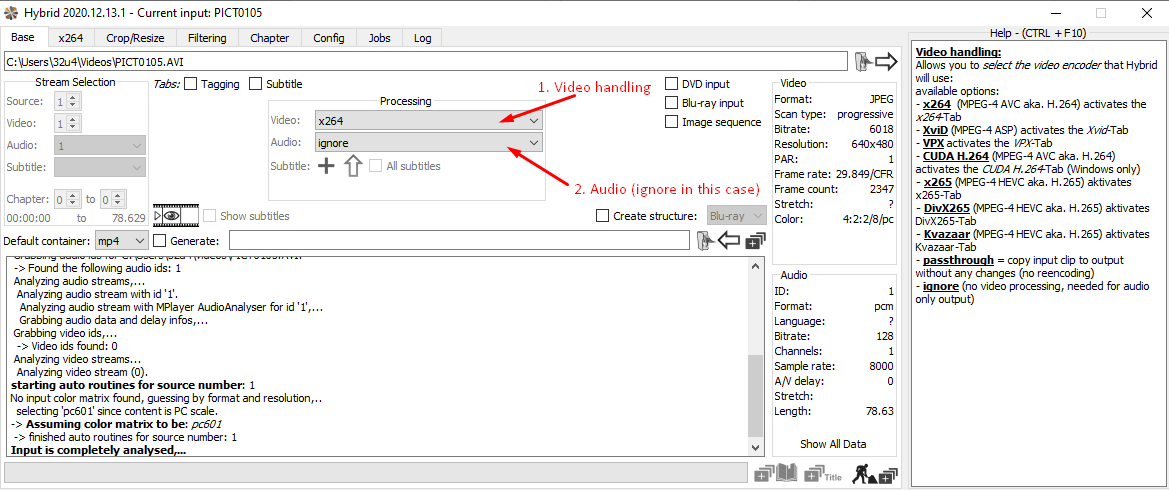
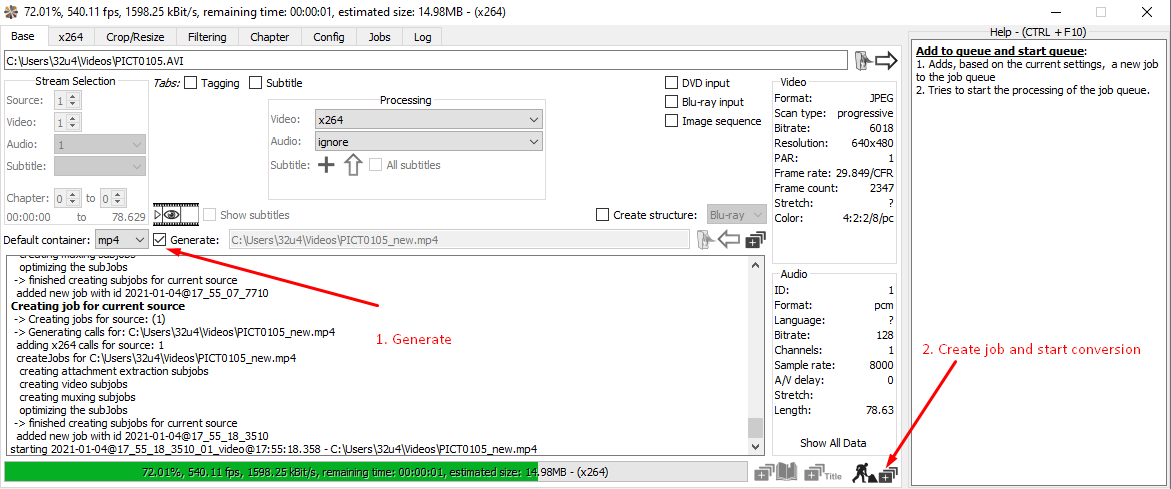
Head back over to the Base tab, and ensure that video processing is set to “x264”, and that audio is set to “ignore”. Also, check the “generate” box to set a file path for the new 60 FPS DVR footage.
Finally, create the job and start conversion. Depending on your computer, the size of the DVR file, and the frame rate, this could take anywhere from 10 seconds to a couple of minutes.
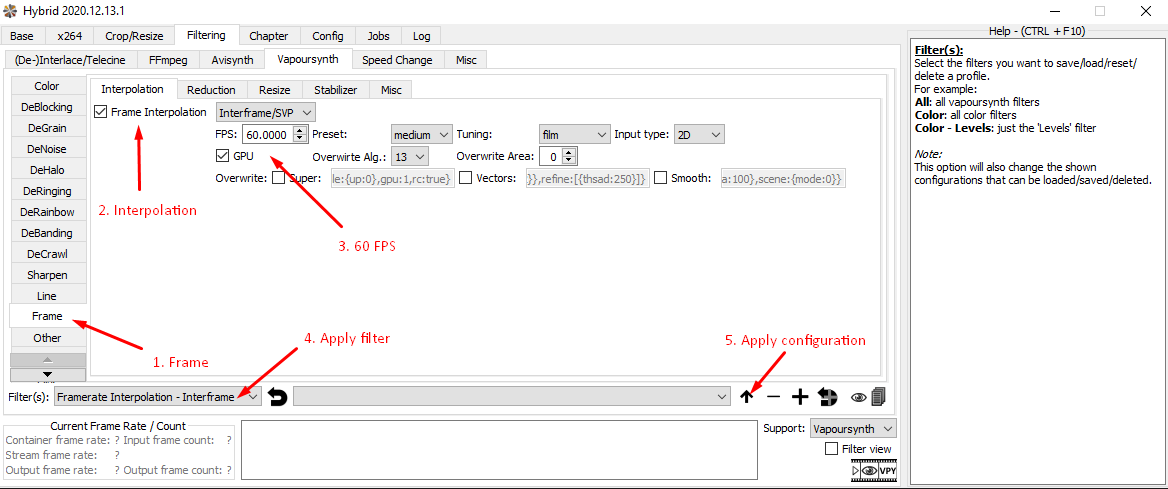
Alternatively, you can use Vapoursynth as the interpolation method. Here is one example configuration:
That’s it! You should now have a beautiful DVR footage that plays back in 60 frames per second, as opposed to the old 30 FPS. While some pilots may like the lower frame-rate because of the motion-blur and sense of speed in the footage, many prefer 60 FPS because it looks cleaner, smoother, and more enjoyable to watch.
Conclusion
Well, there you have it! No need to spend tons of money on a separate DVR module if you are willing to go a few extra steps. While this frame interpolation method is far from perfect, the improvement over the original 30 FPS DVR is simply amazing. I would strongly encourage any FPV pilot out there who wants to see what 60 FPS DVR looks like without spending a ton of money, to try out Hybrid, as well as experiment with other settings to see what works best for them.
Have fun posting your freshly-converted flight videos online, and sharing with friends and family!
Happy flying!