

Help! My FPV Workbench is a Mess!
Throughout my time in the FPV hobby, I have seen many messy workbenches. I often wonder how the very talented pilots out there make it through a build with any kind of efficiency, much less without losing components among the chaos. I would like to share my method of FPV workbench organization with all of you, and hopefully you can take away some key ideas on keeping your space clean, maintained, and keep your components from joining the land of the lost.[vc_row][vc_column width=”1/6″][/vc_column][vc_column width=”2/3″][vc_single_image image=”1174″ img_size=”full” alignment=”center” onclick=”link_image”][/vc_column][vc_column width=”1/6″][/vc_column][/vc_row][vc_row][vc_column][vc_column_text]Recently, I had a friend who decided he was going to downsize his collection of components, spare frames, motors, and propellers. He was kind enough to gift them to me. I came home with a cardboard box full of miscellaneous parts, a large plastic tote packed with frames, and two multi-drawer parts bins. At the time, I didn’t know how I was going to incorporate all this stuff in with my own collection, which is already fairly extensive.
FPV Workbench Organization – Everything Starts with a Plan
My workspace is in my garage, so while I have a good amount of space dedicated for my FPV gear, I also share that space with traditional household storage, a vehicle, woodworking tools, yard tools, etc. I knew that everything extra that I had just obtained was going to have to fit in the space that was already occupied by my gear, so I had to have a plan, and it had to be creative.
First, I had to know what I had, as all the parts were generally just put in bins with no rhyme or reason. The only things that were mostly organized were the parts bins. Therefore, I began by spreading out across my garage, organizing things by groups as I went.
Starting with the large cardboard box, I discovered it was mostly propellers, and 90% of them were out of the original bags. Gathering my own collection of propellers, I started by making functional, “grab and go” sets out of everything combined, making sure each bag had a complete set. I put them together by type, Cyclones, Lumenier, HQ, and so on. I made a quick trip to the store, and settled on some plastic shoe totes that were going to be my storage solution. The groups were put into their new boxes, a label for them, and put in a space I made for them on the shelf above my workbench.
My FPV workbench organization plan was working! I felt pretty good about what I had accomplished! Then I turned around and saw what else still needed to be done. I went inside, let my better half know that I was going to be a while, and sequestered myself in my garage to work on the rest.[/vc_column_text][/vc_column][/vc_row][vc_row][vc_column width=”1/6″][/vc_column][vc_column width=”2/3″][vc_single_image image=”1191″ img_size=”full” alignment=”center” onclick=”link_image”][/vc_column][vc_column width=”1/6″][/vc_column][/vc_row][vc_row][vc_column][vc_column_text]
Why is Organization Important?
To me, organization is synonymous with efficiency. When I start a task, I like to have the path laid out in front of me with as little obstacles as possible. That means everything I may need is close at hand, and exactly where I look for it. There’s a feeling that happens when I can’t find something that drives me crazy. So I spend to time to really think through how my workflow functions, and adapt my space to fit my need. I think that everyone can benefit from good FPV workbench organization when it comes to building FPV multirotors.
Think about it from the perspective of breaking down just the average parts that make up a completed multirotor:[/vc_column_text][/vc_column][/vc_row][vc_row][vc_column width=”1/4″][vc_column_text]
- 26 screws
- 6 standoffs
- 8 nuts
- 8 nylon standoffs
- 4 nylon nuts
- 4 arms
[/vc_column_text][/vc_column][vc_column width=”1/4″][vc_column_text]
- 3 Carbon Plates
- 4 ESCs
- 4 Motors
- 20 lengths of Wire
- Flight controller
- Power Distribution Board
[/vc_column_text][/vc_column][vc_column width=”1/4″][vc_column_text]
- VTX
- VTX Antenna
- Receiver
- Camera
- Lens
- XT-60 Connector
[/vc_column_text][/vc_column][vc_column width=”1/4″][vc_column_text]
- 4 Propellers
- 3 Wiring Harnesses (Camera, VTX, Receiver)
- Zip Ties
- 3D Printed Parts
- Heat Shrink
- Various Tapes
[/vc_column_text][/vc_column][/vc_row][vc_row][vc_column][vc_column_text]Now I know most people don’t look at parts in the broken down way, however, when you do, it becomes evident that there’s actually quite a lot! The minute your workbench erupts into chaos, is the minute you start to lose things! If you don’t have some method of FPV workbench organization, and you know the feeling of trying to hunt down the part you need, then this is for you.[/vc_column_text][/vc_column][/vc_row][vc_row][vc_column width=”1/6″][/vc_column][vc_column width=”2/3″][vc_single_image image=”1169″ img_size=”full” alignment=”center” onclick=”link_image”][/vc_column][vc_column width=”1/6″][/vc_column][/vc_row][vc_row][vc_column][vc_column_text]
Digging in to get Clean
Tip #1 – Clean your Workbench
Before you jump into another build, start by cleaning your workbench. Obviously, this is the first step to FPV workbench organization, and will give you a blank canvas to start from, making each of the next steps easier to accomplish. Get all the debris gathered up and thrown in the trash. This means the plastic bag scraps, the anti-static bags that you think you’ll use again, the wire bits, the broken props, etc. If you aren’t currently using it, get it gone! Grab some cleaner and some paper towels, and wipe everything down. Doesn’t that feel better? Also, don’t forget that container that sits on your desk full of random screws, nuts, zip ties, and whatever else you’ve casually thrown in there in a hurry. You know, that one you go through with a pair of tweezers looking for the piece you need like its Legos? Don’t pretend…..
Tip #2 – Spread Out and Group Up
Once step one is complete, spread out across your garage, your room, your living room floor if you need to, and get your parts and pieces grouped together. This will allow you to see what you truly have. Screws with screws, motors with motors, props with props, ESCs, wires, camera parts, etc. You can separate into bins, bags, piles, whatever works. Now that you’re all spread out and grouped up, you can identify what you need to store and make a plan that can be executed. Go through your that container from Tip #1, and get your screws in groups by size and type. Use a ruler if you have to so that you know what size they are and what group they belong in. Separate out the nuts and standoffs. Make that container go away. You won’t need it.
Tip #3 – Selecting the Proper Storage
Now take a look at the area you have selected for your workbench. If it’s just a simple table or desk, what kind of storage do you already have? Drawers, cabinets? Decide how you want to utilize that. Do you have wall space in you work area? If so, I highly recommend a modular style wall mounting system that allows you to hang hooks and pegs to hang things such as tools that need to be within easy reach. Peg boards work very well, or you can go for something similar that I use which is the Gladiator system. Furthermore, both will allow you to modify your wall system as you acquire more models, tools, or gear.
For organizing the small parts, I recommend getting a multi drawer storage bin such as the one pictured below. Here’s the thing, plastic storage solutions are cheap, and go a long way toward keeping the pilots workbench clean and organized. Whatever you pick, make sure there’s enough room to really get your gear organized. When looking at the multi drawer organizer, start thinking on how you want to separate your parts. I have drawers for each size of screw, each type of part, etc. My drawers have removable dividers so that I can separate parts of the same type, such as M3x6mm button head screws in the front, M3x6mm socket caps screws in back. Same size, different types of screws.[/vc_column_text][/vc_column][/vc_row][vc_row][vc_column width=”1/6″][/vc_column][vc_column width=”2/3″][vc_single_image image=”1190″ img_size=”full” alignment=”center” onclick=”link_image”][/vc_column][vc_column width=”1/6″][/vc_column][/vc_row][vc_row][vc_column][vc_column_text]
Tip #4 – Start Organizing
It’s time to get serious about FPV workbench organization! Now that you have your choice in storage solutions start getting your hardware and components in them! As you go, start labeling, being as descriptive as space allows. Also, think about your work habits, where you sit, and where you can easily reach. Parts that you will need more often, need to be closer.
They should also be put into clusters, such as all screws in the same area, electronic components together, camera and FPV equipment together, etc. This will make finding the parts you need that much simpler. Make things as “grab and go” as possible. When going through my props, I made sure to make full sets in one package. That way, when going out to fly, I didn’t have to think so hard about how many clockwise and counter clockwise props I need, I could just select what I needed.
It may take a few tries to get things “perfect” for you, but that’s part of the fun. In fact, every time you organize, you see what you currently have, and can see what you truly need to purchase.
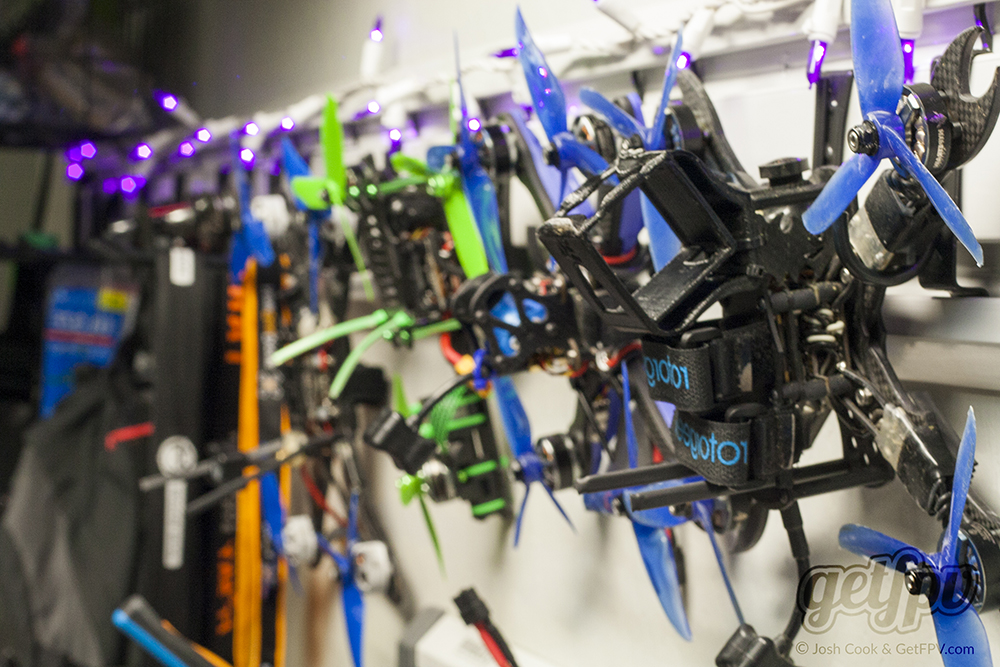
Tip #5 – Everything has a Home
Remember, the goal here is to find a home for everything. Whether for your spare multirotors, your tools, your batteries, or your hardware, nothing lives out in the open where it can cause clutter. It lives in a drawer, a tote, or on the wall, and off the workbench. More so, I have a dedicated spot for the current multirotor build or repair that I am working on. At this point, your FPV workbench organization plan should be excellent.[/vc_column_text][/vc_column][/vc_row][vc_row][vc_column width=”1/6″][/vc_column][vc_column width=”2/3″][vc_single_image image=”1170″ img_size=”full” alignment=”center” onclick=”link_image”][/vc_column][vc_column width=”1/6″][/vc_column][/vc_row][vc_row][vc_column][vc_column_text]
How to Stay Organized During a Build
Tip #6 – Keep your Trash Bin Handy
I keep a kitchen sized trash can next to my workbench. I often pull it close to my chair as I am working, and when I open a part, the plastic and boxes go into the trash. Scraps of wire that I won’t reuse? In the bin. Zip tie ends that lay about the desk? In the bin. Hopefully you are seeing the trend here. This is a key point to ensure that your FPV workbench organization plan stays the way you intended.
Tip #7 – Don’t Lose your Parts!
I have multiple solutions on my bench to keep from losing parts. First, I purchased a small bin with drawers that house all my soldering tools in it. I keep my solder sucker, tweezers, spare solder tips, tip cleaner, etc. here. I also keep USB cables in here for programming my flight controllers. Toward the back of my bench I utilize an office drawer organizer. Its low profile, has multiple divisions in it, and makes organizing the parts for my builds easy. That’s generally where I put most of the smaller parts such as screws and components. I also use parts bins to keeps some of the larger parts within easy reach. I only pull out what I am currently working on, which also keeps things from getting lost.
Tip #8 – Broken Parts
As you gain experience in the hobby, you will replace parts that are broken. If you’re anything like me, and like to tinker or repair, you need a space to go with those broken parts so they can get into the repair queue. If not, see Tip #6.
Tip #9 – Keep it Clean!
Above all, after each repair or build, go back to Tip #1. Put things away where they belong, so you know where to find them the next time. Sweep off all the trash in to the bin. Wipe your work mat down. Remember that FPV workbench organization plan that you worked so hard to create, and get it back to the way it should be!
I have spent a good amount of time setting up my workbench to accomplish these goals, probably more so than most. While I am generally pretty good at maintaining, there are times where I go into my workspace just to re-organize it all again. Every time I build or repair something, I learn a new process that might change the way my space is set up. Additionally, having your area set up in a modular fashion will allow you to adapt to these learning moments, and become just that much more efficient. Please, feel free to tell me how you organize in your workbench. Something you do may work for others, or for me![/vc_column_text][/vc_column][/vc_row][vc_row][vc_column width=”1/6″][/vc_column][vc_column width=”2/3″][vc_single_image image=”1194″ img_size=”full” alignment=”center” onclick=”link_image”][/vc_column][vc_column width=”1/6″][/vc_column][/vc_row]
This was absolutely AWESOME!!!! Really spoke to me, reinstating thoughts I’ve had but never put into practice. Excellent post! Definitely going to be using these tips this week as I clean up my office / workspace.
Great stuff! Happy that you were able to get some good info from this post. Please send us some before and after pictures and we could even add it to the bottom of this post as community submissions! (Feel free to send them to [email protected] if you are keen)
Great article. I’m in the process of getting organized myself so I wanted to offer some help to others that may be trying to do the same. First I think a good follow up to this would be a recommended organizational parts list. I’ve been going off of an old Sparkfun article that was geared more towards a general prototyping work-space. https://www.sparkfun.com/news/1620. I’d really like to see similar recommendations from the FPV community on their go to shops for getting organized.
I’m now motivated to clean up my work space and get ready for spring!
My work bench always seems so small but now after seeing pictures, I realize I just have too much stuff on it!
My work bench is a mess always is and likely always will be, My wife is always buying me storage things but seems like as soon as I need something out of one it becomes a huge mess again!
I found this subject important to me due to the amount of time I spend building and repairing my quadcopter. Some of the most important is lighting and the extra hand type tools. Recently I have been looking for magnetic parts trays and a better way to keep heat gun and solder iron cords out of the way. Also, I like open bins for tossing old or maybe rebuild later type categories. I would love to go through the throw away parts of some of these sponsored pilots. Im doing micro-solders on old vtx’s to try and get one more flight out of them.
Getfpv.com is my go to site! Thanks for all you guys do!
Really nice workbench you have. I will get some ideas from it. My workbench is a mix of mess (here I do the quads maintenance) and organized plastic boxes for the accessories.
Such a great tips,
It’s really helpful and interesting info. Very well job, thank you!
Best wishes
IM going to start grouping tomorrow. Nice suggestions My Ikea Cube is overloaded and requires functionality.