

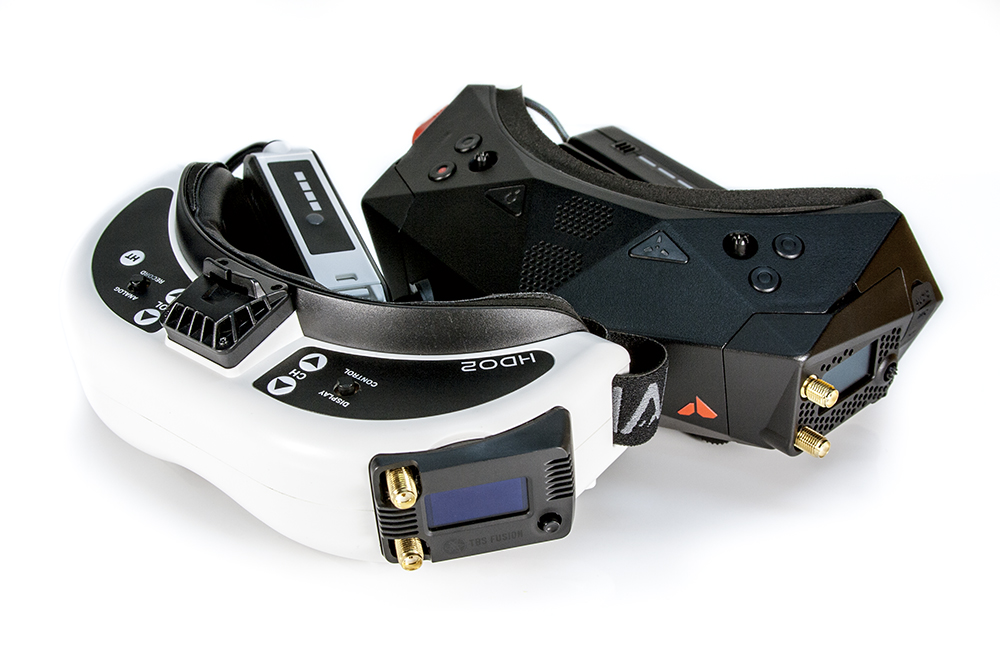
[vc_row][vc_column][vc_column_text]Over the last several months, the team over at ORQA has been making some waves in the FPV community surrounding the release of the ORQA FPV.One goggles. In response, Fat Shark revealed the HDO2, the newest flagship for their long line of FPV goggles. Which is the right one for you? Let compare them![/vc_column_text][/vc_column][/vc_row][vc_row][vc_column][vc_single_image image=”5613″ img_size=”full” alignment=”center” onclick=”link_image”][/vc_column][/vc_row][vc_row][vc_column][vc_column_text]
Display Screens
Both the Fat Shark HDO 2 and the ORQA FPV.One use the same micro displays from Sony, the 0.5″ OLED. My guess is that they are the Sony ECX337A. Originally designed as a view finder in digital cameras, these micro displays are arguably the most expensive part of the FPV goggle. Are there better displays out? Absolutely. However, they are cost prohibitive to put into a pair of FPV goggles. Unless you’re using a full HD system, the better displays would be all but wasted.
Both Fat Shark and ORQA chose these screens due to the supply cost and the great specs they offer. The ECX337A has a resolution of 1280 x 960 and the OLED screens deliver better blacks and a much better contrast ratio over traditional LED screens. Also, both the HDO2 and the FPV.One are capable of switching from 4:3 screen ratio to 16:9.
Optics
It’s evident from the moment you put the goggles on that there is a difference in how each company has approached the construction of the optics. Despite having the same screens, difference in the optics can affect things like field of view (FOV). There is a very slight difference between the two as shown in the graphic below. The Fat Shark HDO2 has a 46° FOV and the ORQA FPV.One has a 44°. This comes down to the difference in distance from the front optical lens to the screens.[/vc_column_text][/vc_column][/vc_row][vc_row][vc_column][vc_column_text]
[/vc_column_text][/vc_column][/vc_row][vc_row][vc_column width=”1/6″][/vc_column][vc_column width=”2/3″][vc_single_image image=”5594″ img_size=”full” alignment=”center” onclick=”link_image”][/vc_column][vc_column width=”1/6″][/vc_column][/vc_row][vc_row][vc_column][vc_column_text]Beyond the FOV, there is the interpupillary distance adjustments, or IPD. This is the distance between your eyes, and it’s important to be able to adjust this for each individual user. To appropriately merge two screens into one, the lenses have to be centered on your pupil in each eye. This has been a problem in the past with Fat Shark goggles with an IPD adjustment range of 59mm – 69mm, but they have worked to correct this. The HDO2’s have an IPD adjustment range of 54mm – 74mm, making them more universal for those with narrower and wider set eyes. The ORQA FPV.One goggles also have a wide IPD adjustment range at 56mm – 74mm.
Both have taken a similar approach in designing their optics with round lenses versus the rectangular optic of older generations of FPV goggles. When you first put on either set of goggles, you get the sensation of looking down a tube at the square screens. The screen tends to illuminate the edge of the tube and cause it to stand out. This can be distracting at first, but the effect tends to push into the background as you focus on flying. You can see an illustration of what this looks like down below.[/vc_column_text][/vc_column][/vc_row][vc_row][vc_column width=”1/6″][/vc_column][vc_column width=”2/3″][vc_single_image image=”5598″ img_size=”full” alignment=”center” onclick=”link_image”][/vc_column][vc_column width=”1/6″][/vc_column][/vc_row][vc_row][vc_column][vc_column_text]
Screen Distortion
Both the Fat Shark HDO2 and the ORQA FPV.One have screen distortion due to the optics, however in opposite ways. The HDO2 has what’s called “Barrel Distortion, where the center of the edges of the screen is bowed out away from the center. This gives the image a feel like it is wrapped around the outside of a cylinder, making the center of the image almost bulge out toward your eye. The effect is very minimal, and after flying for a while, you adjust to it.
The FPV.One has a “Pincushion Distortion” effect, where the center of the edges bows in toward the center. The feeling here is that the screen is wrapped around the inside of a cylinder making the center of the scree feel like it’s bowing away from your eye. The effect is a little more pronounced than the HDO2, but you will adjust to it. Below are some examples from the two different units.[/vc_column_text][/vc_column][/vc_row][vc_row][vc_column][vc_column_text]
[/vc_column_text][/vc_column][/vc_row][vc_row][vc_column width=”1/2″][vc_single_image image=”5607″ img_size=”full” add_caption=”yes” alignment=”center” onclick=”link_image”][/vc_column][vc_column width=”1/2″][vc_single_image image=”5566″ img_size=”full” add_caption=”yes” alignment=”center” onclick=”link_image”][/vc_column][/vc_row][vc_row][vc_column][vc_column_text]
Vision Correction (Diopters)
Fat Shark HDO2
Where the optics start to differ is how each one approaches diopter adjustment for correcting vision. The Fat Shark HDO2 uses an adjustable focus mechanism that pushes the lenses forward or backward to adjust the diopter range from a +2 to -6. There is no longer a slot to add secondary diopters lenses, so if your range of vision correction falls outside what the HDO2 offers, you’d be better off going with a different set of goggles. If you’re wed to the Fat Shark HDO2’s you can also use contacts (if your prescription allows) to correct you vision independent of the goggles.
The downside to the focal adjustment is when the lens is at its outer extreme, the lenses extend past the foam that protects them from getting dirty on your forehead. Also, depending on your face shape, the lenses can come very close to your eyes. Several users have complained about them touching your eyelashes, which can both cause discomfort, and dirty the lenses. Thicker foam might be able to mitigate this.
Secondary to this, the user needs to be careful when putting the goggles on (or taking them off) to not touch the focal adjustments. While the retention is good, a bump can change the setting.
ORQA FPV.One
The ORQA FPV.One uses the tried and true method of adding diopter lenses. This allows you to use the diopter of your choice an need to get the vision correction you need. You can go with the Diopter set for Fat Shark Goggles which include 02, -4, and -6 diopters, or if you need different or more specialized (such as to correct an astigmatism), you can get them RHO-Lens. With the optics sitting deeper within the unit, the ORQA FPV.One the optics stay out of the way.[/vc_column_text][/vc_column][/vc_row][vc_row][vc_column width=”1/2″][vc_single_image image=”5615″ img_size=”full” alignment=”center” onclick=”link_image”][/vc_column][vc_column width=”1/2″][vc_single_image image=”5555″ img_size=”full” alignment=”center” onclick=”link_image”][/vc_column][/vc_row][vc_row][vc_column][vc_column_text]
Receiver Modules
All receiver modules on the market have been designed with the Fat Shark line of FPV goggles in mind. Most module cases and covers are also designed to fit the Fat Sharks. There have been times where modules have out paced the goggles in term of their power requirements, however, currently, that’s not much of an issue as we get further away from the older generations of goggles.
Fat Shark HDO2 Module Compatibility
Currently all the major receiver modules (and many of the minor ones) work just fine with the HDO2. Like it’s predecessor, the HDO, it has the enhanced power system to properly supply the newest generations of receivers. ImmersionRC rapidFIRE, TBS Fusion, and FuriousFPV True-D all will fit and function just fine.
The Fat Shark HDO2 has a secondary bay for additional attachments such as the optional head tracker board. If future modules require use of the secondary bay (such as the LaForge module), it has the room to accept those.
ORQA FPV.One Module Compatibility
The team at ORQA has taken a different approach, designing their goggles with a specialty cover for the module bay. The bay cover was created around the ImmersionRC rapidFIRE. This does not mean that the FPV.One is incompatible with other modules. It has the power capabilities that will allow it to run the current generation (and most likely the next several generation) of modules. It does mean, however, that any other module will need a custom 3D printed case.
Perhaps with enough popularity of the ORQA FPV.One, receiver module manufacturers will produce professional looking covers. 3D printed ones are great, and speak to the DIY nature of the FPV community, but real injected molded covers would be even better.
Key to module compatibility, due to it’s internal computer, the FPV.One interacts with the ImmersionRC rapidFIRE much as we wish all modules would with the Fat Shark. Not only can you change channels within the band that you are currently in using the buttons on the goggle, you can also change bands. This is due to the goggles being able to take advantage of SPI communication.
The secondary bay is for add-on boards such as the FPV.Connect that will enhance the capabilities of the the FPV.One goggles. The expectation is that ORQA (or other third party developers) will release other such mod boards that will extend the life of the goggles beyond the normal cycle.[/vc_column_text][/vc_column][/vc_row][vc_row][vc_column][vc_column_text]
DVR Capabilities
Fat Shark HDO2 DVR
Fat Shark has chosen to go with the same DVR unit as previous generations of their goggles despite years of pilots asking for a better solution. It records at 640 x 480 resolution at 30fps to an .avi file. The DVR records to a microSD card that is accessed between the optics on the inside of the goggles. Playback is also possible inside the DVR menu accessible by long pressing the DVR button once in DVR standby mode You can manipulate the footage such as fast forward, rewind and select the playback speed by using the 5-way joystick. The DVR has three different record functions that can be set from the DVR menu:
- Default: To activate the DVR, press and hold the 5-way joystick until the red light between the optics is on steady. To start recording, short press the 5-way joystick. A beep will sound and the red light will flash to indicate recording. To stop recording, press again.
- Auto-Start: DVR will begin recording automatically upon power up.
- Auto-Start Continuous: DVR will begin recording automatically, and will overwrite files when room is needed.
ORQA FPV.One DVR
The ORQA FPV.One has gone the route of including a much more robust DVR, capable of recording at 1280 x 960 at 60fps to an .mp4 file. The DVR is recorded to a microSD card that is located above the right optic. Same as the Fat Shark, you can playback DVR recording right in the goggles, however you can also manipulate the footage to play in fast forward, slow-mo, rewind and pause. You can access the DVR menu by long pressing the 5-way joystick on the right hand side which will give you access to a few options.
- Auto Delete: Will delete the oldest files as the memory card is filled to make room for current recordings
- Microphone Volume: Sets the recording sensitivity of the internal microphone to record sounds around the pilot
- Receiver Volume: Set the recording volume of a microphone attached to your aircraft
- Format SD card: Clears off your SD Card of all videos
Currently, there is no auto-record function like the Fat Shark DVR has. Recordings are started and stopped by pressing the button with the red dot on it on the top right side. The DVR overall is a much better solution than what Fat Shark has included in the HDO2.[/vc_column_text][/vc_column][/vc_row][vc_row][vc_column width=”1/2″][vc_single_image image=”5627″ img_size=”full” add_caption=”yes” alignment=”center” onclick=”link_image”][/vc_column][vc_column width=”1/2″][vc_single_image image=”5628″ img_size=”full” add_caption=”yes” alignment=”center” onclick=”link_image”][/vc_column][/vc_row][vc_row][vc_column][vc_column_text]
Secondary Features
Power Button
The Fat Shark has finally introduced a power button to the HDO2! The power button is located on the bottom of the goggles on the right side. When you first get your goggles the power button functions strictly as a button to control the speed of the fan. When you plug the battery in, the goggles will automatically power up as they always have. In order to activate the power button, you will need to open the secondary bay and locate the jumper pin next to the AV-in/out port. Pull the pin and use it to jump the two pins closest to the outside of the goggles. Now, with a long press of the power button, the goggles will turn on. A short press when on will cycle between fan speeds (low or high, never off). Another long press will power down the goggles.[/vc_column_text][/vc_column][/vc_row][vc_row][vc_column][vc_column_text]
[/vc_column_text][/vc_column][/vc_row][vc_row][vc_column width=”1/2″][vc_single_image image=”5609″ img_size=”full” alignment=”center” onclick=”link_image”][/vc_column][vc_column width=”1/2″][vc_single_image image=”5611″ img_size=”full” alignment=”center” onclick=”link_image”][/vc_column][/vc_row][vc_row][vc_column][vc_column_text]
[/vc_column_text][/vc_column][/vc_row][vc_row][vc_column][vc_column_text]The ORQA FPV.One also utilizes a power button, located on the top of the right side. It has a few different modes that you can setup through the OSD on the goggles. Always on, which turns them on as soon as the battery is plugged in, just like Fat Shark. Mode 1 requires only a short press of the button to turn them off and on. Mode 2 requires a short press followed by a long press, similar to DJI’s power buttons. To control the fan in the FPV.One, it has it’s own fan button located on the top left. It operates as an on and off button.[/vc_column_text][/vc_column][/vc_row][vc_row][vc_column width=”1/6″][/vc_column][vc_column width=”2/3″][vc_single_image image=”5556″ img_size=”full” alignment=”center” onclick=”link_image”][/vc_column][vc_column width=”1/6″][/vc_column][/vc_row][vc_row][vc_column][vc_column_text]
HDMI & AV-In/Out
Both the Fat Shark HDO and the ORQA FPV.One have HDMI in for use with units like the Fat Shark Byte Frost, or for use with your PC while flying sims. If you’re just starting out, it can be a good way to both adjust to the goggles and to practice your skills.
The AV-In / Out port can be used with ground stations if you favor that. The HDO2 port both accepts incoming signal as well as sends out signal for use with something like the ImmersionRC PowerPlay DVR. The FPV.One however is limited to just incoming signals.[/vc_column_text][/vc_column][/vc_row][vc_row][vc_column][vc_column_text]
Head Tracker
The FPV.One has a built in head tracker for use with models that can utilize it. The head tracker does double duty as a head tilt alarm. The alarm can be tuned within the setting menu, with options to turn it on or of, set the zero point, and to determine at what angle from the zero point the alarm will sound. When the alarm goes off, the goggles beep until you return your head to within the set tolerance. It’s a great feature for training yourself to not dip your head and change the alignment your antennas.
The HDO2 does not have a head tracker, and currently, to add a head tracker you will need to contact Fat Shark support for the older VIN board and will need to replace the button board.[/vc_column_text][/vc_column][/vc_row][vc_row][vc_column][vc_column_text]
Face Plate Foam
Over the years, Fat Shark has come to perfect the face plate foam. When I first got my Dominator HD2’s they came with self stick foam that adhered to the face plate. Over time, they developed a Velcro system to make it much easier to change out the foam as it got dirty and worn out. Then Fat Shark released the pleather foam that lasted much longer and kept sweat and dirt from absorbing into the foam. That is the same foam that comes with the HDO2.
Because the new goggles are slightly wider than previous models, Fat Shark has provided foam wedges to better fit the face plate to the user. They are completely removable via the Velcro, so their use is optional, but as some have had issues with proper fitment in the past, this is one more way that Fat Shark is taking care of it’s users.
The ORQA FPV.One currently uses the self stick foam, and while extremely comfortable and very capable of preventing light leaks, I would prefer a Velcro system. I have read that the team at ORQA are working towards this solution.[/vc_column_text][/vc_column][/vc_row][vc_row][vc_column][vc_single_image image=”5623″ img_size=”full” alignment=”center” onclick=”link_image”][/vc_column][/vc_row][vc_row][vc_column][vc_column_text]
Which Goggle is the Right Choice?
After going through all of the similarities, and more importantly the differences, what’s it all boil down to? Which set of FPV goggles should you go with? That’s a hard question to answer universally, but I will give you some food for thought.
The Case for Fat Shark
Fat Shark has been a staple in the hobby for a long time, with a proven track record of new releases, support, and innovation that has supported the FPV community. In the HDO2, they have included many features that the users have asked for, while still keeping the price point competitive. For $500, you can get one the best goggles on the market, minus a few features. They have excellent optics, excellent screens, compatibility with the latest generation of modules, and that cater to a wide variety of face shapes and eye types. What they lack is accommodation for pilots with astigmatisms that need more specialized lenses, and the DVR is several generations old at this point.
ORQA to the Rescue?
The ORQA FPV.One is a new contender, packing in several of the same key pieces as the HDO2, with some decent new innovations that make them stand out. A more powerful internal computer, Integrated head tracker / head tilt alarm, a more robust and current generation DVR unit, more direct control over the receiver module,and the distinct ability to add capabilities via the expansion bay make this FPV goggle something to seriously consider. It has a feel of being slightly more future proof than any other set of goggles out there. However, consider that the support piece of the puzzle from ORQA has yet to be determined. The team at ORQA has done great so far, here’s hoping they keep it up!
Each FPV goggle unit has their shortcomings. As you consider each set, consider the features they have vs. the issues you’re willing to deal with. Currently, there is no perfect FPV goggle for everyone, nor do I think there ever will be. Choose wisely, as this is one of the staple purchase for the FPV hobby, and to put it one way: “These things ain’t cheap!”.[/vc_column_text][/vc_column][/vc_row][vc_row][vc_column][vc_column_text]
[/vc_column_text][/vc_column][/vc_row][vc_row][vc_column][ultimate_spacer height=”20″][vc_separator][ultimate_spacer height=”20″][/vc_column][/vc_row][vc_row][vc_column width=”1/2″][vc_single_image image=”5586″ img_size=”medium” alignment=”center”][dt_default_button link=”url:https%3A%2F%2Fwww.getfpv.com%2Ffat-shark-dominator-hdo-2-fpv-goggles.html||target:%20_blank|” size=”medium” button_alignment=”btn_center”]Get the Fat Shark HDO2 FPV Goggles[/dt_default_button][/vc_column][vc_column width=”1/2″][vc_single_image image=”5630″ img_size=”medium” alignment=”center”][dt_default_button link=”url:https%3A%2F%2Fwww.getfpv.com%2Forqa-fpv-one-oled-fpv-goggles.html||target:%20_blank|” size=”medium” button_alignment=”btn_center”]Get the ORQA FPV.One OLED FPV Goggles [/dt_default_button][/vc_column][/vc_row]