

So, you just built your first FPV racing drone and you want to get fast, but in order to do so, you need PRACTICE. LOTS and LOTS of practice. However, every time you get to the field, you don’t know what to do. There are a plethora of track elements that you have seen, and lots of tracks you want to try. In this article, I will take you through my formula of designing an effective and fun practice track quickly, that you can use to design your own tracks and improve your flying skills. I even used the same formula for MultiGP Global Qualifier track submission that landed me in the top 5!
This article was submitted through the GetFPV Community Program by Ervin Liao. You can check out more of Ervin’s content at his YouTube, and Instagram.
Disclaimer: This article was written solely by a member of the FPV Community. Views and advice in this article are that of the author and does not necessarily reflect the opinion or views of GetFPV.
Recommended Materials
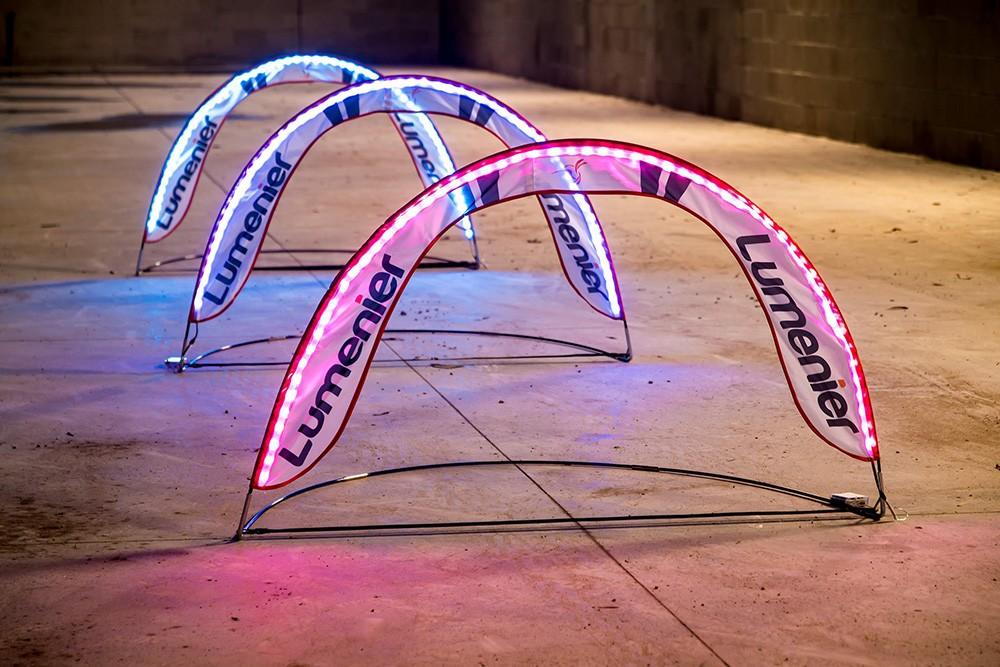
To design a practice track, you will need some gates and flags. I recommend at least five gates and 2 flags, but at minimum, you should have two gates. With two gates, you will not be able to build a full track, but you will be able to practice most elements on a race track. Also, natural elements such as trees make great flags, but with actual racing flags, it is easier to manipulate and change the flow of the track.
Another simple thing you will want to have is paper and a pen/pencil. At home, you can quickly draw out the track so when you get to the field you have a diagram to follow. The sketch will be rough and there will be no set dimensions because this is just a practice track.
Step 1: Figure out the Elements you want to practice
The first step in designing a practice track is to choose which element you want to practice and focus on such as ladders, corkscrews, slaloms, etc. If you are stuck on what element you want to practice there is a great article explaining the most common track elements in the drone race. I would choose only one or two elements to practice per session depending on how many gates you have and how much of each element you want to practice.
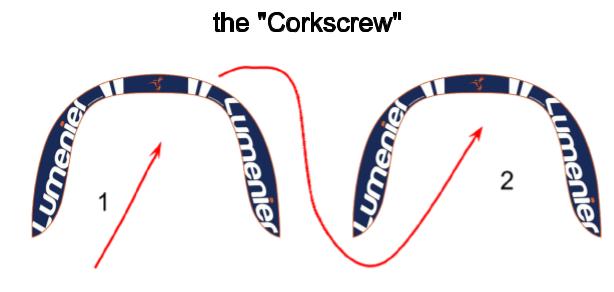
Some tips for choosing the element to practice are to review your past DVR and see where you crash the most or where you are getting past the most in a race. Another idea to choose your element to practice can be going into the simulator to get comfortable with an element and then practice that element in real life. For this article, I will use corkscrews as the example element to guide you through the track design process since it is one of the most common elements, but hard-to-fly elements on the race track.
Step 2: Place the elements on the Track
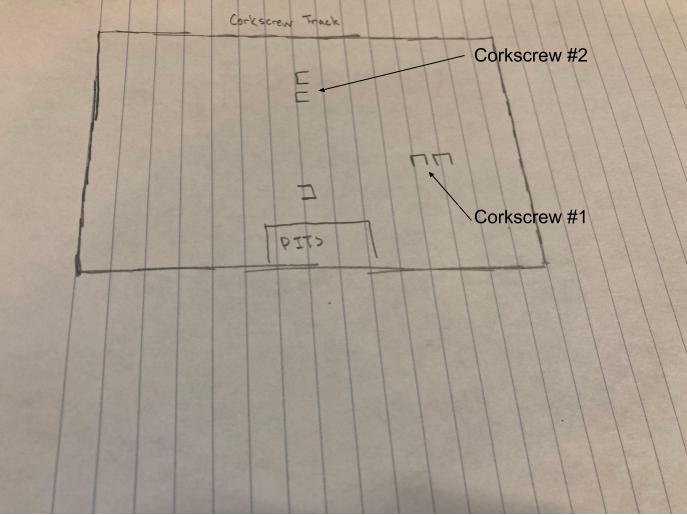
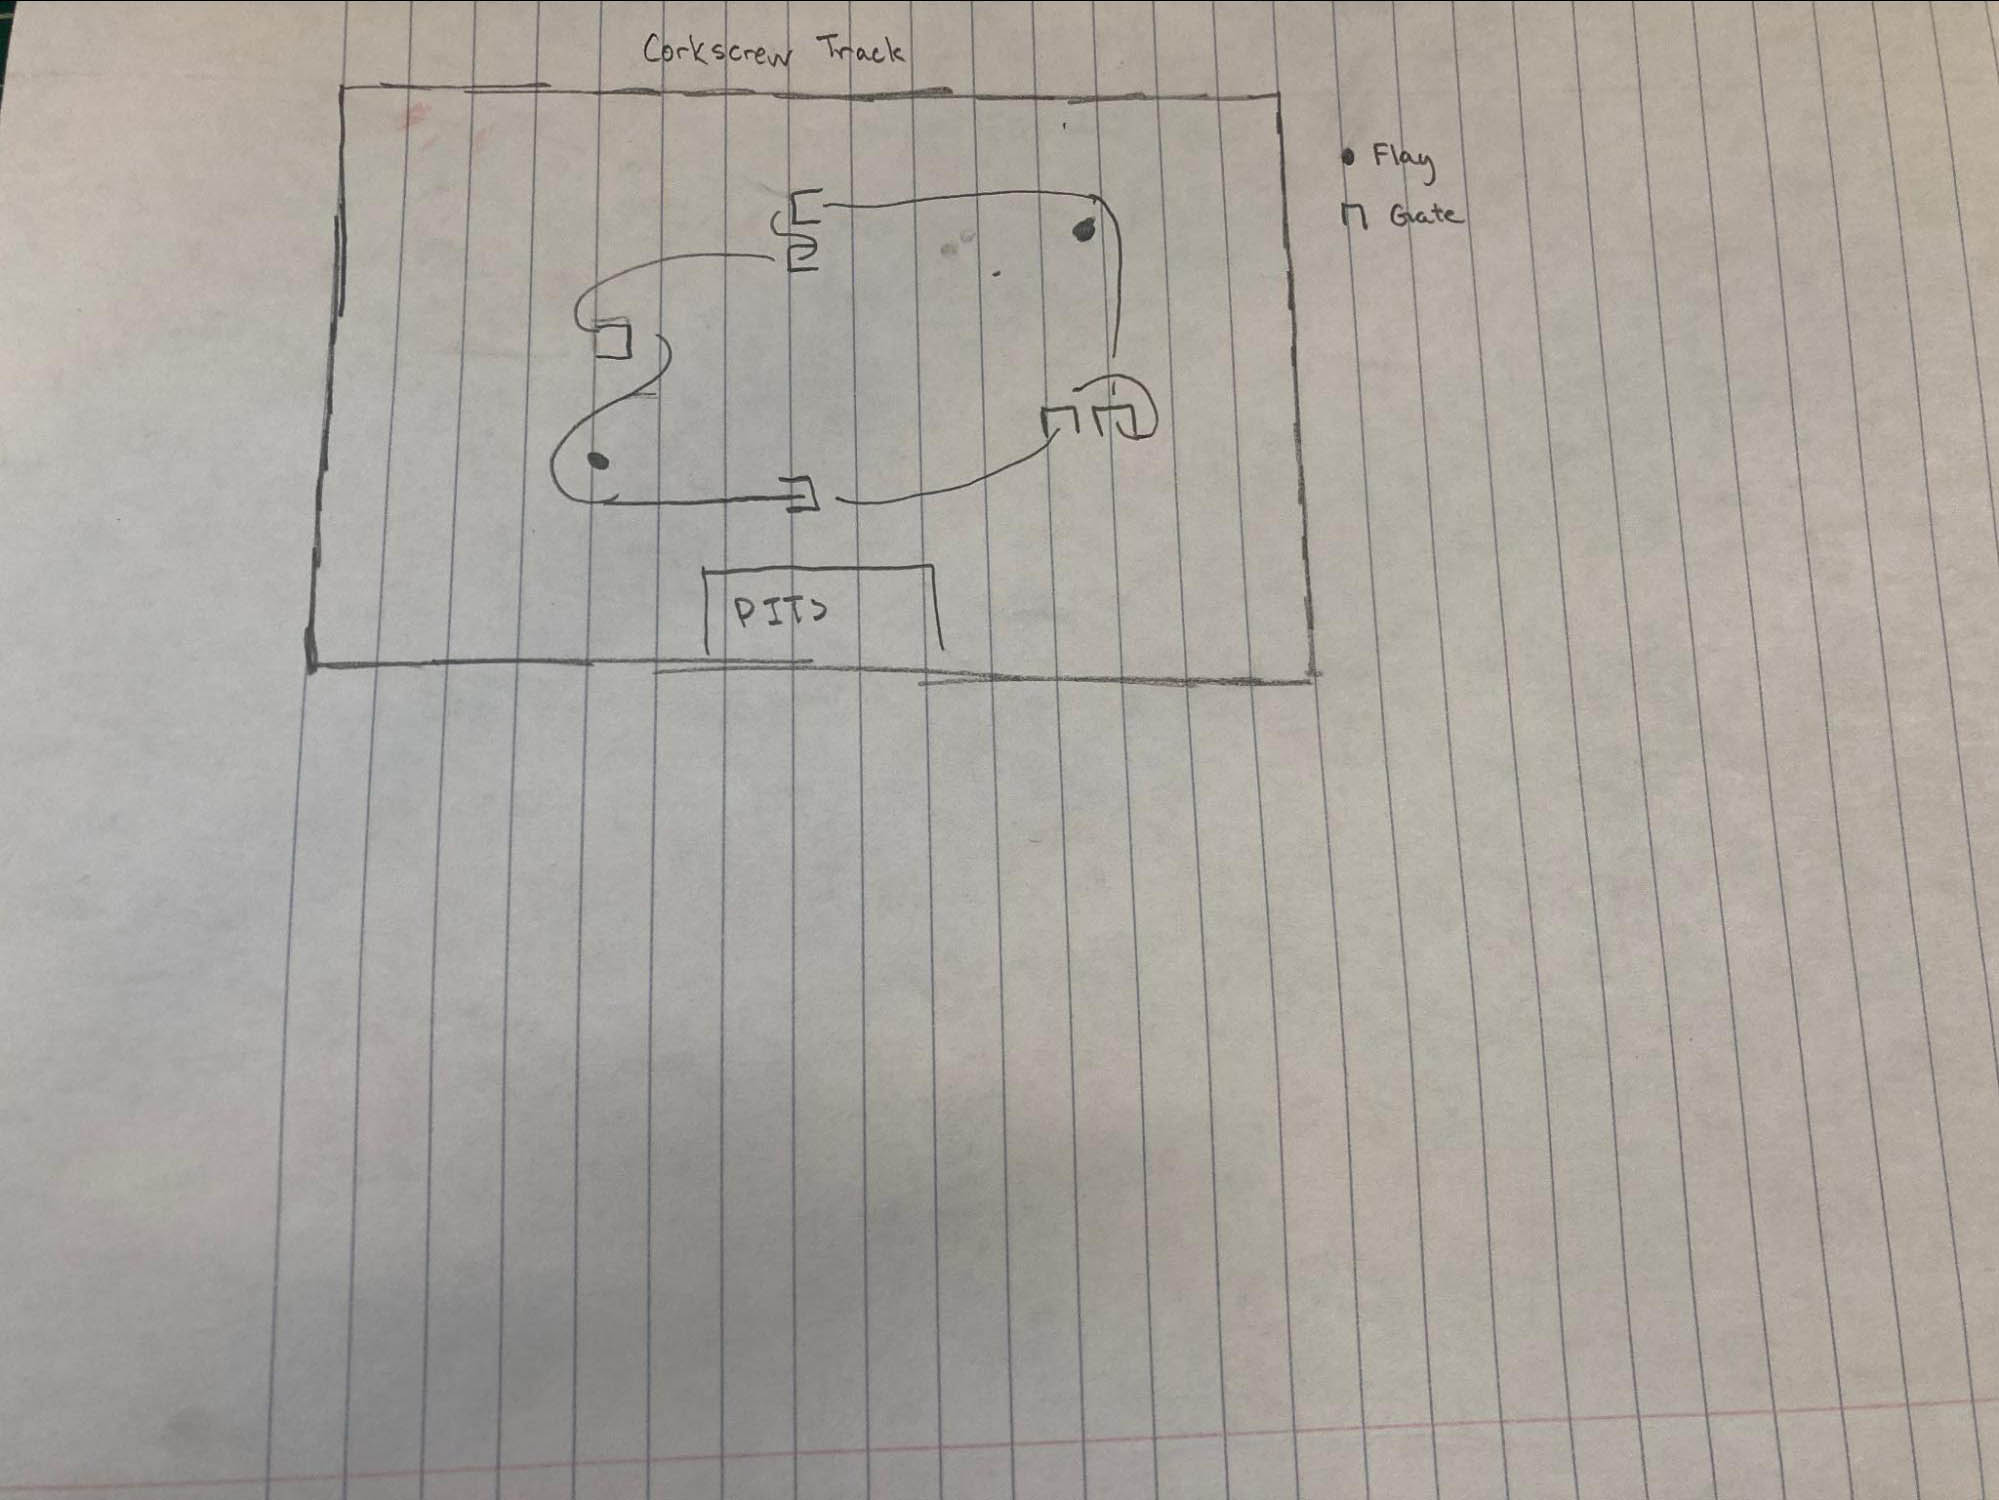
After you choose the element or elements that you want to practice, you will want to start putting the elements on your track, or as of now, a piece of paper. The first thing I would do is to put a gate near your pilots’ pits as the “start” gate. The start gate will be where you put your lap timer if you have one, and the first gate you go to when you launch. You can see where I put my start gate in the drawing below.

After you put the start gate down, start scattering the “focus element” around the field. This is the element that you chose in the previous step. Put the same element around the field so it creates an oval and a base for the track, but make sure they are far enough apart. Something crucial is to set up the element in both directions. For example, with a corkscrew, you would want to set up a corkscrew in which you turn right and a corkscrew in which you turn left. You want to practice both directions so you will be comfortable with both when it comes to race day. My example with corkscrews is shown below. I have put 2 corkscrews down one where you fly around leftwards and the other corkscrew where you fly right.
Step 3: Add “Filler” elements
After you have your focus element spaced out around the field the next step is to add what I call “filler” elements. Filler elements are optional but are there to make the track more interesting. They are put between the focus element to spice up the track and make it more interesting. Examples of filler elements can range from a single gate or flag to more complex elements such as slalom or a 180 turn.
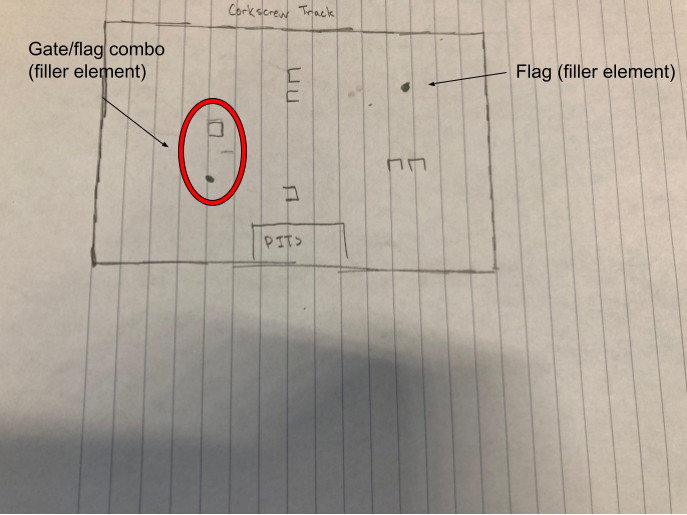
Filler elements should be simple and something you are comfortable with. Your main objective is to practice the focus element, and you should not need to worry about the filler element. For my example, I will be using a gate and two flags scattered between my 2 corkscrews as “filler” elements. One tip when adding “filler” elements is to put it in some way that you have to turn both right and left to practice maneuvering in both directions.
Notice in the picture below I have a flag between the two corkscrews and a gate and a flag between the second corkscrew and start gate.
Step 4: Making Edits
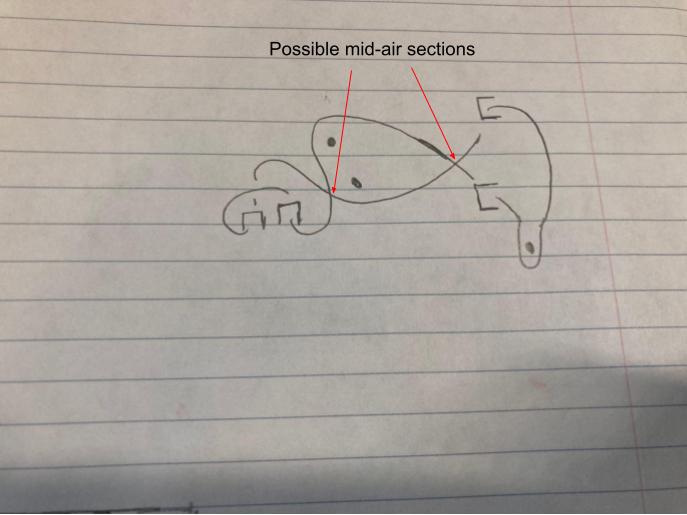
After putting both the focus element and filler elements down, draw a line through the course. This way, you will be able to see how the track flows and make sure there are no problems with the track. As you can see in the picture below, I have drawn out how I am going to fly the track.
Something to look out for after drawing the flight line are places for mid-airs. Make sure the flight line does not cross or does not get too close to another gate. You can see my picture below of a track that has places where midairs are possible. Usually, if you follow the steps above, there will be probably no places for midairs, but it is always good to check. Keep in mind this only applies when you are practicing with multiple people.
Something else to look for is to see if your track has both right and left turns. As I have said above, you need to be comfortable with turning both ways. However, if you know you need to practice turning one side, go ahead and make a track that has many turns towards your less dominant side.
If you find any problems with your track, move some elements around. You should be able to fix it with a few minutes of experimenting. If you have time, you can also use a simulator with a track designer such as Velocidrone to build the track out and see how it flows.
Step 5: Set it up and Fly it!
The last step and the easiest step is to build the track and fly it! Go out to the field and set up the gates as you have drawn on a piece of paper or built in the simulator. You’ll be amazed how so quickly you can build a fun and interesting track that helps you shore up your skills.
Here is a video of the track I designed above in Velocidrone!
Conclusion
Hopefully, you now know how to quickly design a practice track for any practice session. My hope is that you can use this formula to design fun and interesting tracks while practicing and getting faster. Though this article was meant for practice tracks, you can still use this formula for larger tracks for actual races. However, instead of a focus element, you choose many elements. After choosing the many elements, you follow the same formula by placing the elements on the track and then adding filler elements and editing it.
I can’t wait to see what new tracks you design!
More Resources
Here are some more articles for more information about drone racing and track design.
Drone Racing Practice Guide: 10 Maxims To Live By
Drone Racing – Eight Common Track Elements