

This article was submitted through the GetFPV Community Program by Aidan Henriques. You can follow Aidan on Instagram or YouTube.
Disclaimer: This article was written solely by a member of the FPV Community. Views and advice in this article are that of the author and does not necessarily reflect the opinion or views of GetFPV.
Let’s start by identifying what OSD means. OSD stands for on-screen display and basically shows many different stats including battery voltage, GPS coordinates, and flight time. If you would like to see these stats during your flight, you have come to the right place.
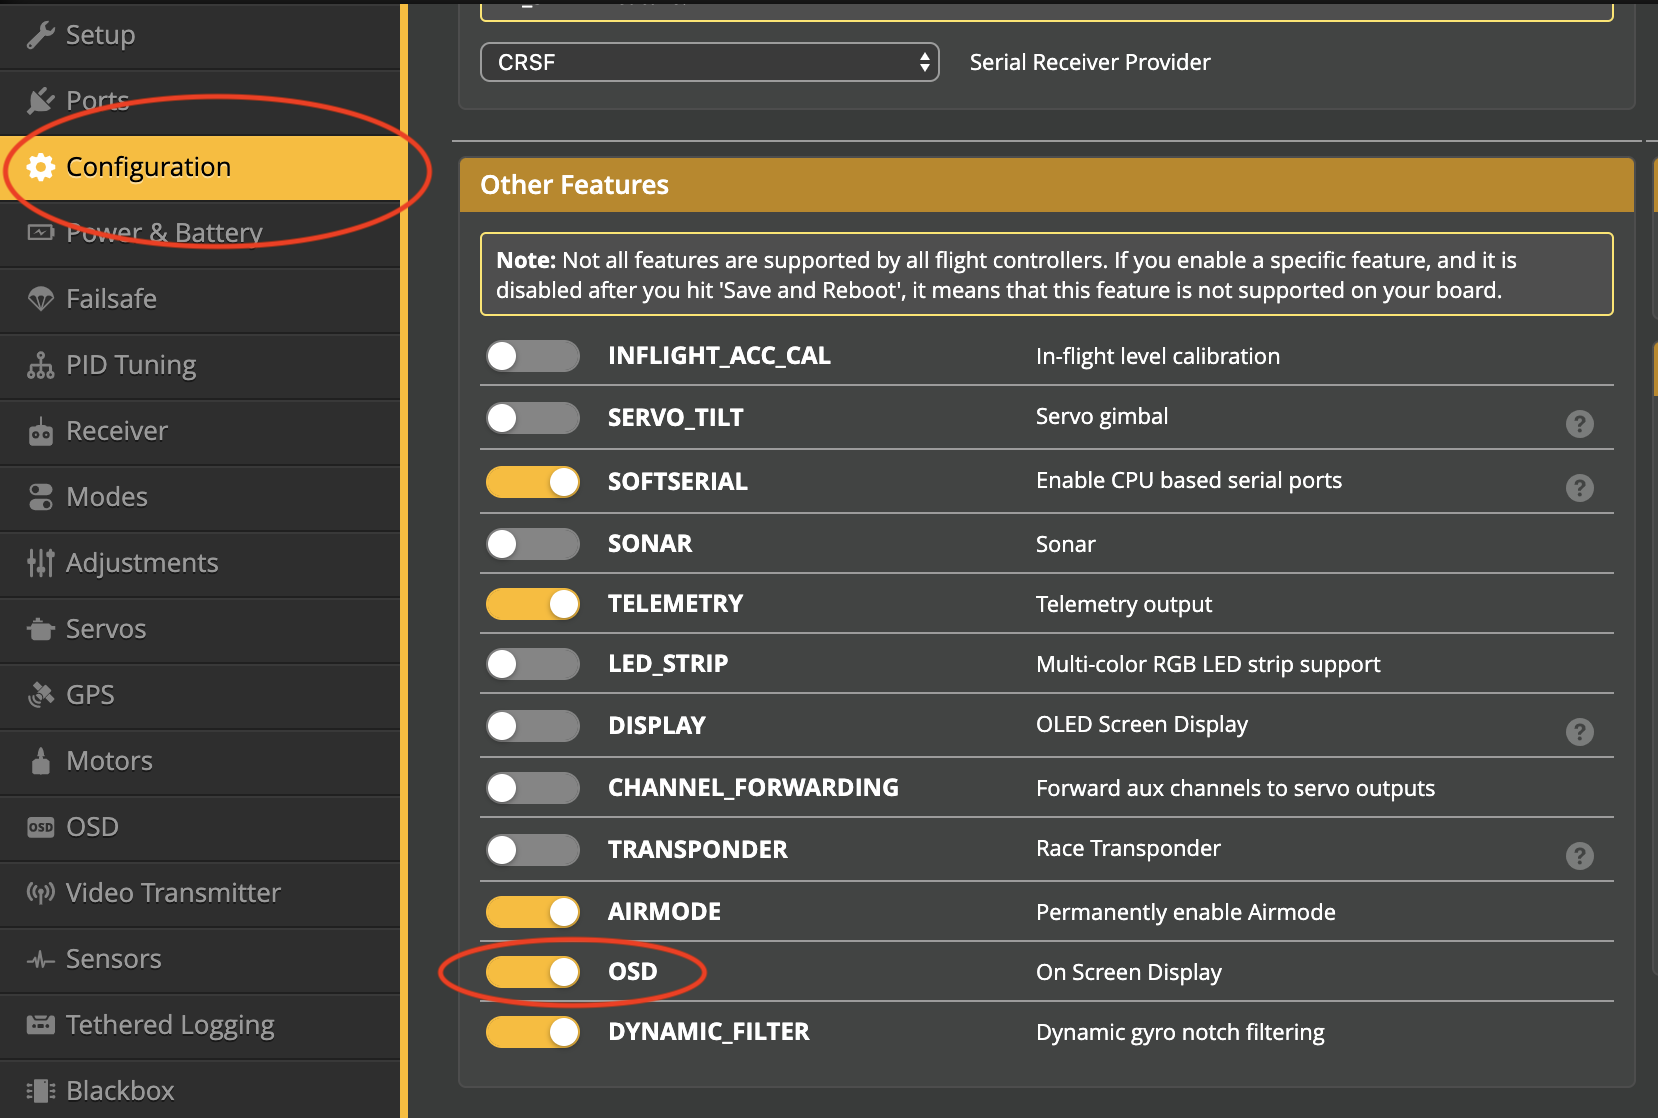
Firstly, in Betaflight, head over to the configuration tab where you can enable the OSD. Usually this will default to “on” and not need adjusted.
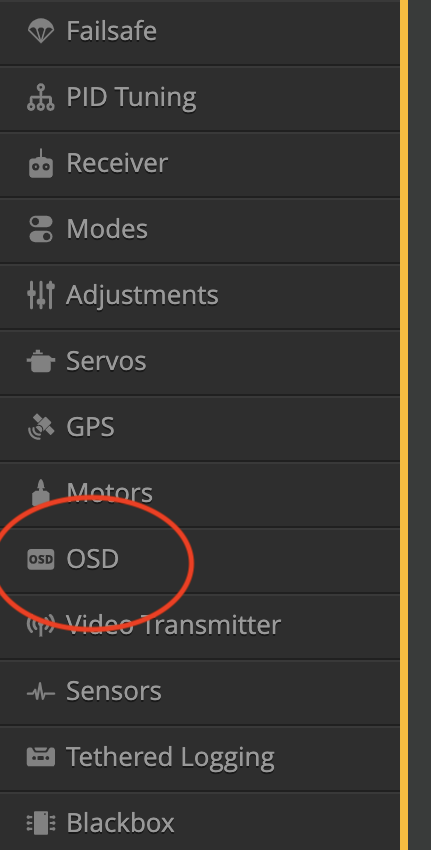
Now, head over to the OSD tab where you can start picking and choosing your desired elements.
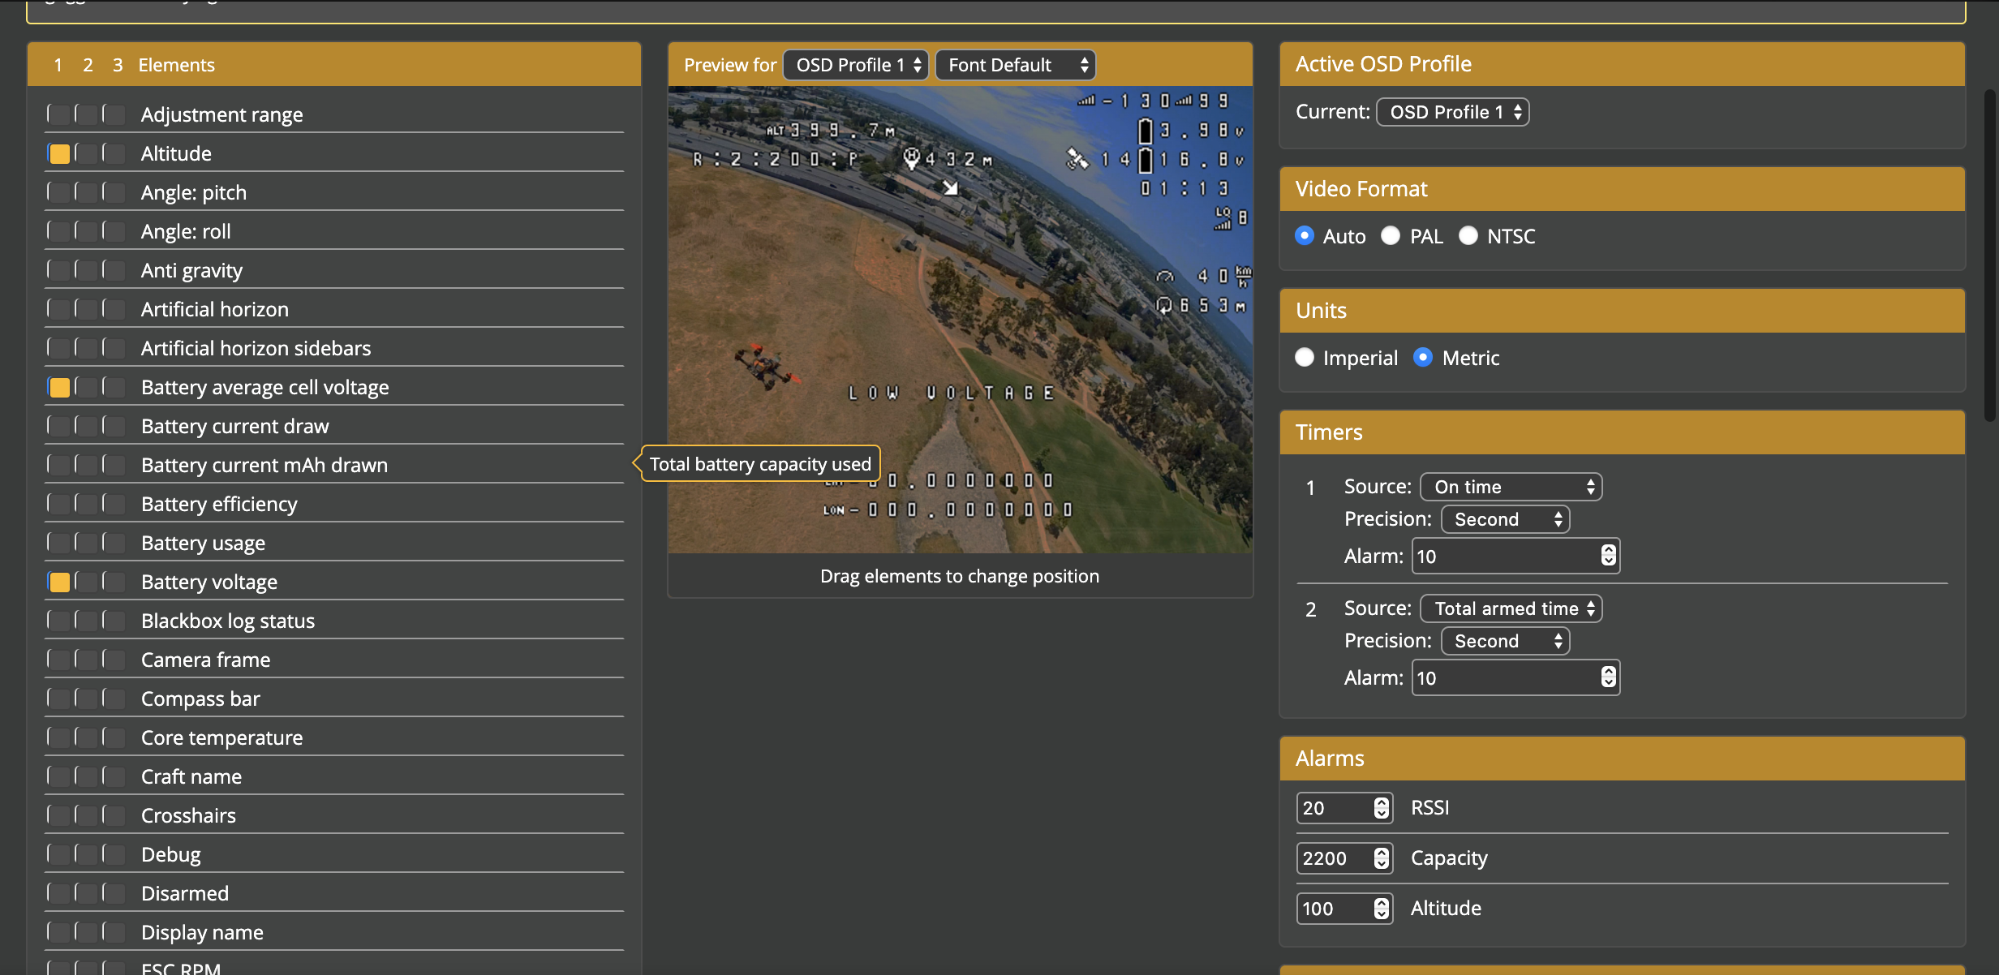
Once you are in the OSD tab, you will see a variety of options including the elements tab. At the top you will see 1, 2, 3 and “elements”. These numbers correspond to different profiles that you can make if you would like to have GPS stats, for example show up on some flights but not others. There are many different elements to choose from most of which are personal preference, but there are a few I would recommend for everyone. Firstly, battery voltage is an essential one to have enabled in order for you to prevent your batteries from being over discharged. I would also recommend having battery average cell voltage enabled as it makes it easier as you do not have to do the math mid-flight to know if the cells are getting low. If you have a GPS on your drone, I would recommend enabling all of the GPS elements including latitude and longitude, which helps you find your drone in a crash, the home arrow which can help you find your way back, as well as home distance, so that you know how far away you are. I would also recommend reading through all of the elements, because I have only mentioned a few of them and many could be useful to you depending on your preference.
Next, there is a preview tab in the middle which will give you options to change the font type as well as move around the elements on your screen to the position of you liking. It is generally better to have elements closer to the side than the middle so that they do not block anything important.
On the right side you are able to change which profile will be active in your goggles as well as video format. You can also modify the unit form either metric or imperial depending on your preference. You can also configure alarms, warnings, and post flight statistics. I would recommend having low voltage warnings and alarms but its up to you. Post flight statistics can be very useful to compare different props, motors, or parts as you can see how they affect flight time and amperage draw.
If you are using the DJI goggles you will have to also enable custom OSD in the settings tab of your goggles and configure the UART that your air unit is attached to. I had to use trial and error by just switching on and off different UARTS until I found the correct one. Some flight controllers come with a diagram telling which UART is where. If you are using analog goggles you do not need to adjust any UART settings, but you must make sure your camera’s video-out is connected to the flight controller’s video in, and the flight controller’s video-out is connected to the video transmitter.