


This article was submitted through the GetFPV Community Program by Aidan.
Disclaimer: This article was written solely by a member of the FPV Community. Views and advice in this article are that of the author and does not necessarily reflect the opinion or views of GetFPV. You can follow Aidan on Instagram or YouTube.
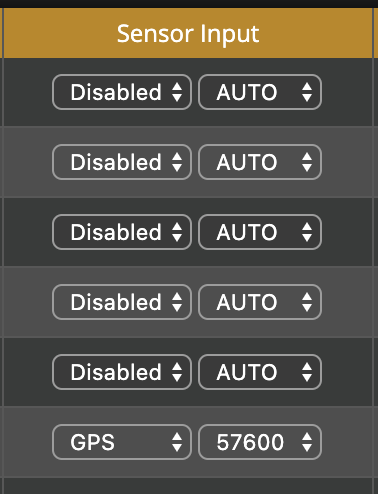
Just got a GPS for your FPV drone? Want to know how to set it up? Well, you have come to the right place. To start, you will have to solder up your GPS to one of the Uart Ports on your flight controller. You will need a 5v, Gnd, Tx, and Rx pad. After you have done this, identify the Uart that you have soldered to and then go to the Uart tab and go to “Sensor Input”. Select GPS and then auto which will automatically select the right number for you.
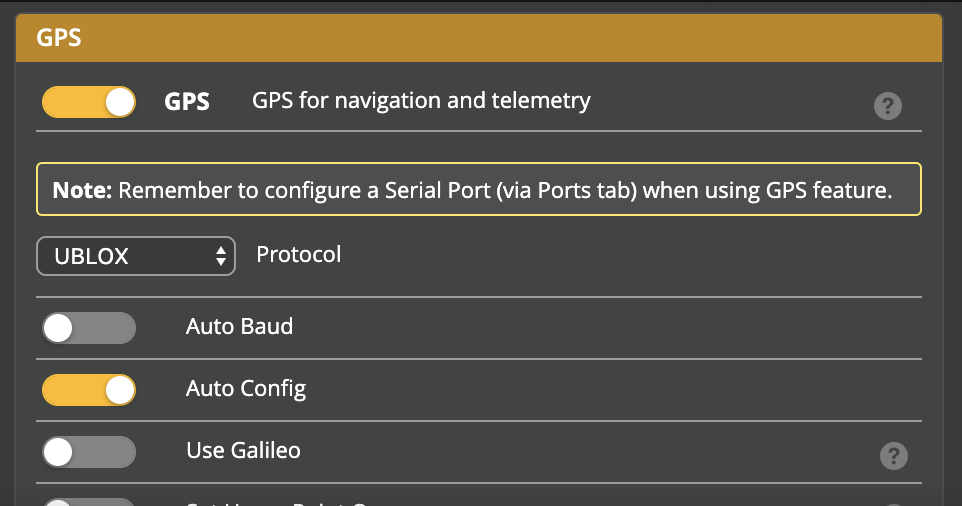
After this, you are going to want to go over to the configuration tab where you will scroll down to the section that says GPS. Turn on the switch that says GPS and then select the appropriate protocol for your GPS. If you cannot find which protocol your GPS is, you can trial and error until you get it right as there are only three supported protocols.
Next, under the modes tab, you should set up a switch for GPS rescue so that you can use it when you may lose your video signal, but not your transmitter signal. Make sure you set it to the aux channel that corresponds to your desired switch.

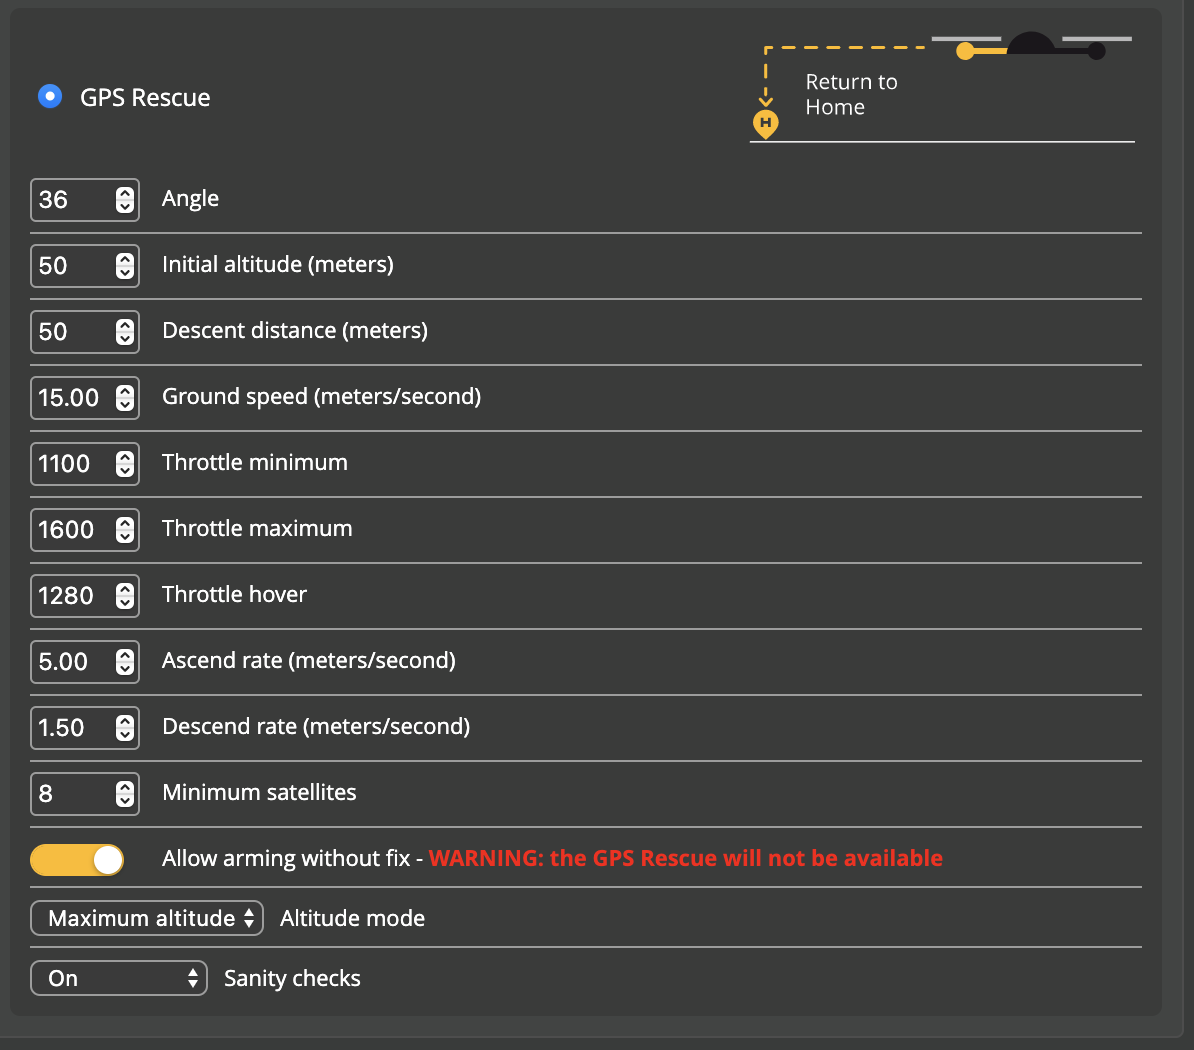
Then, you will want to set up GPS for failsafe, in case your transmitter signal was to go out. Make sure you select the GPS rescue option and then configure the settings to your liking. Here are my settings if you would like a good starting point.
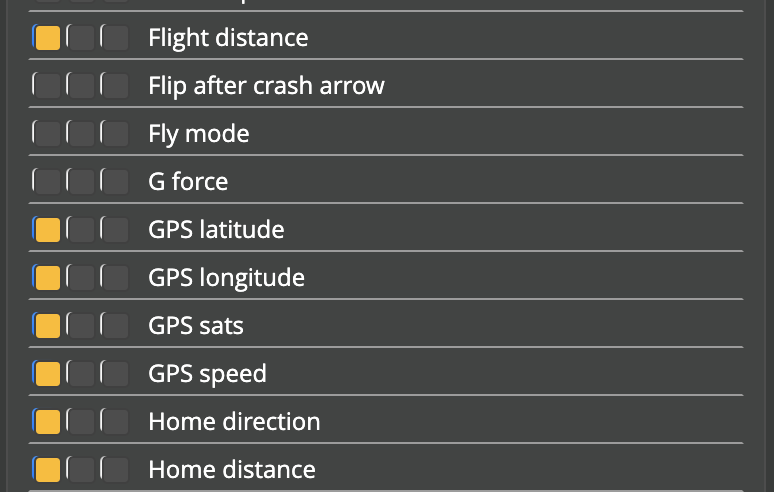
Lastly, to check if your GPS is working, add some GPS stats to your OSD elements. Keep in mind, it will take a while for the GPS to power up for the first time because it has to do a cold start. Here are my OSD settings if you would like a good starting point.
If you do not have goggles yet, you can use the GPS tab to test it.

If you would like to purchase a GPS for your FPV drone I have a few recommendations.